


ID Alerts is the core monitoring system within the standalone Identity Defender app, designed to bring all your protection tools into a single, unified feed. It continuously monitors and notifies you of suspicious activity that suggests you might be at an increased risk of identity theft.
Beyond tracking your Social Security Number (SSN) and regularly scanning the dark web for your exposed data, ID Alerts has expanded sensors to monitor more types of user-submitted data. Depending on your plan, ID Alerts can also monitor Home and Auto Title records, Court Records, high-risk financial transactions, and 401(k) activity, and even includes a Neighborhood Watch for registered sex offenders.
If any suspicious activity or data exposure is detected, you’re alerted right away so you can take immediate action.
Jump to…
How to get ID Alerts
How to confirm your identity before using ID Alerts
How to use ID Alerts
How to update your information
Services included in ID Alerts
How to get ID Alerts
Currently, new and existing ExpressVPN users in the U.S. who purchase an Advanced or Pro subscription have access to ID Alerts. The level of protection scales depending on your tier:
- Advanced Plan: Includes core monitoring (like dark web and SSN monitoring), Credit Scanner, monthly Credit Reports, and standard Data Removal and ID Theft Insurance* limits.
- Pro Plan: Unlocks the full suite of enhanced monitoring features, including Home Title, Auto Title, and 401(k) alerts, along with higher Data Removal limits and up to $5M USD in ID Theft Insurance* (including Cash Recovery for stolen funds).
To get started:
- Go to the Order page and choose an Advanced or Pro ExpressVPN plan.
- Select the button on the plan to proceed.
- Complete your order by entering your email address and payment details. You now have access to ID Alerts as part of your ExpressVPN subscription.
Once your subscription is active and you’ve created your account, you can start using ID Alerts through both the ExpressVPN+ dashboard and the Identity Defender apps for Android and iOS.
Need help? Contact the ExpressVPN Support Team for immediate assistance.
How to confirm your identity before using ID Alerts
Before you start using ID alerts, you’ll need to confirm your identity.
When confirming your identity, you will need to provide some general personal information about yourself. It only takes a few minutes to complete. This information is used solely to provide Identity Defender services. All data is encrypted both in transit and at rest, compliant with SOC 2 standards. This data is not linked to your VPN activity, which remains governed by the ExpressVPN Privacy Policy. For more on how your data is handled, see the Identity Defender Privacy Policy.
You can confirm your identity in the Identity Defender mobile apps for iOS and Android or the ExpressVPN+ portal. Follow the steps for your preferred platform:
Need help? Contact the ExpressVPN Support Team for immediate assistance.
How to use ID Alerts
You can check your ID alerts in the Identity Defender app or your ExpressVPN+ dashboard.
How to use ID Alerts in the Identity Defender app
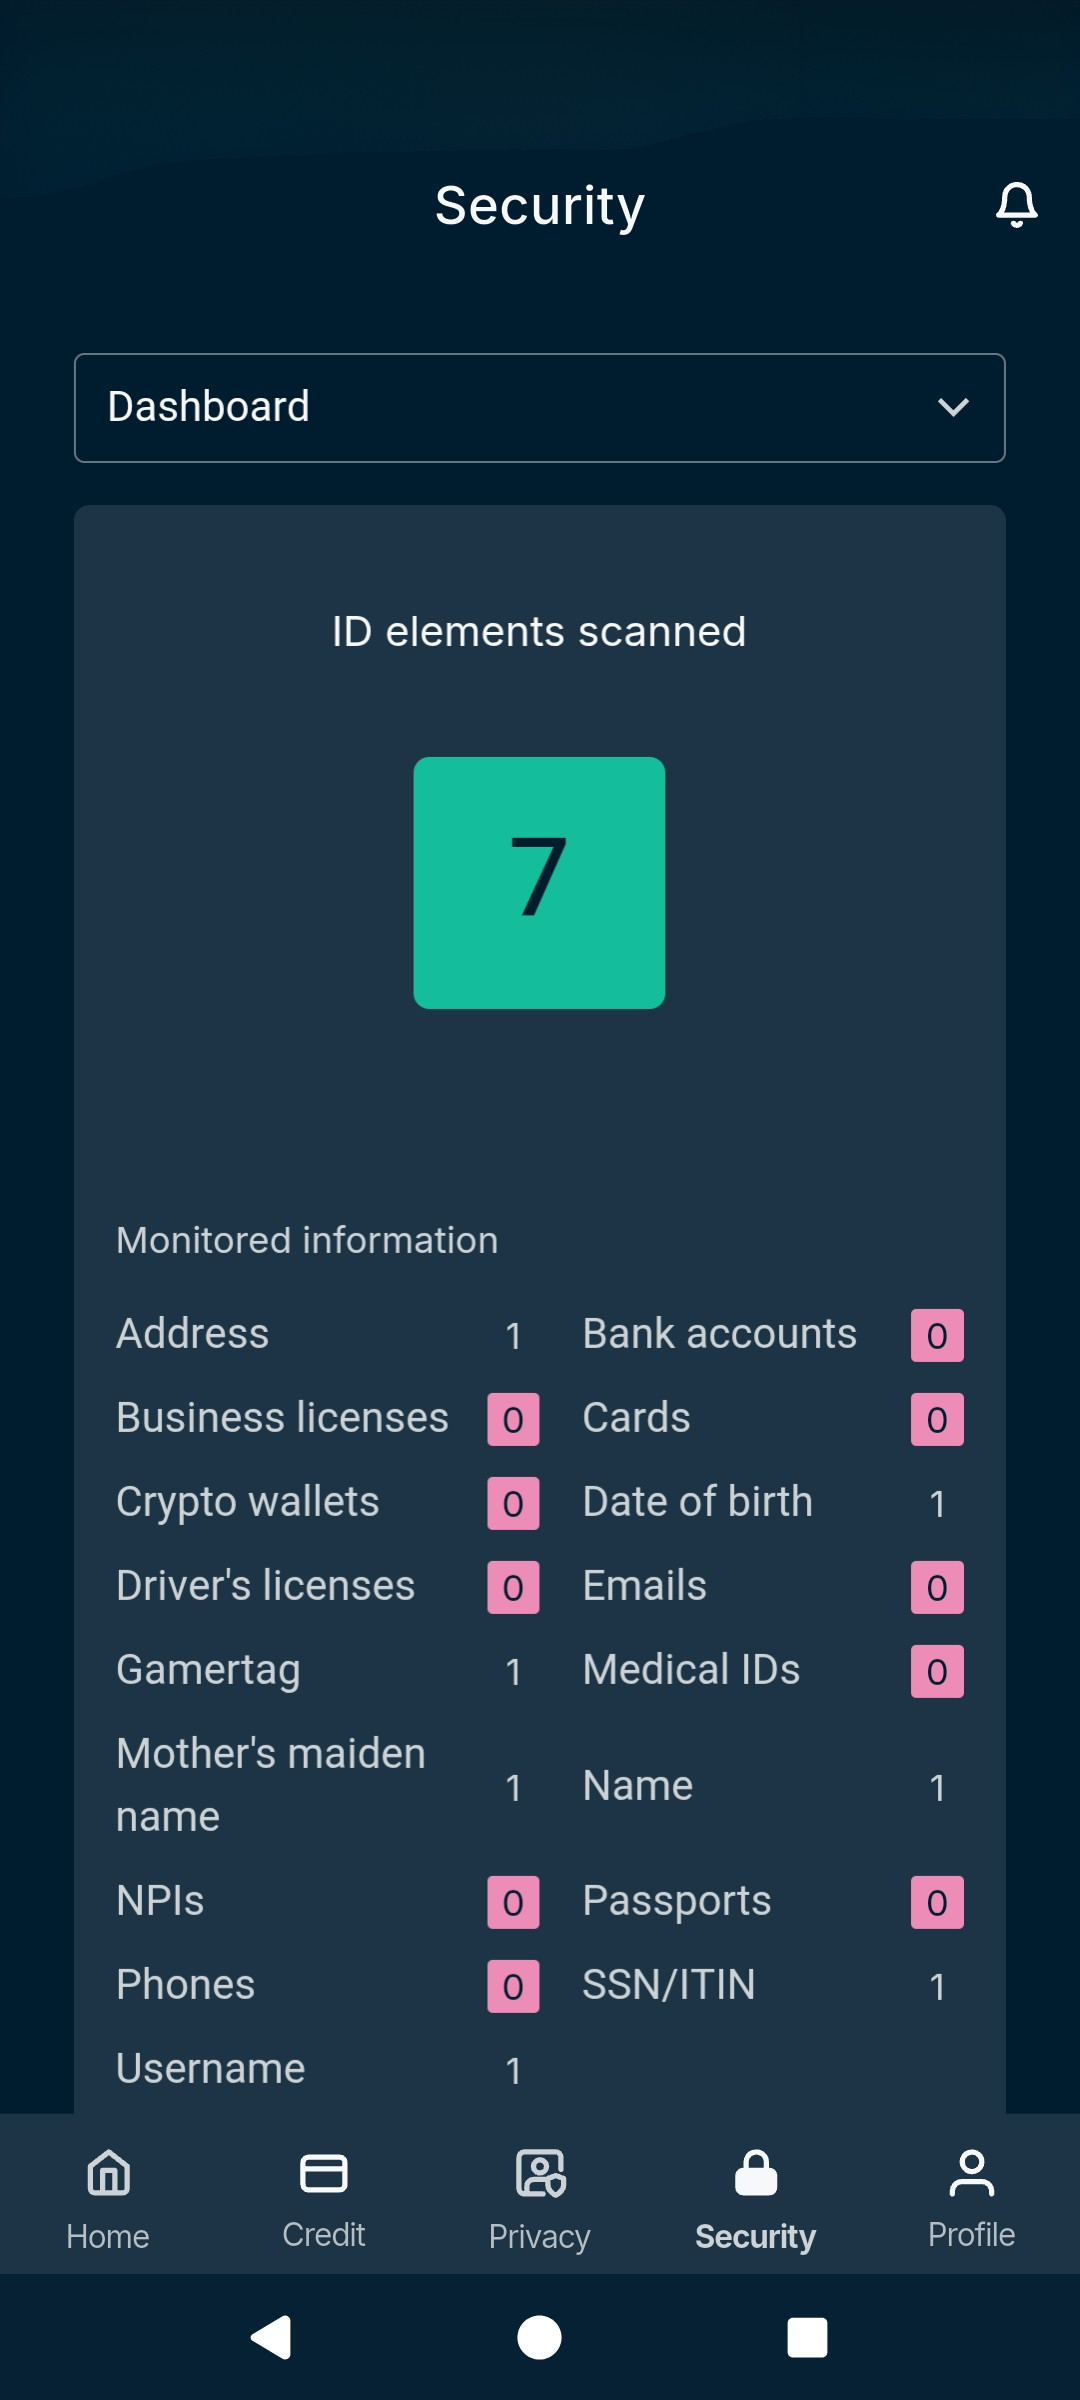
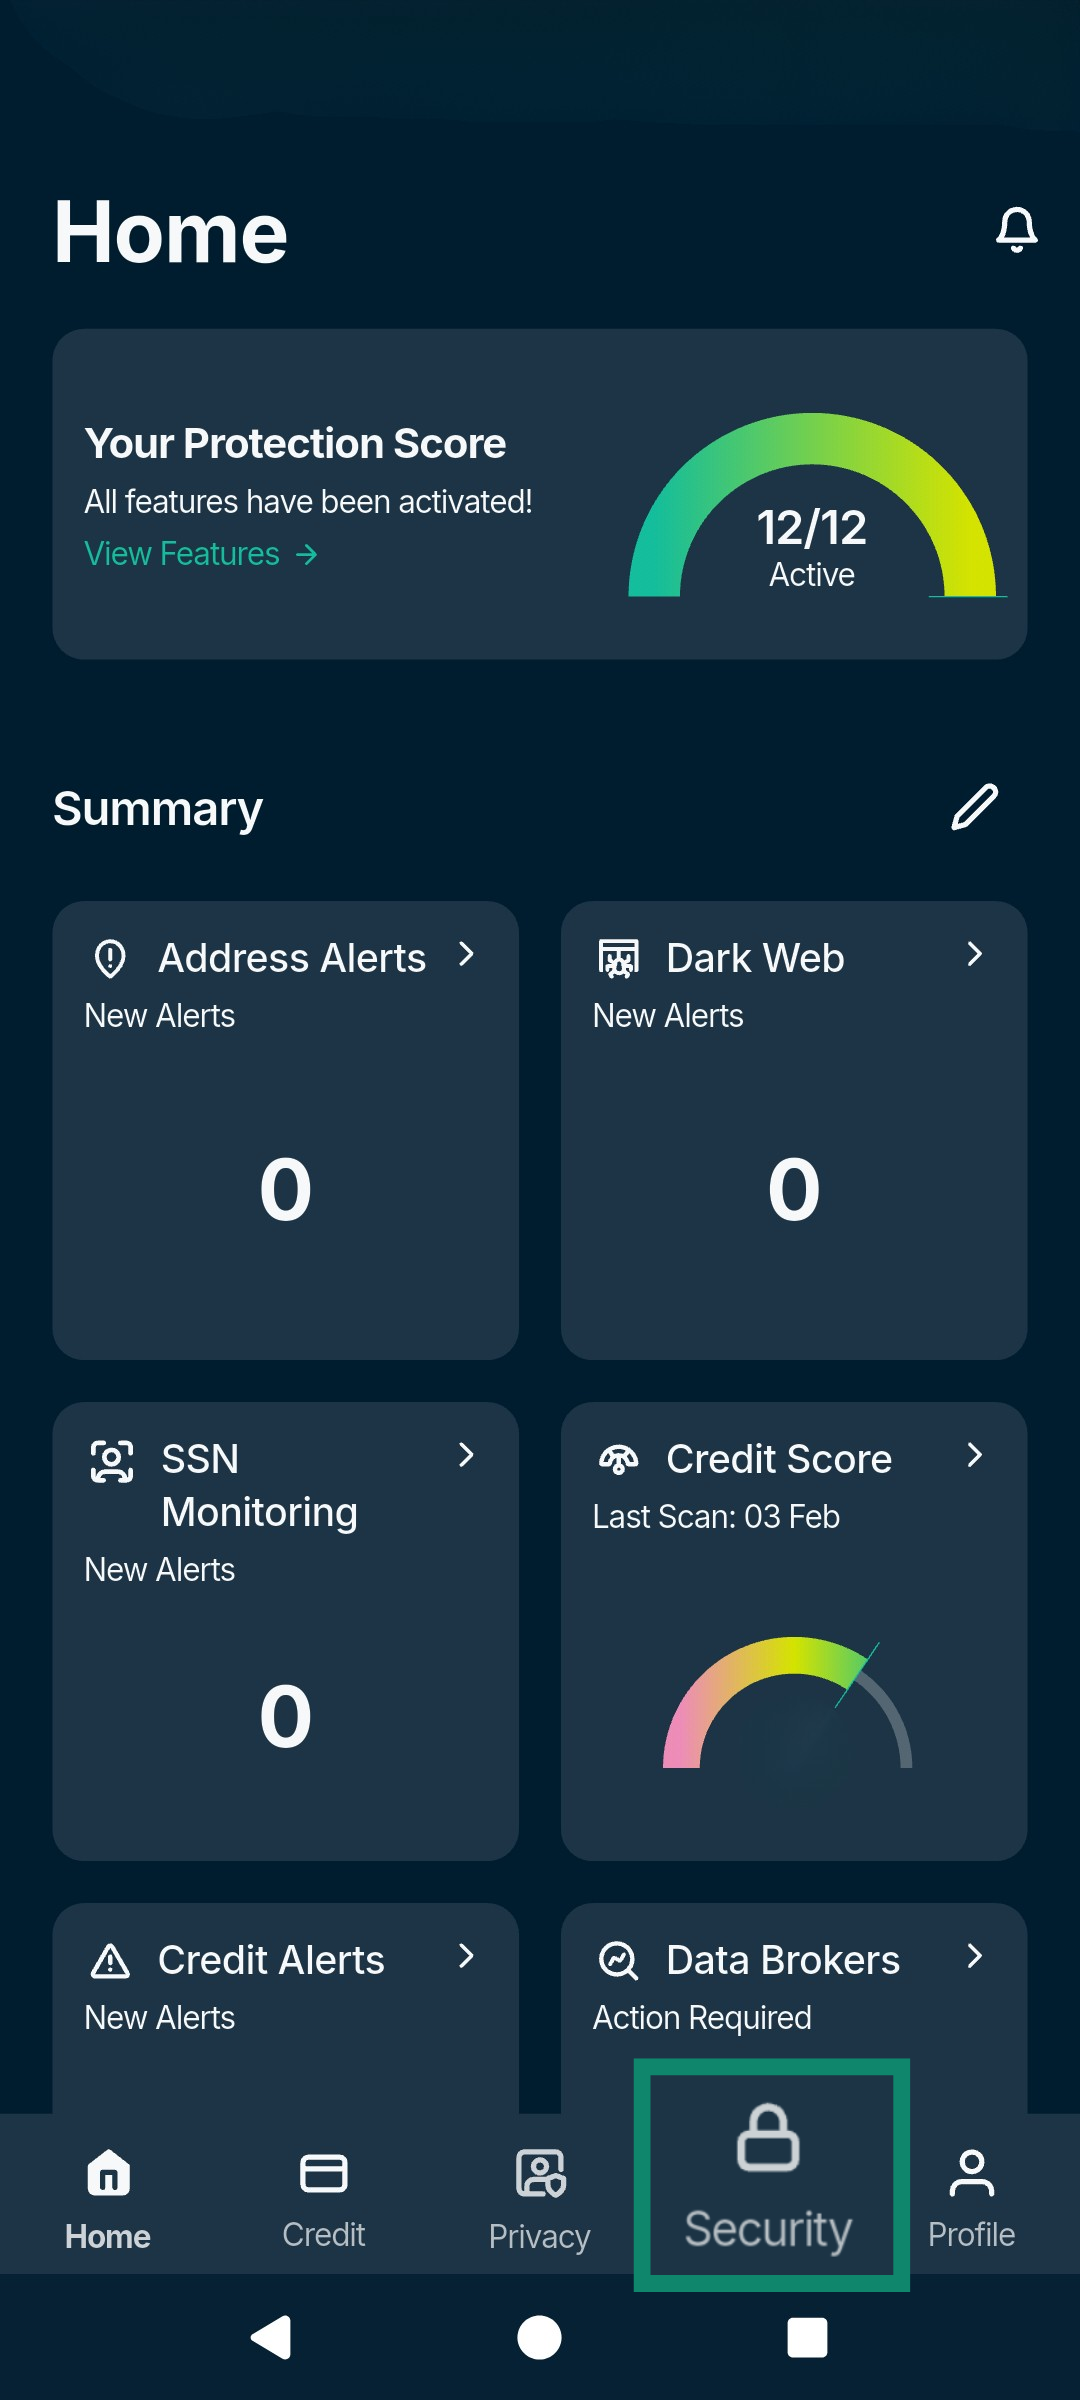
- Open the Identity Defender app and tap the Security tab.


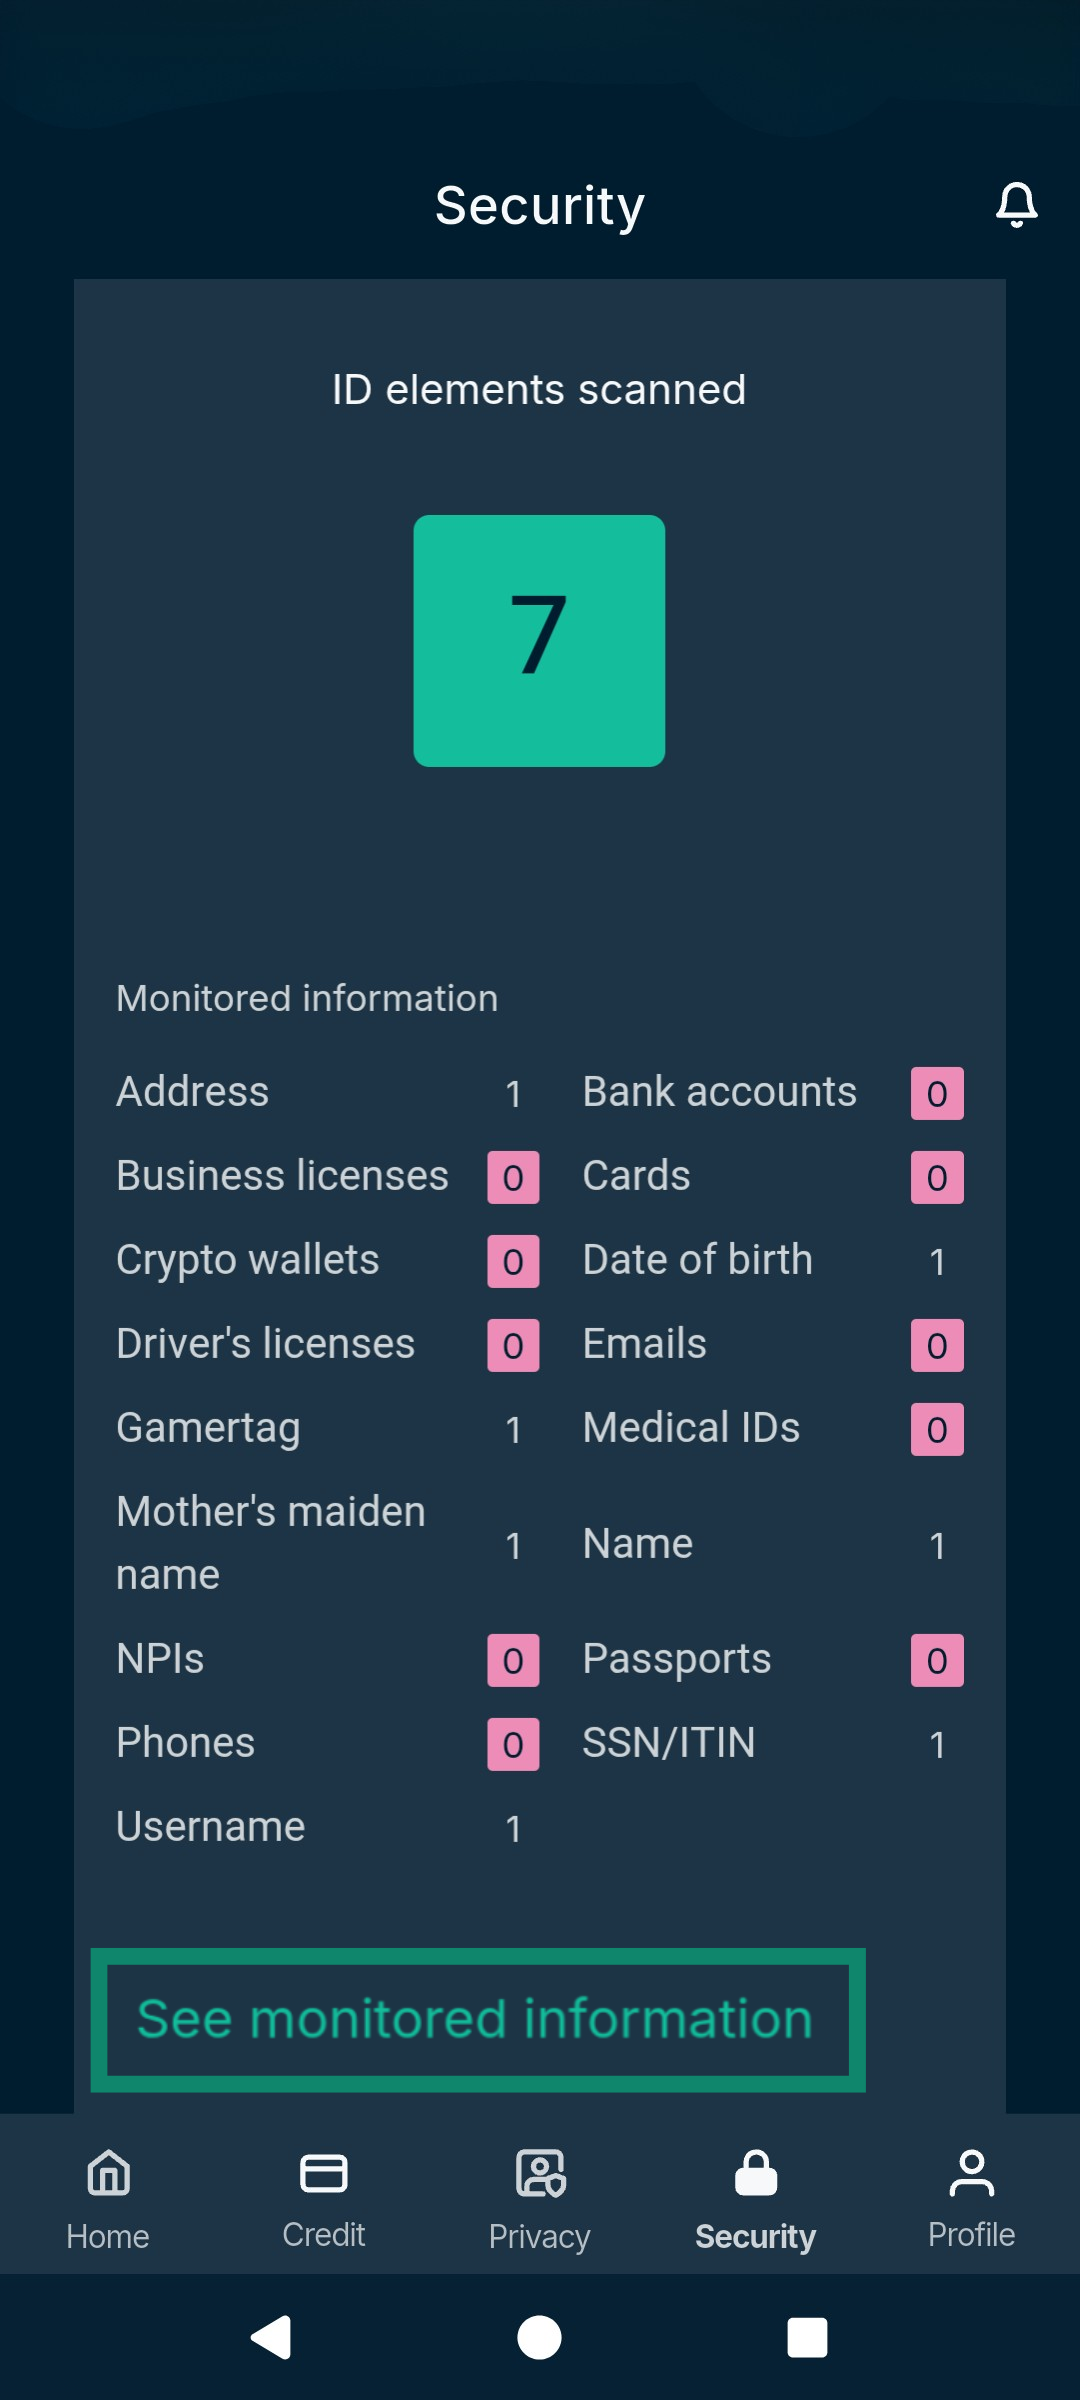
- You will see a “Scanning” message on the screen. After scanning is complete, the Identity Defender app will provide a summary of your scanned ID elements and a breakdown of all your monitored Information.

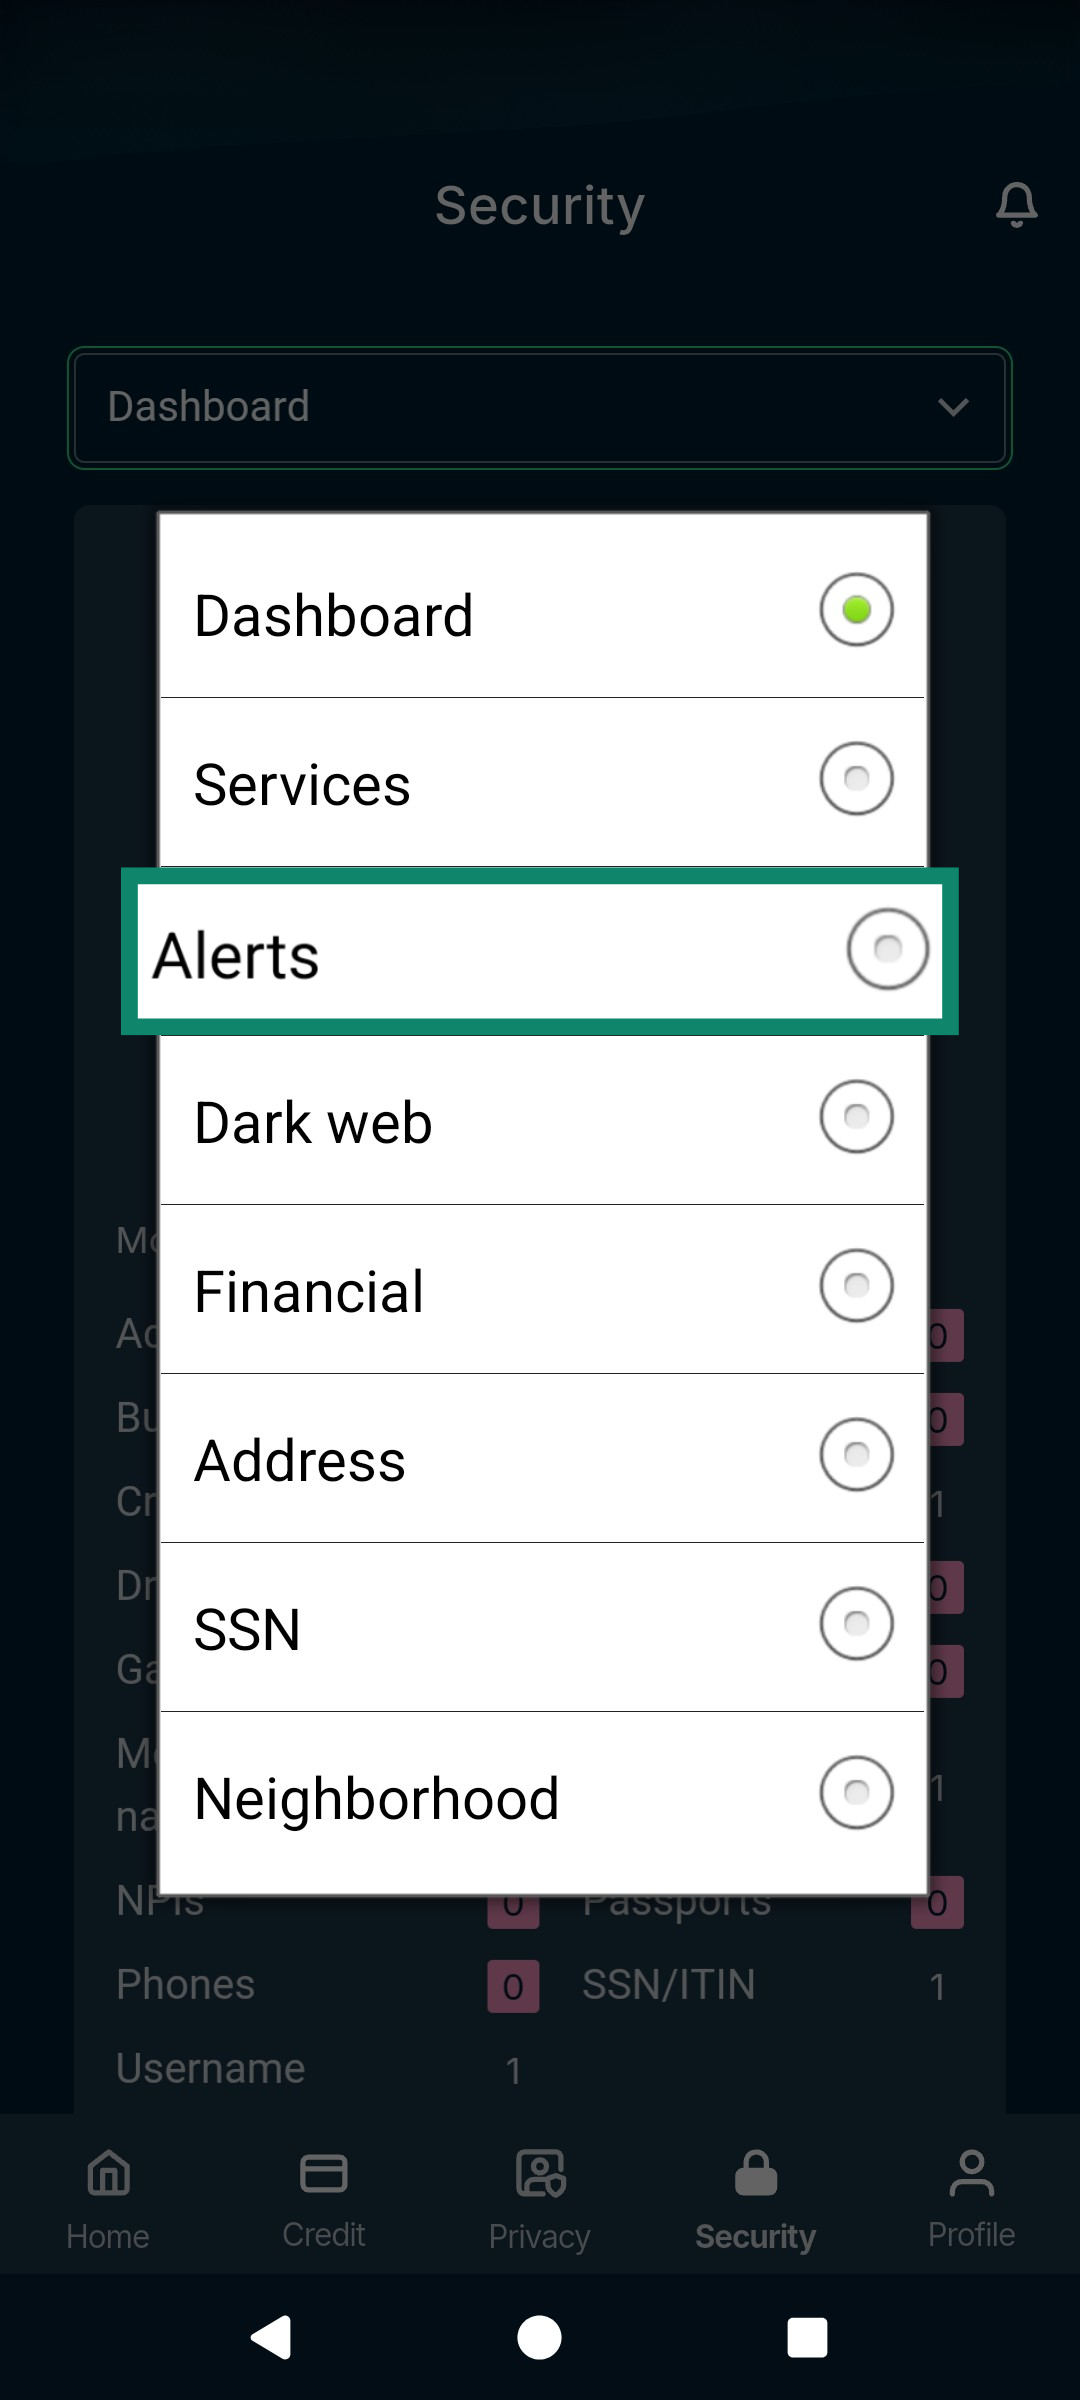
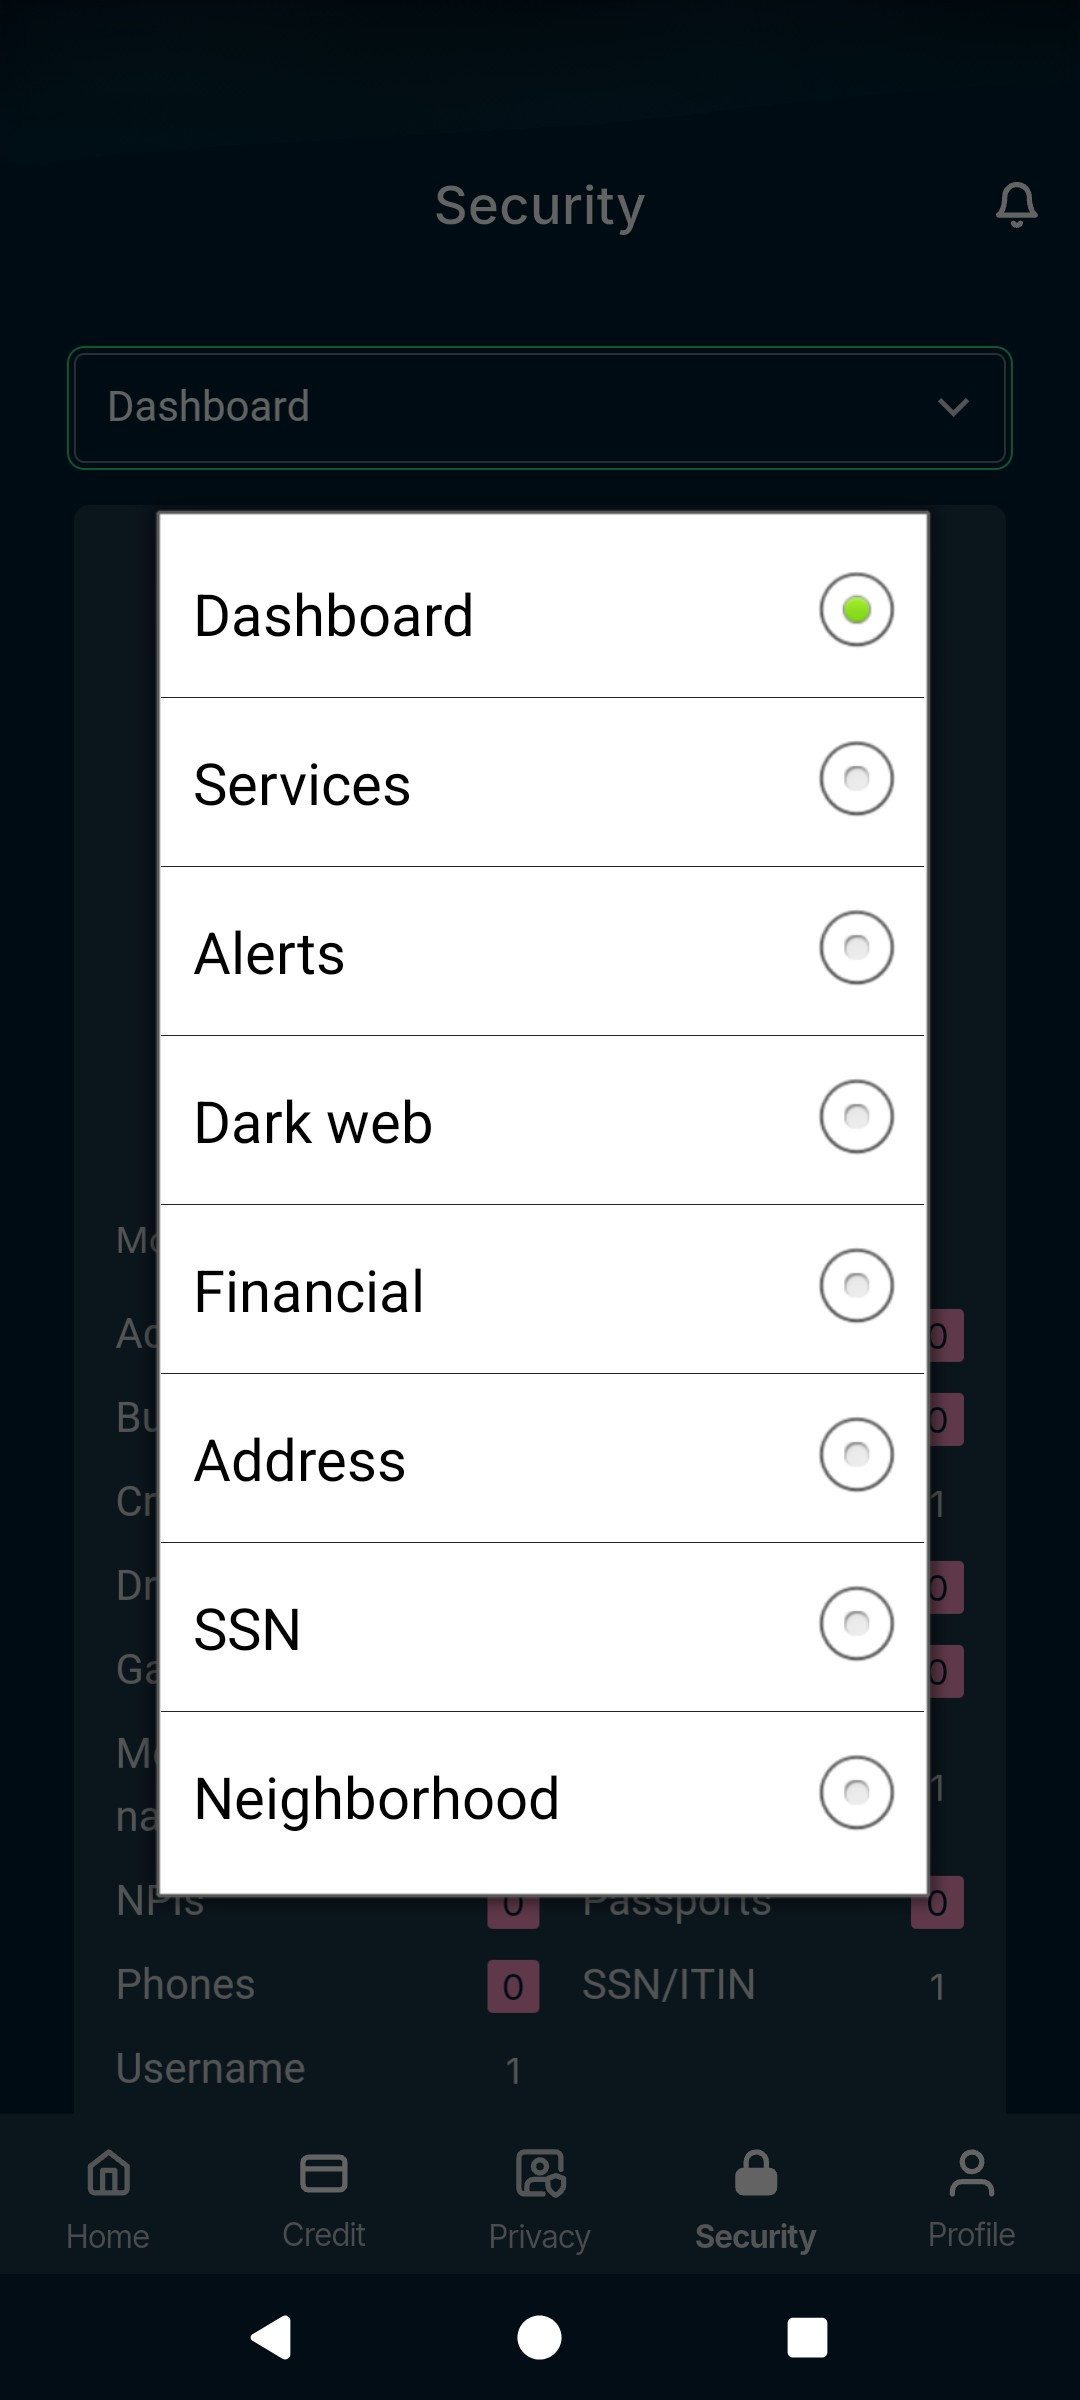
- Tap the dropdown Dashboard at the top and select Alerts.

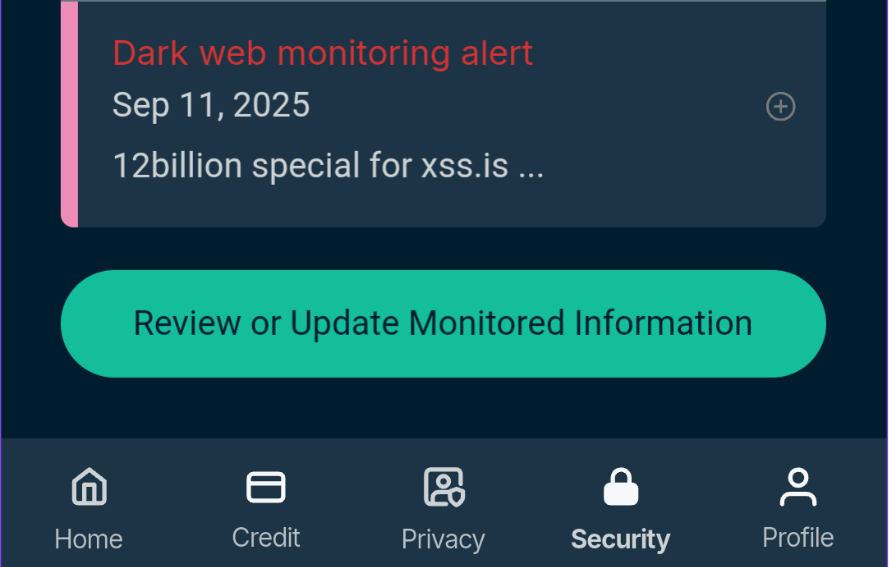
- Here, you can review any active alerts (like dark web monitoring alerts) and tap the Review or Update Monitored Information button to take immediate action.


How to use ID Alerts in ExpressVPN+
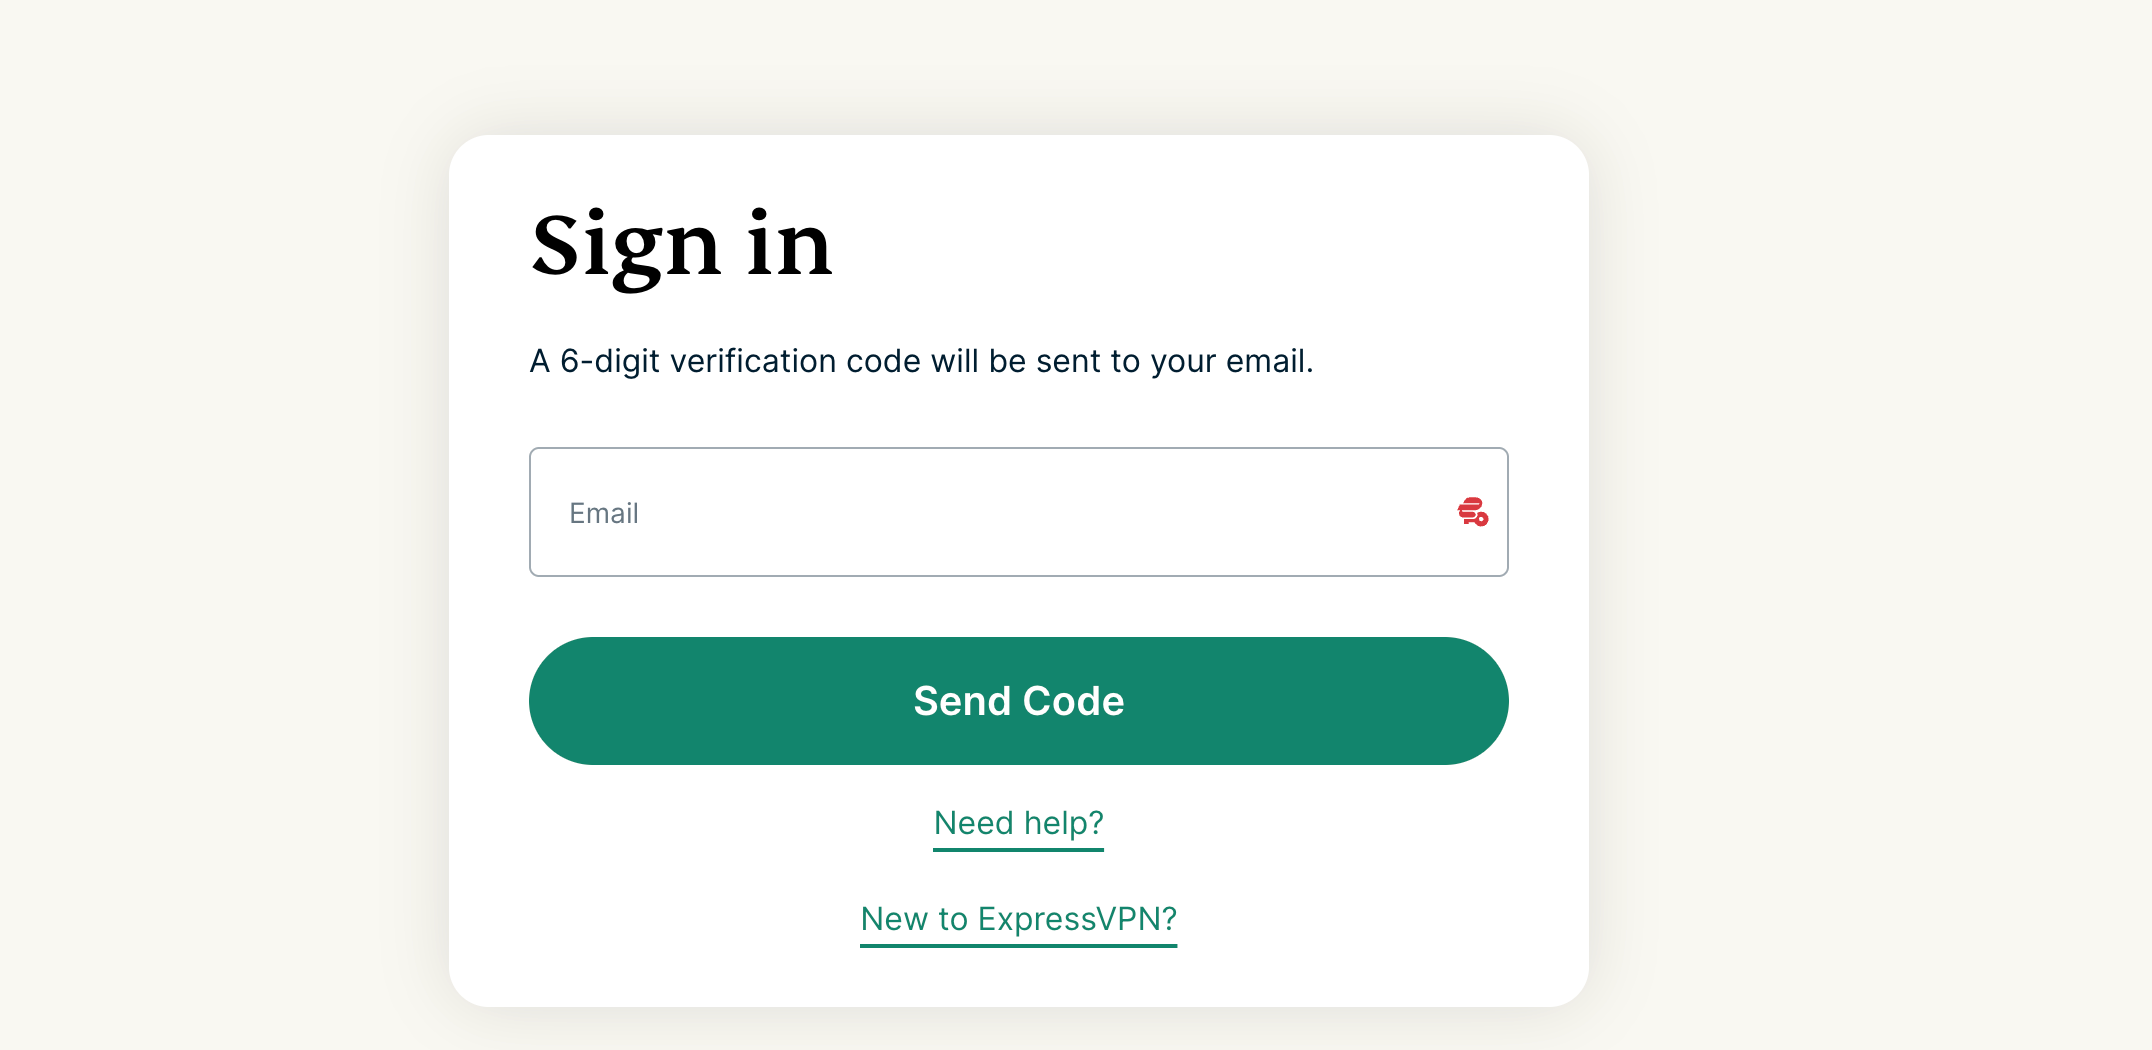
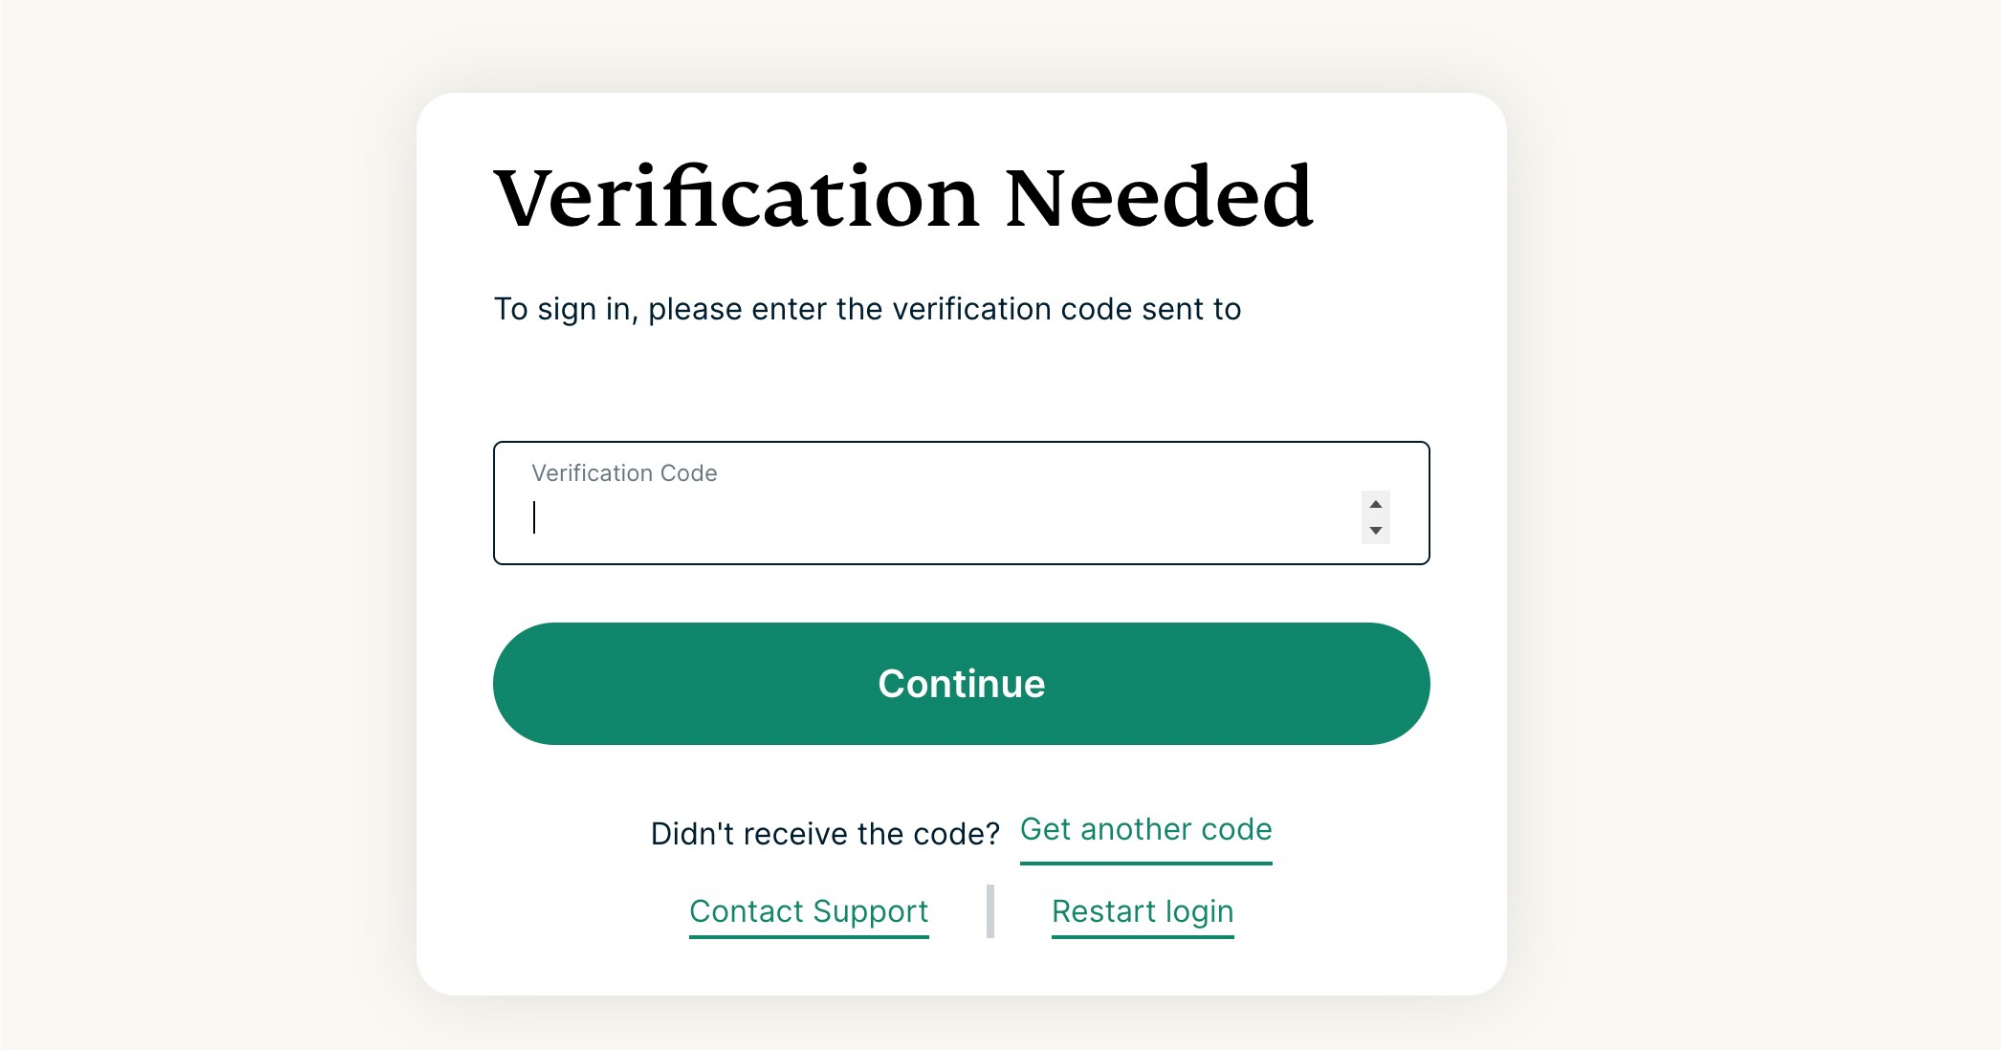
- Go to portal.expressvpn.com. If prompted, provide your email address and click Send Code.


- Enter the code sent to your inbox and click Continue.


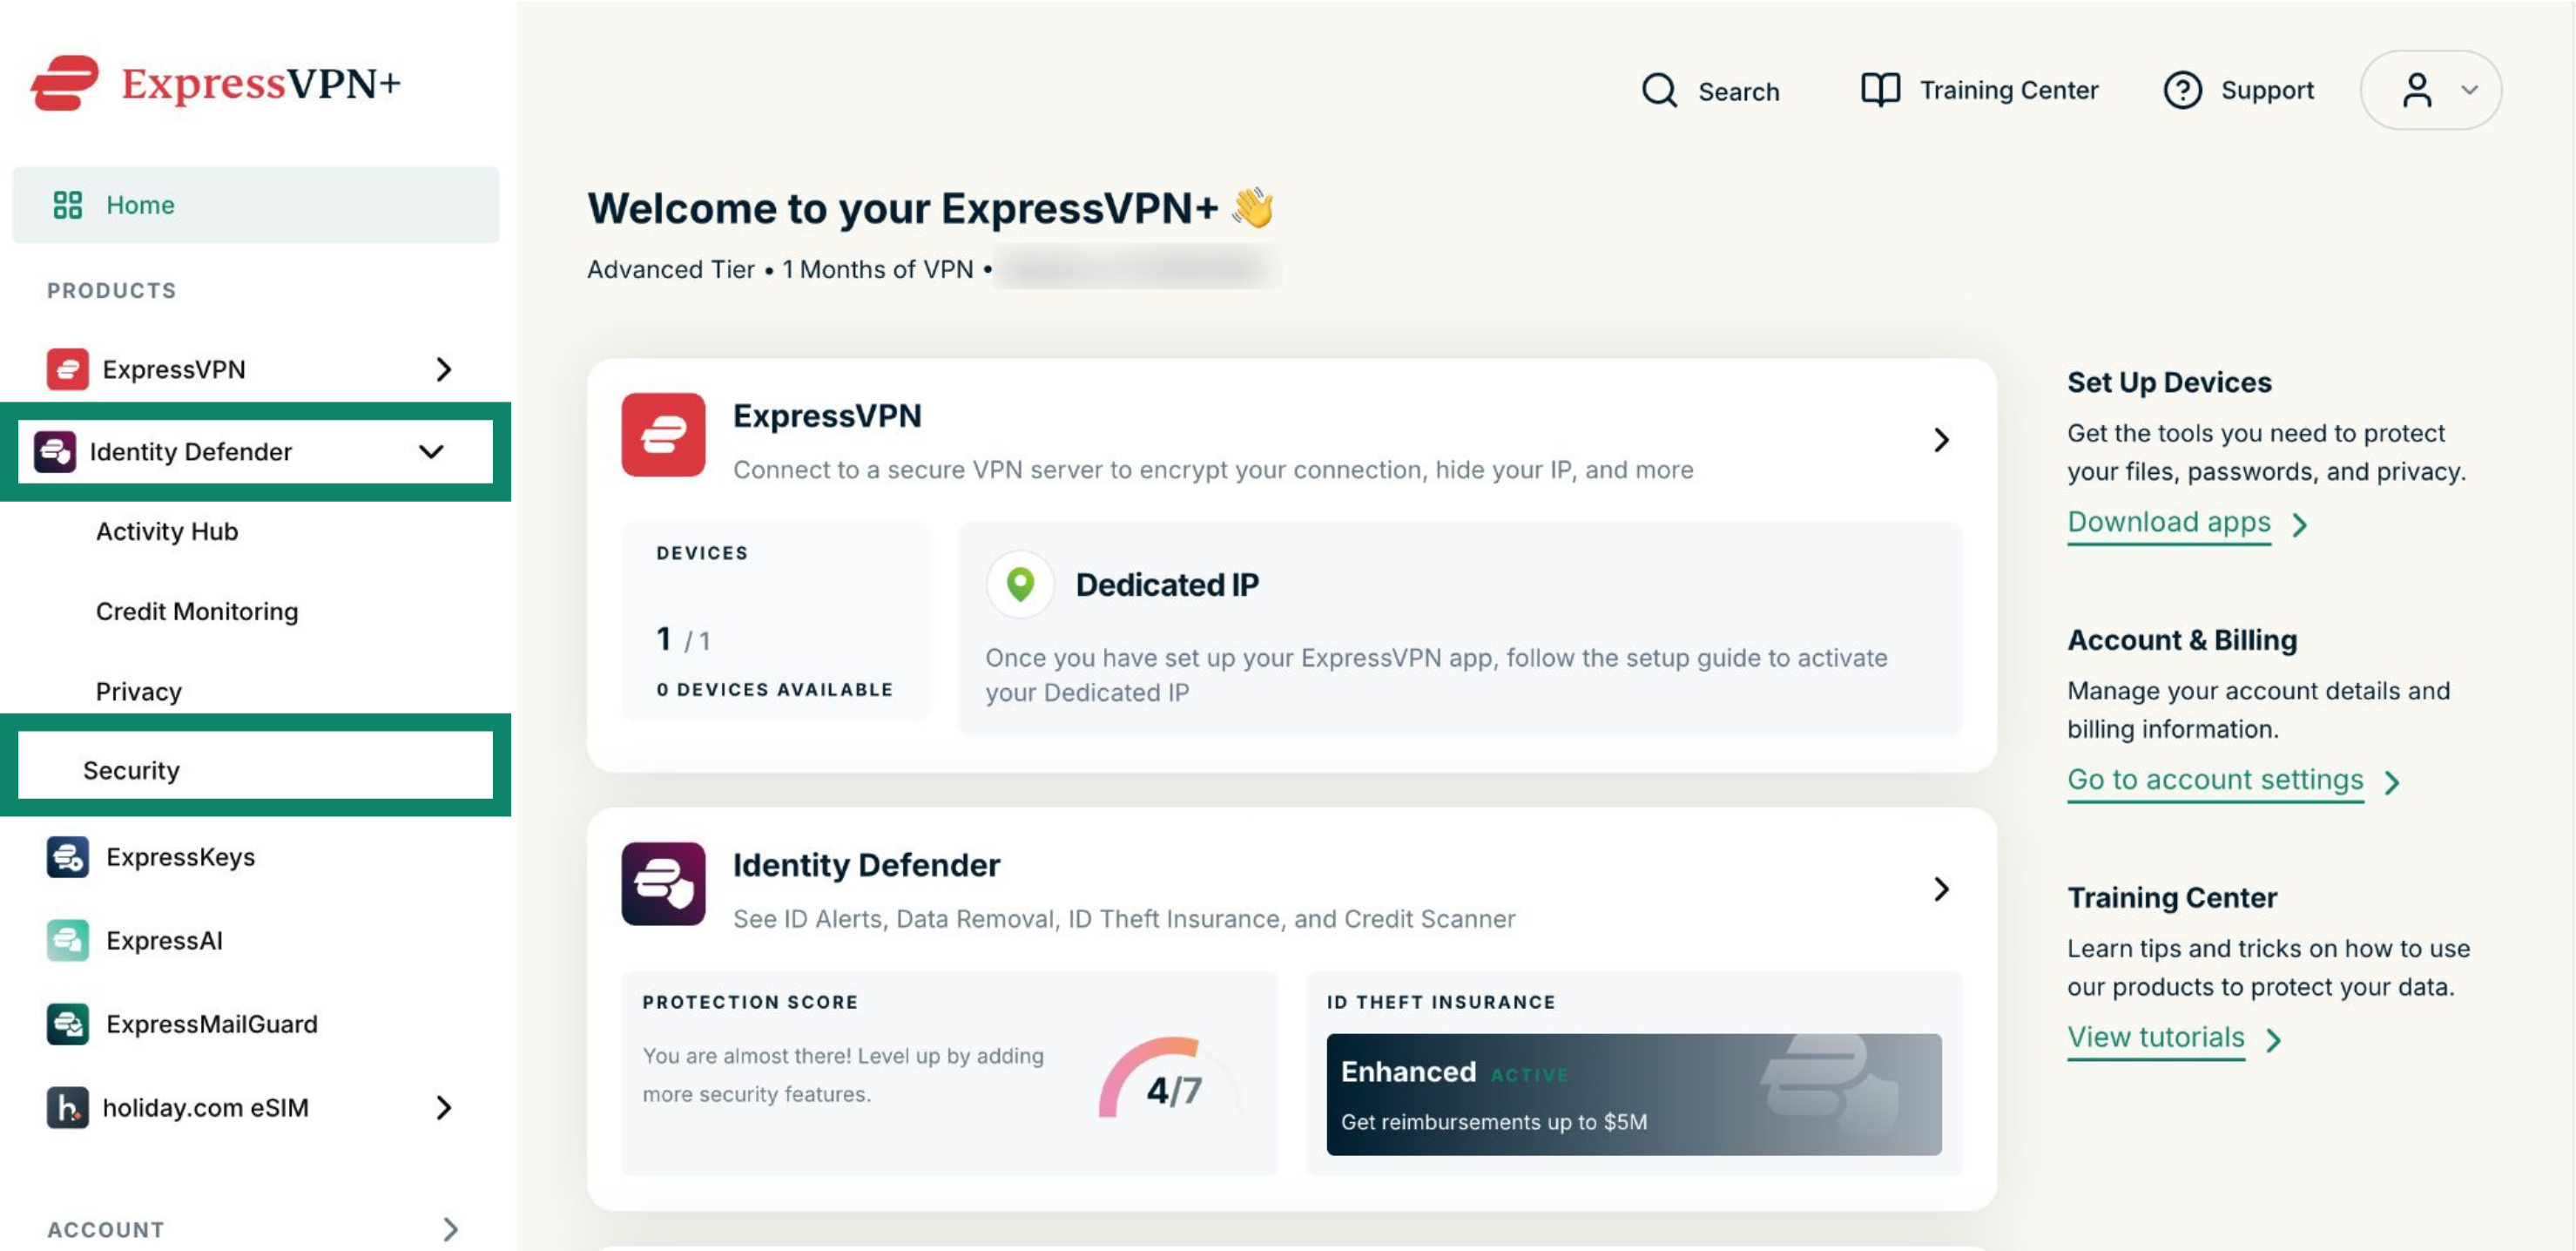
- Click Identity Defender in the left-side menu and select Security.


- Here you will see a list of all alerts.


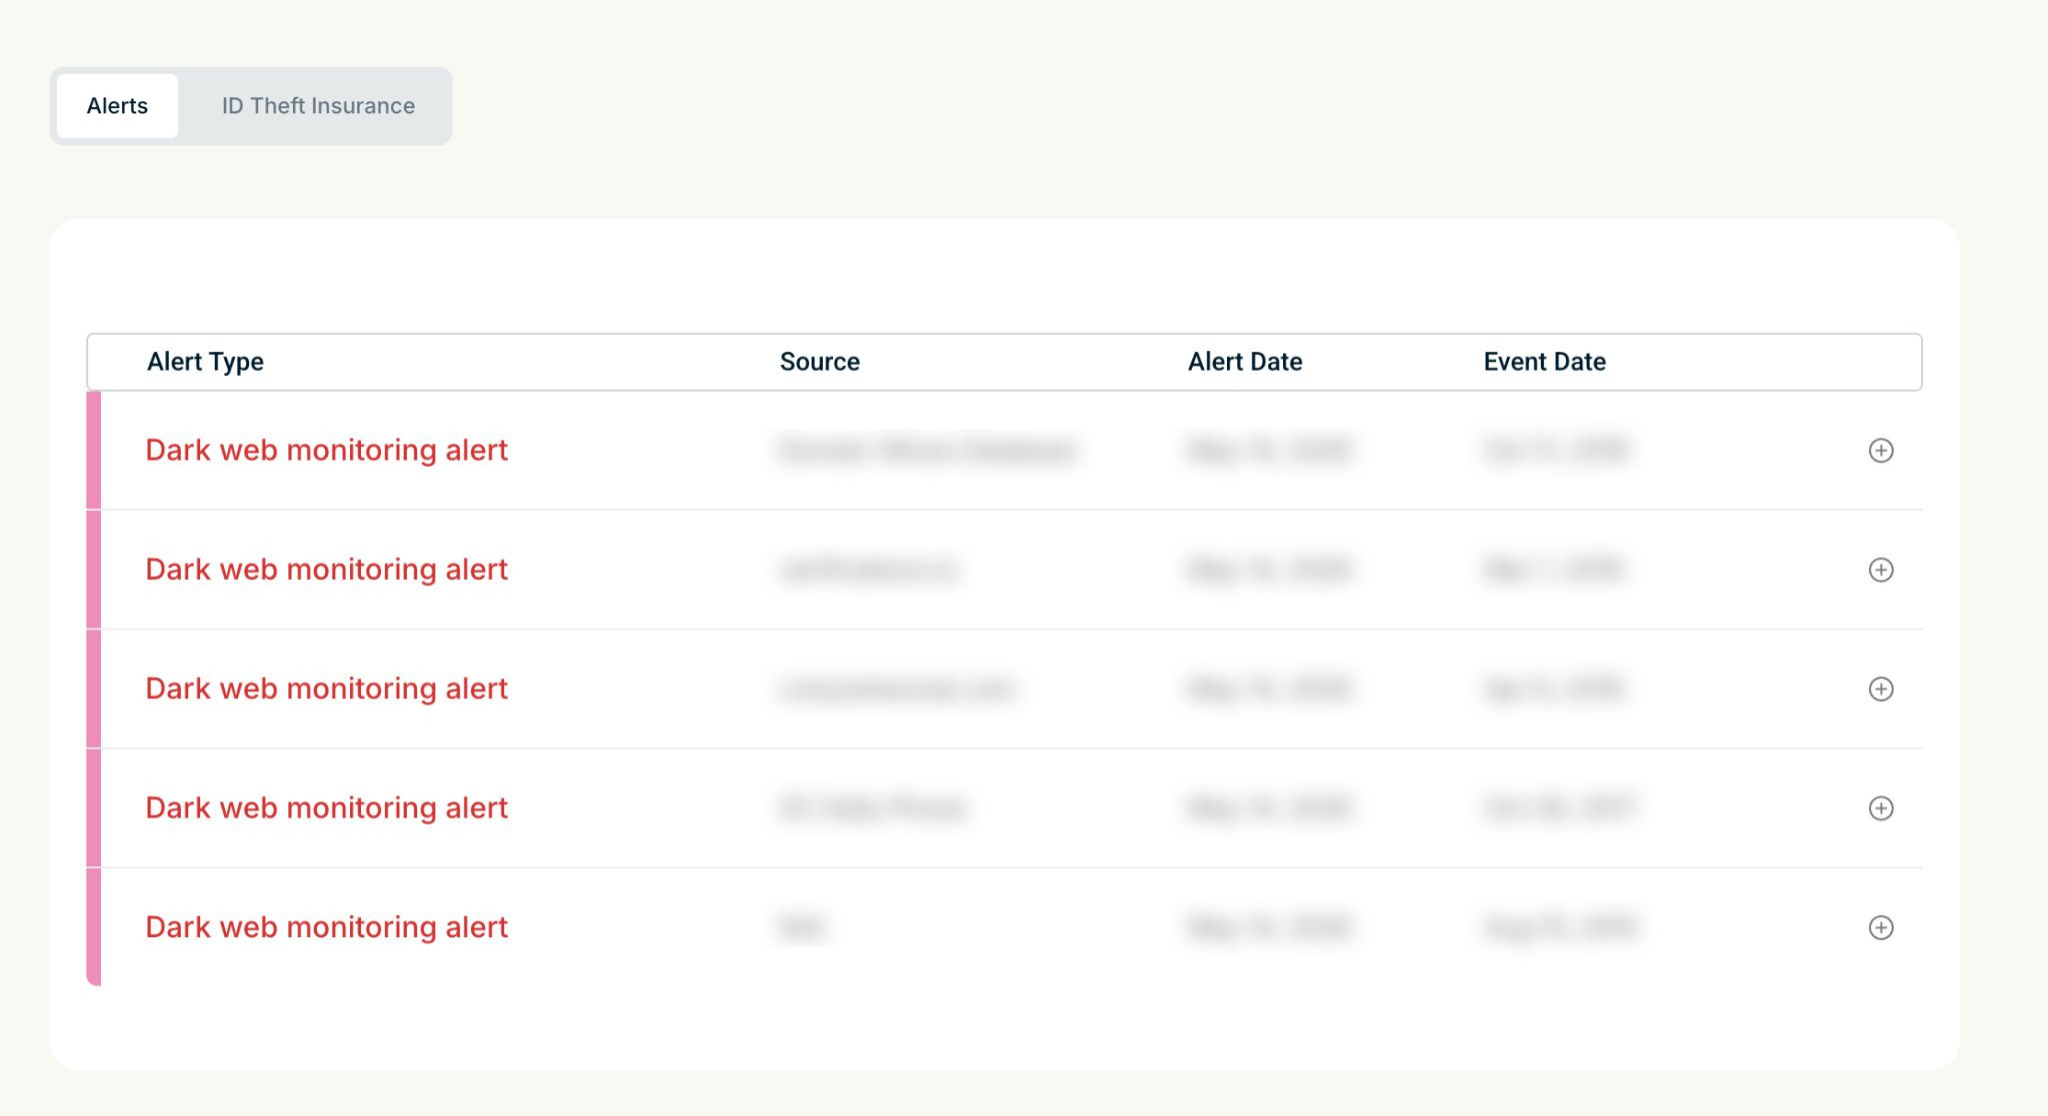
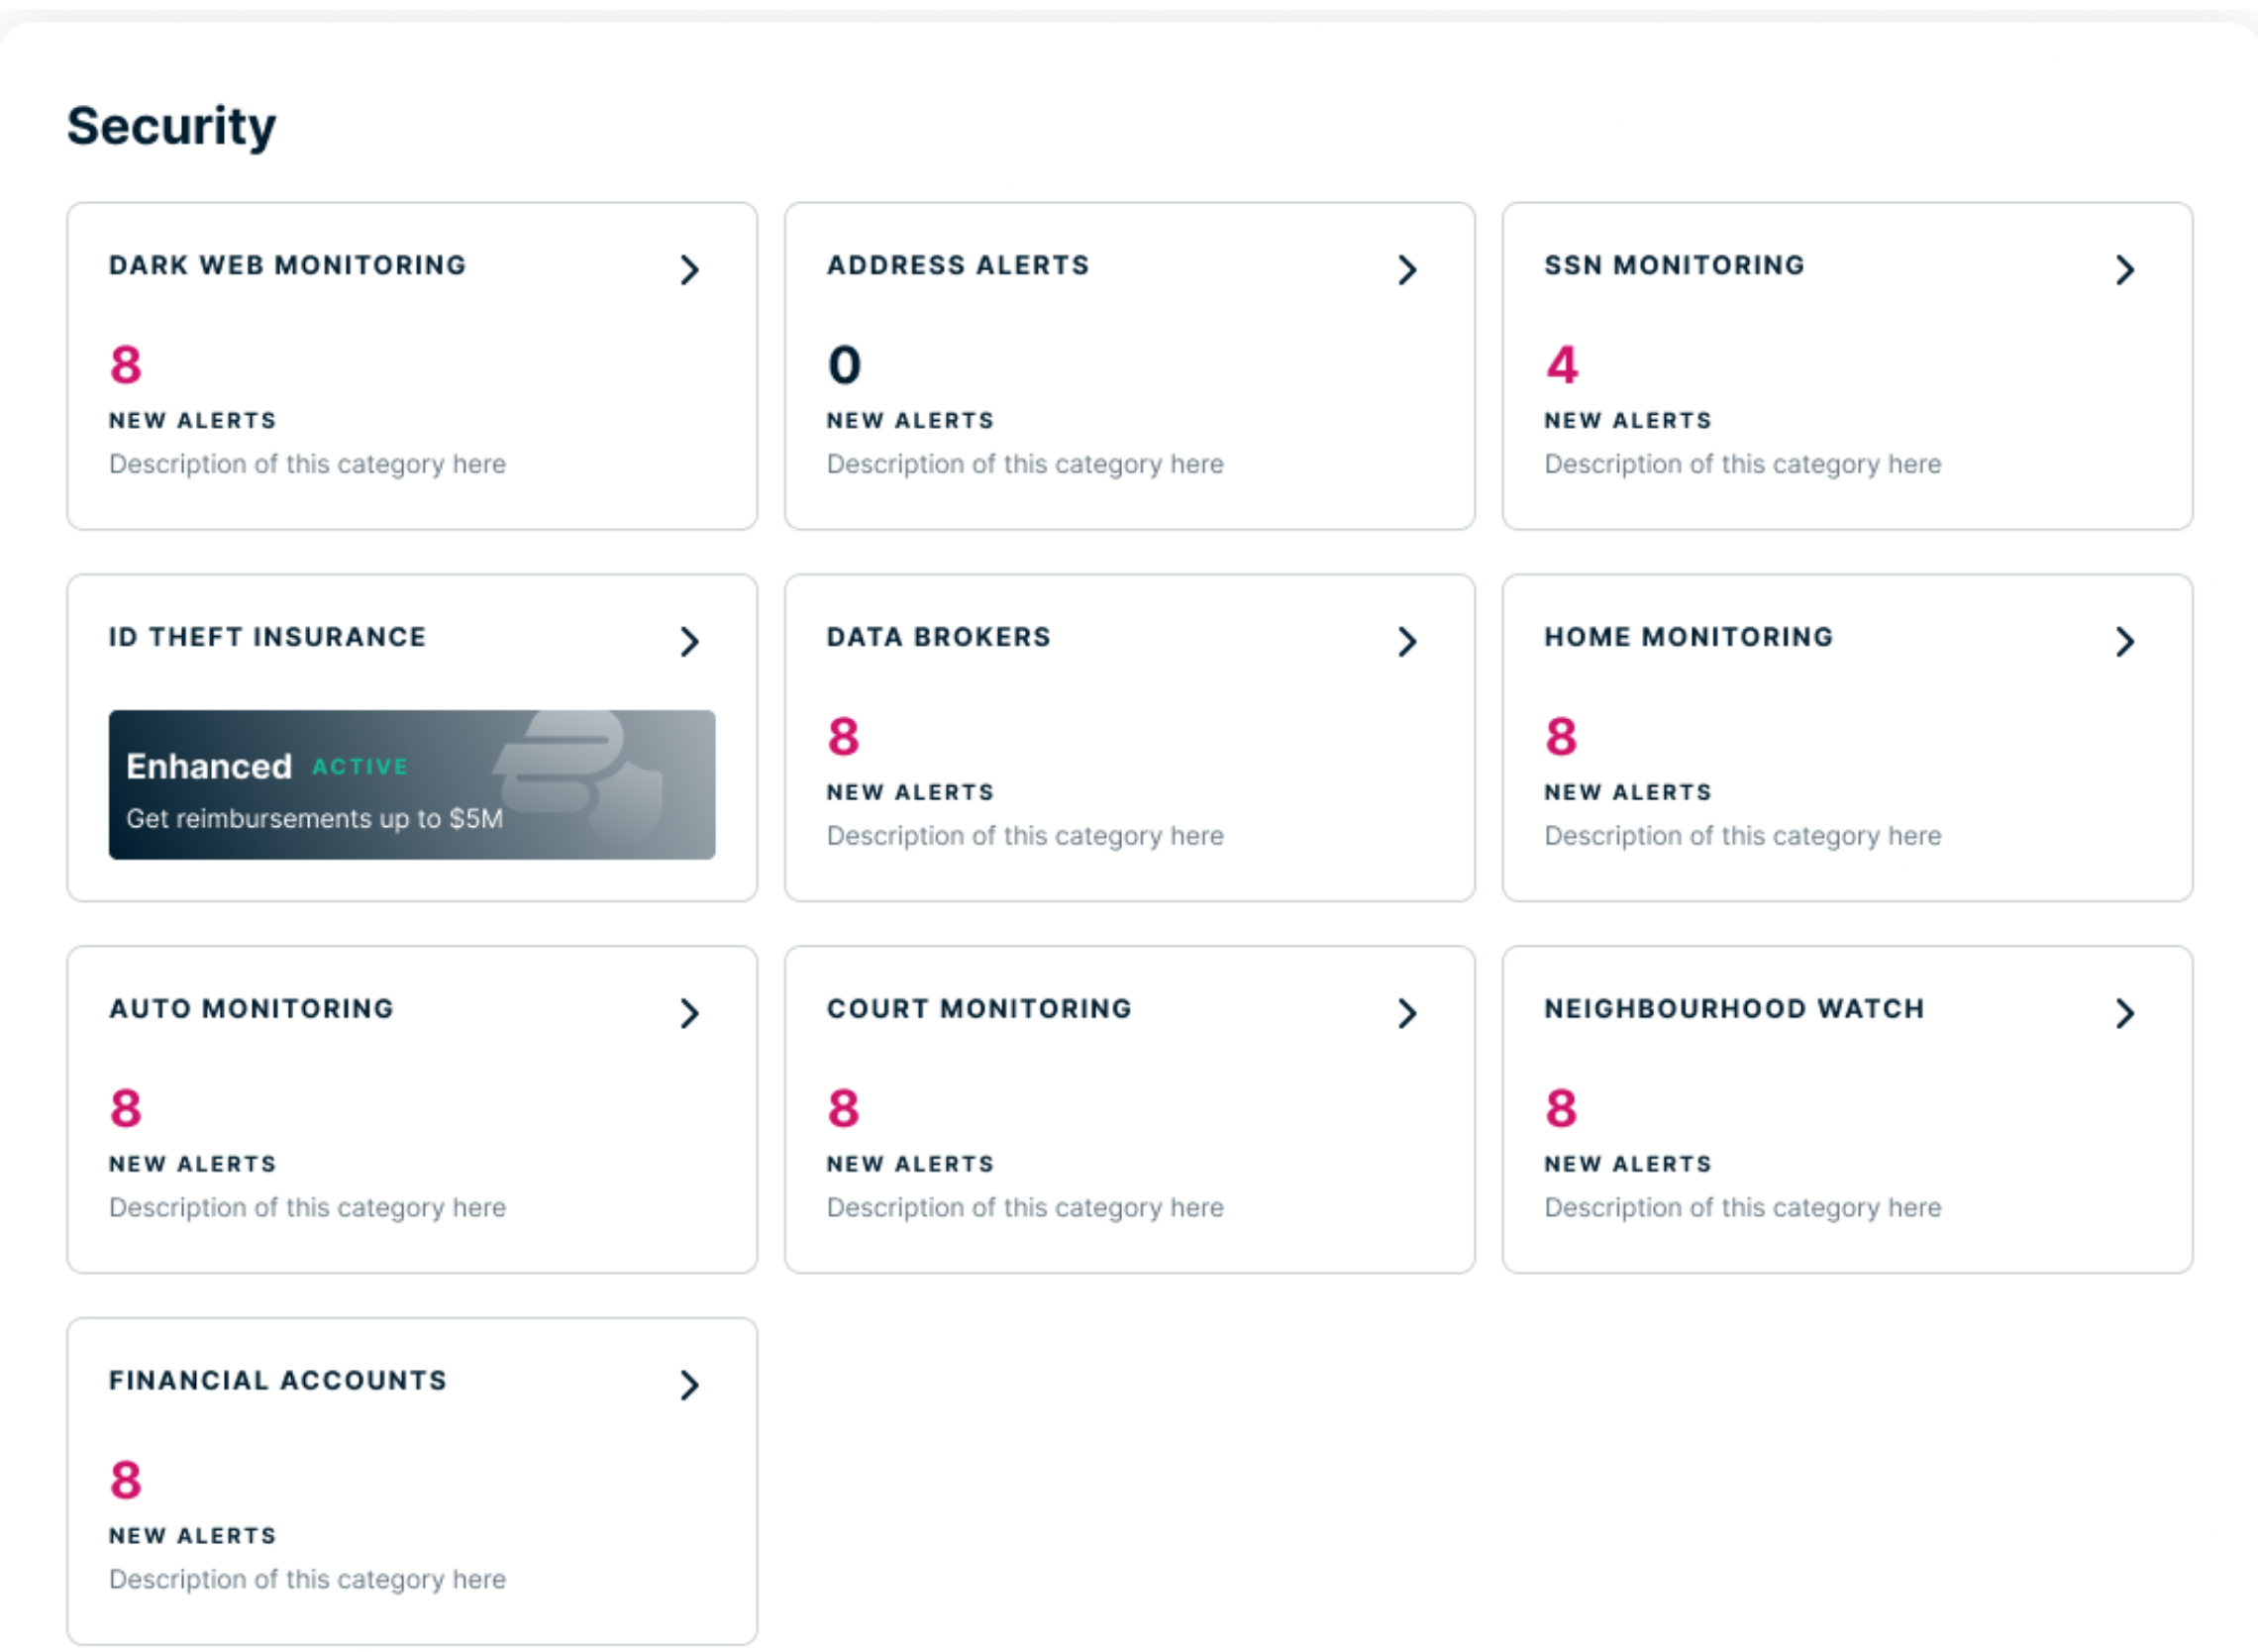
In ExpressVPN+, you can also see an overview of all your ID Alerts by category:
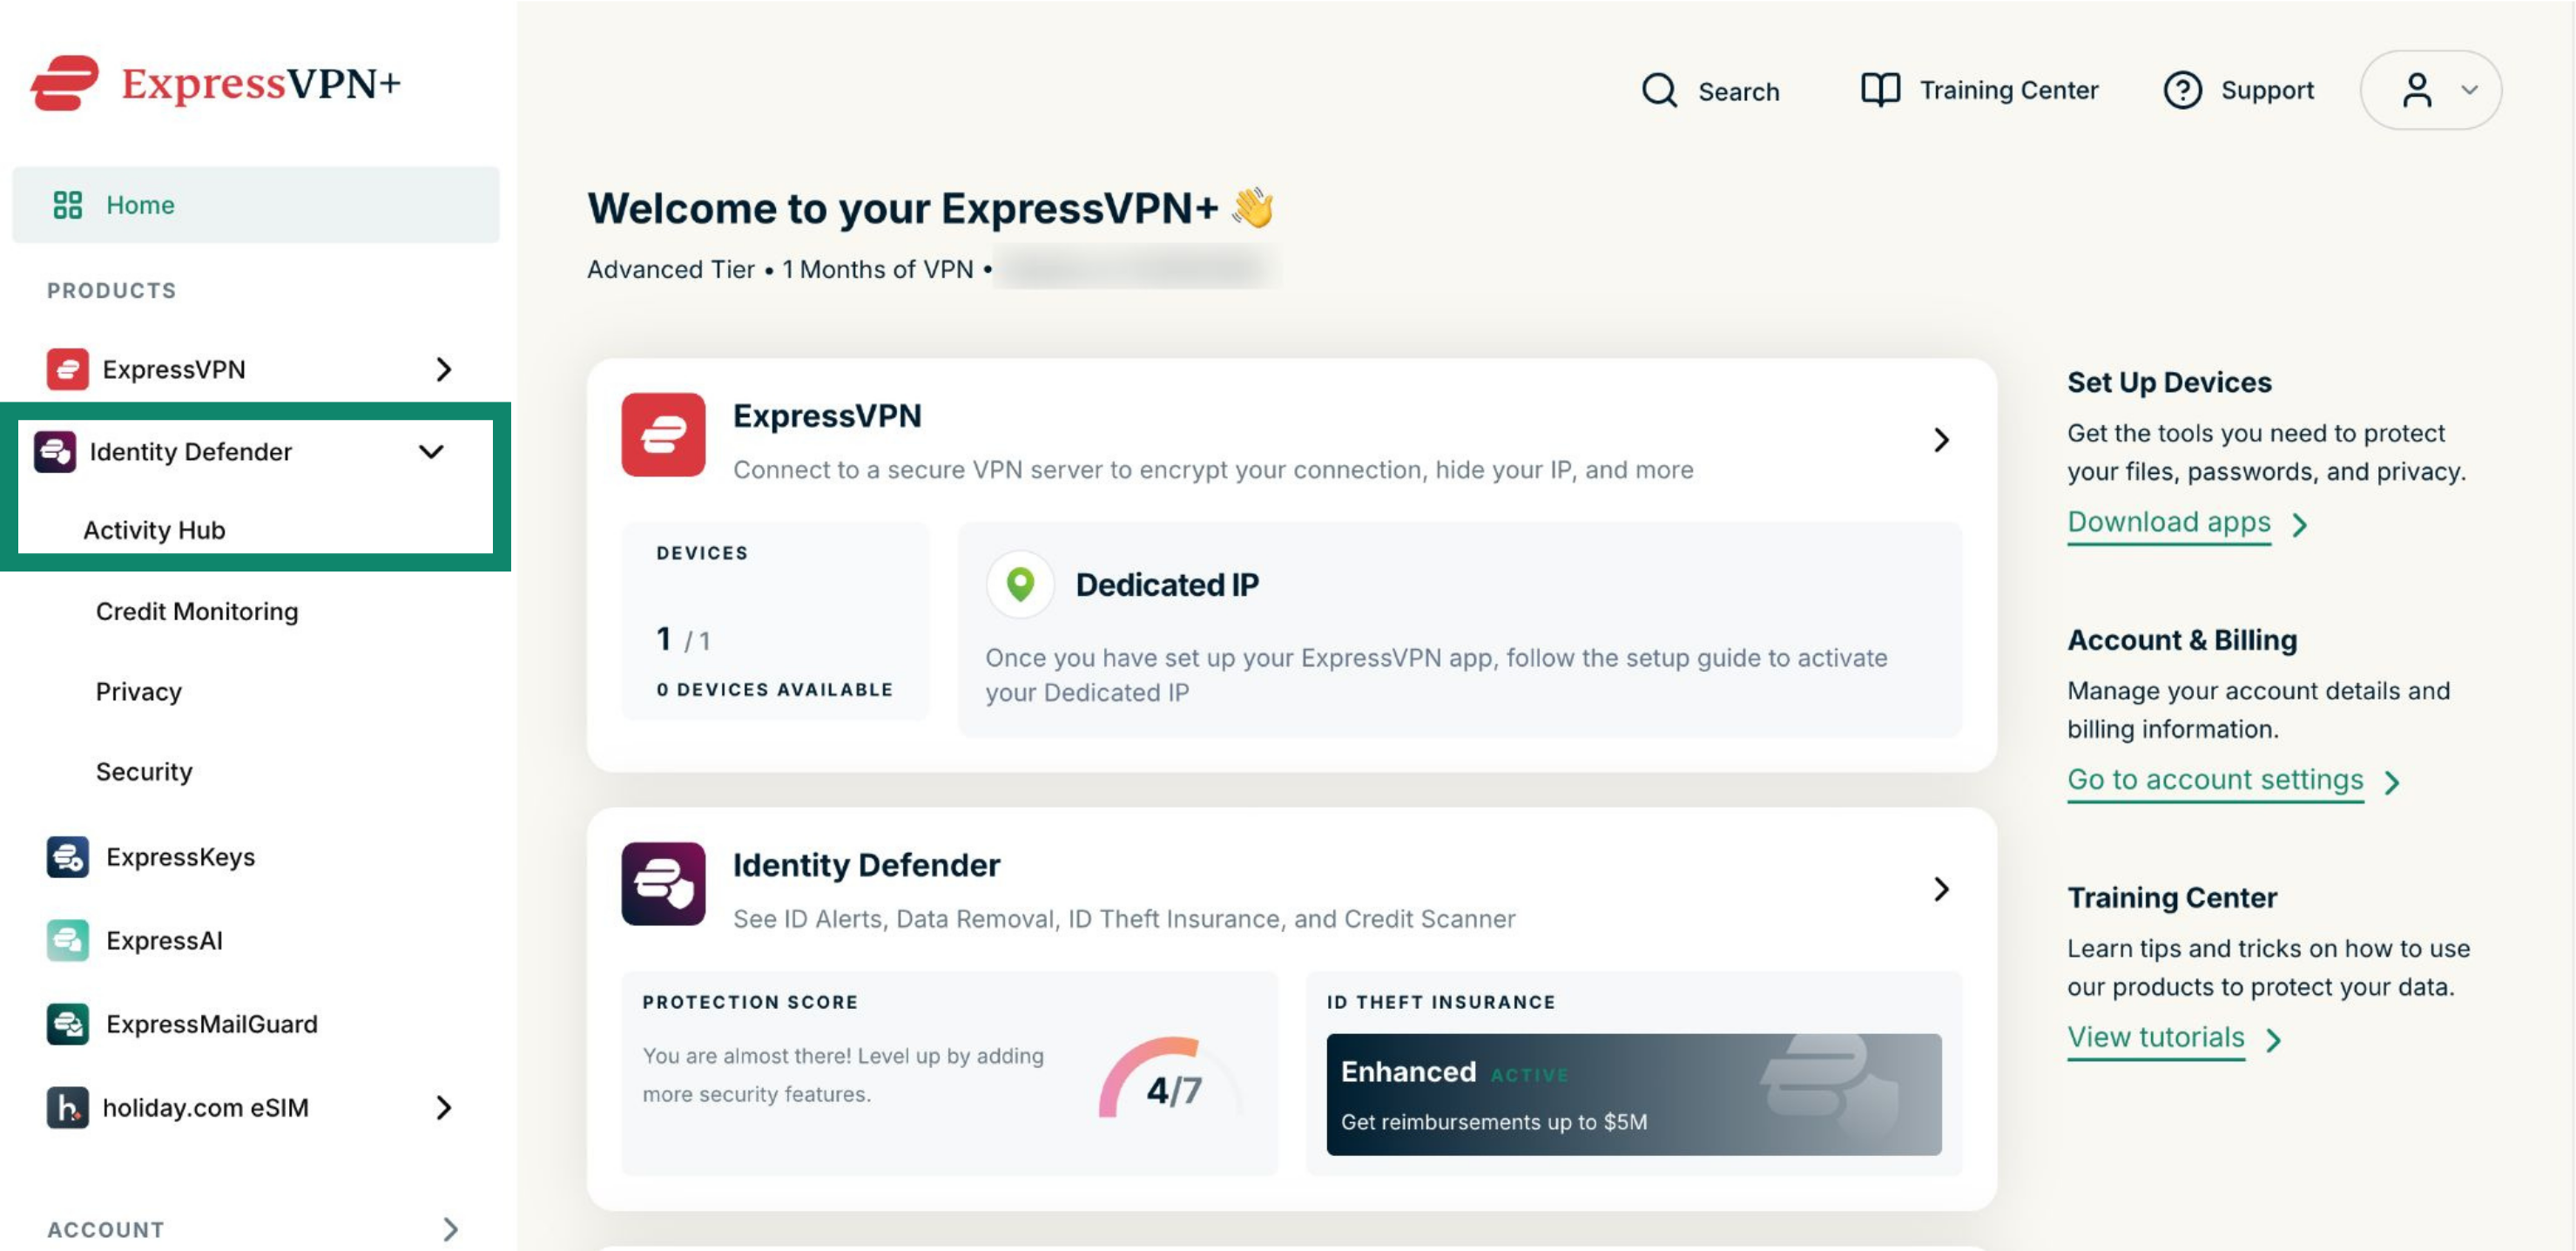
- Click Activity Hub in the Identity Defender menu.

- You’ll see each monitoring category along with the number of new alerts for each.


Need help? Contact the ExpressVPN Support Team for immediate assistance.
How to update your information
When you set up ID Alerts, we ask for basic information like your email and address to get started. Once you share this information with us, ID Alerts starts monitoring it immediately and will show you alerts if anything suspicious is detected.
However, you can significantly enhance your protection by adding more personal details to your monitoring profile at any time to expand what ID Alerts monitors on your behalf, including:
- Addresses (up to 10)
- Bank accounts (up to 20)
- Business license (1 only)
- Credit and debit cards (up to 10)
- Crypto wallets (up to 10)
- Dates of birth (1 only)
- Driver’s license (up to 10)
- Email addresses (up to 10)
- Gamertags (up to 10)
- Medical IDs (up to 10)
- Mother’s maiden name (1 only)
- Your name (1 only)
- National Provider Identity (NPI) number (1 only)
- Passports (up to 10)
- Phone numbers (up to 10)
- Social Security Number / ITIN (1 only)
- Usernames (up to 10)
You can adjust the information that ID Alerts monitors in either the Identity Defender mobile app or your ExpressVPN+ dashboard.
How to update your information in the Identity Defender app
- Open the Identity Defender app and tap the Security tab.

- On the Dashboard screen, tap See Monitored Information.

- Tap the dropdown menu and choose the service for which you want to add information.

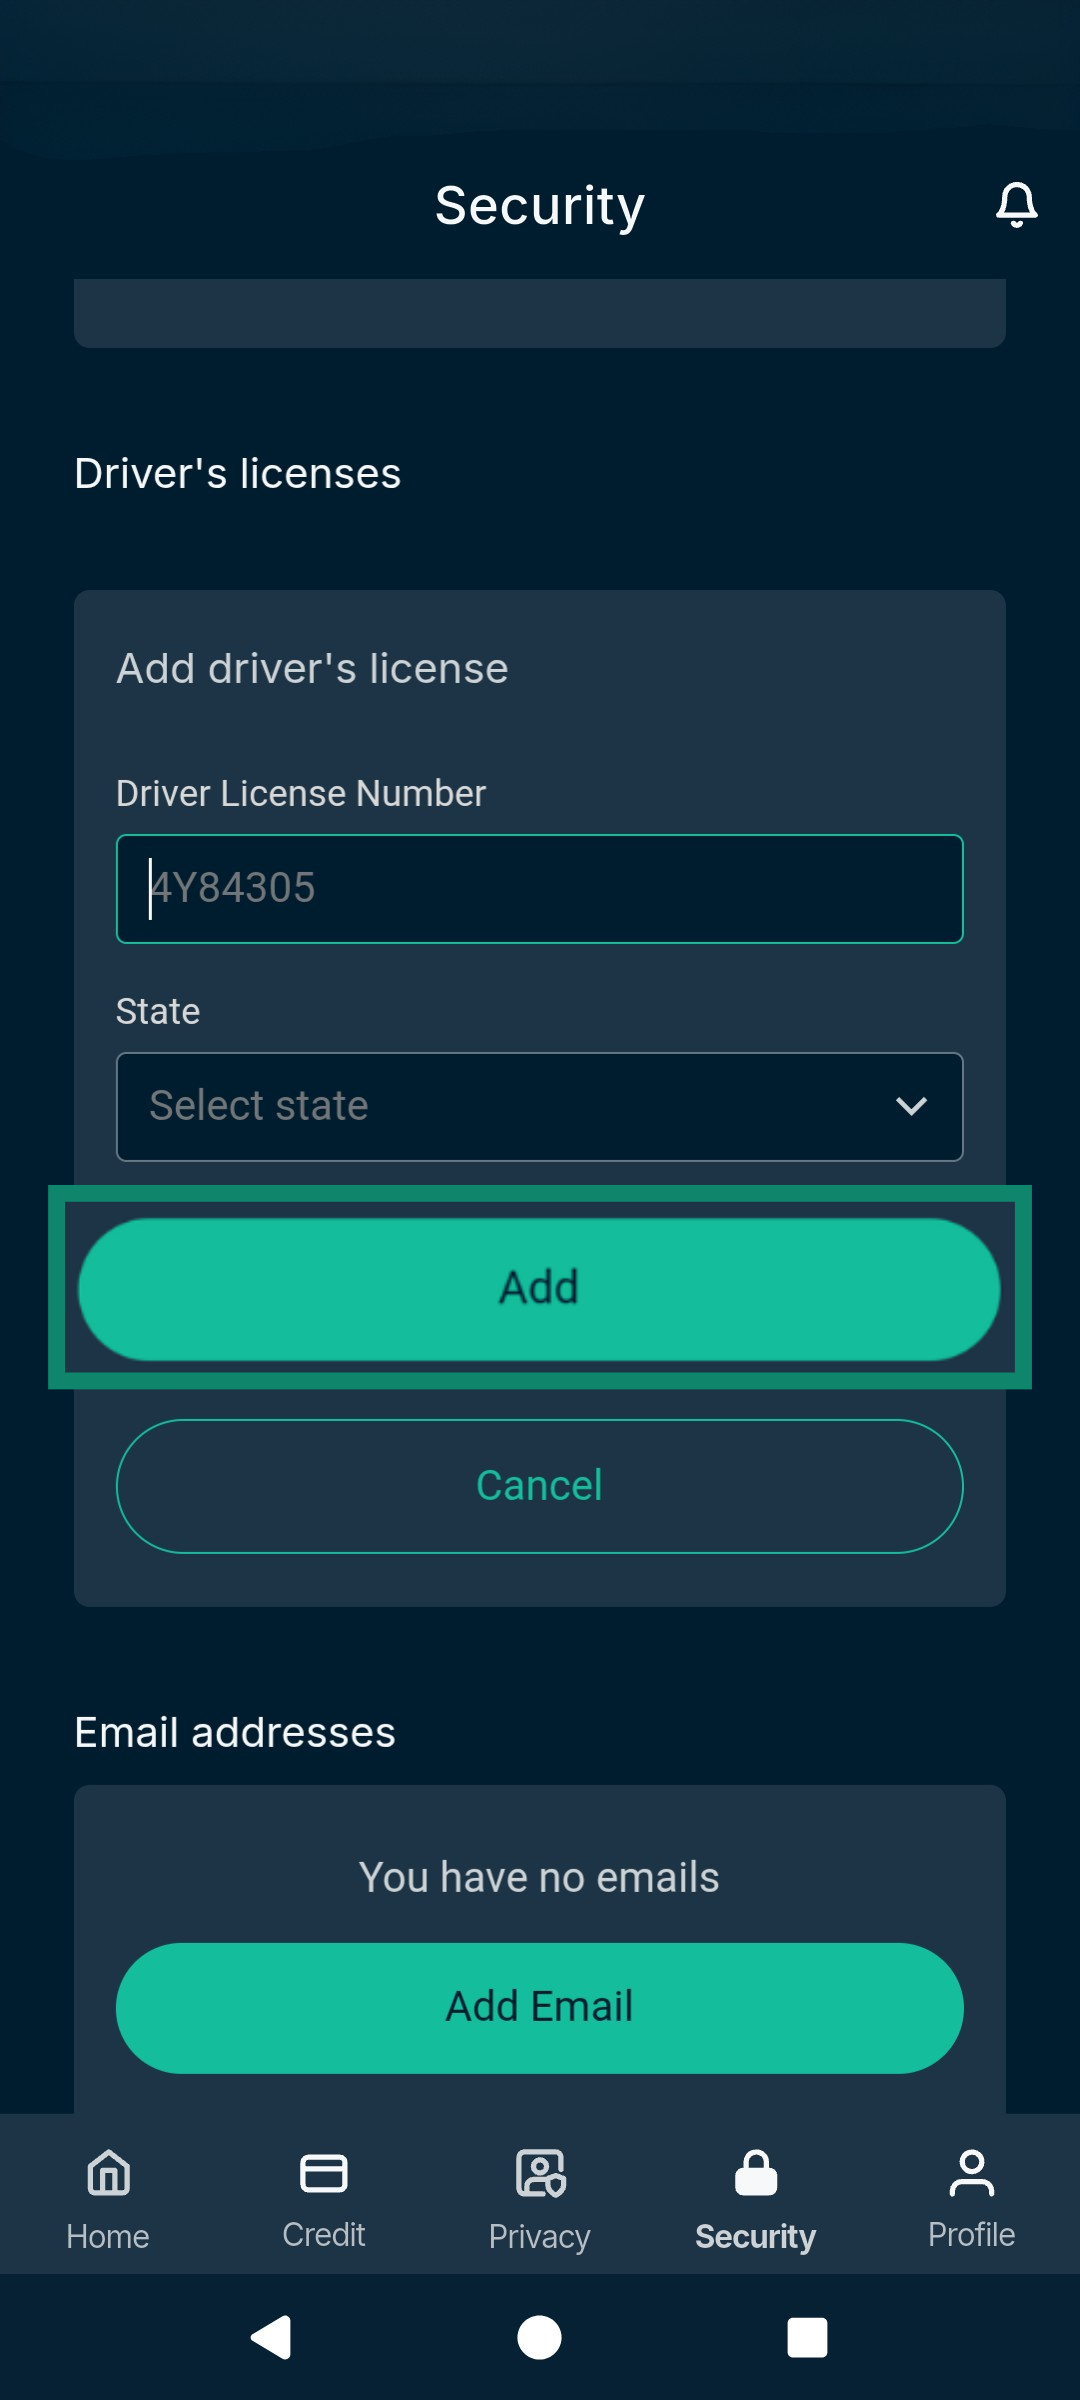
- Scroll down to the section you want to add information for and tap Add [type of information you’re adding].

- Fill in the information, then tap Add to monitor new data.


How to update your information in ExpressVPN+
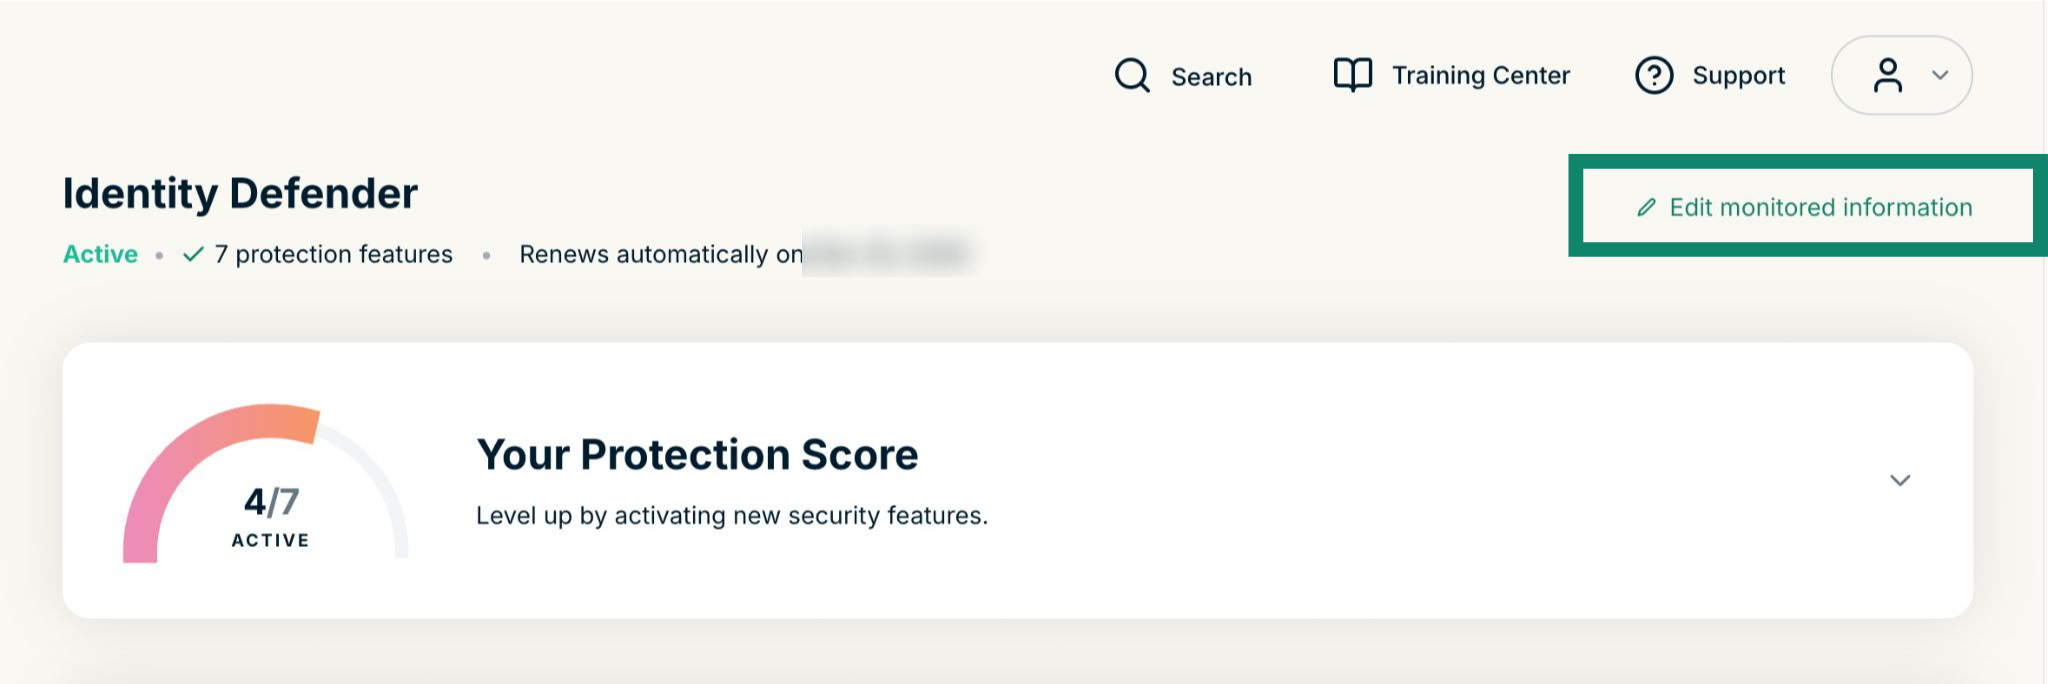
- In the ExpressVPN+ portal, click Identity Defender in the left-side menu and select Activity Hub.

- Click Edit monitored information.


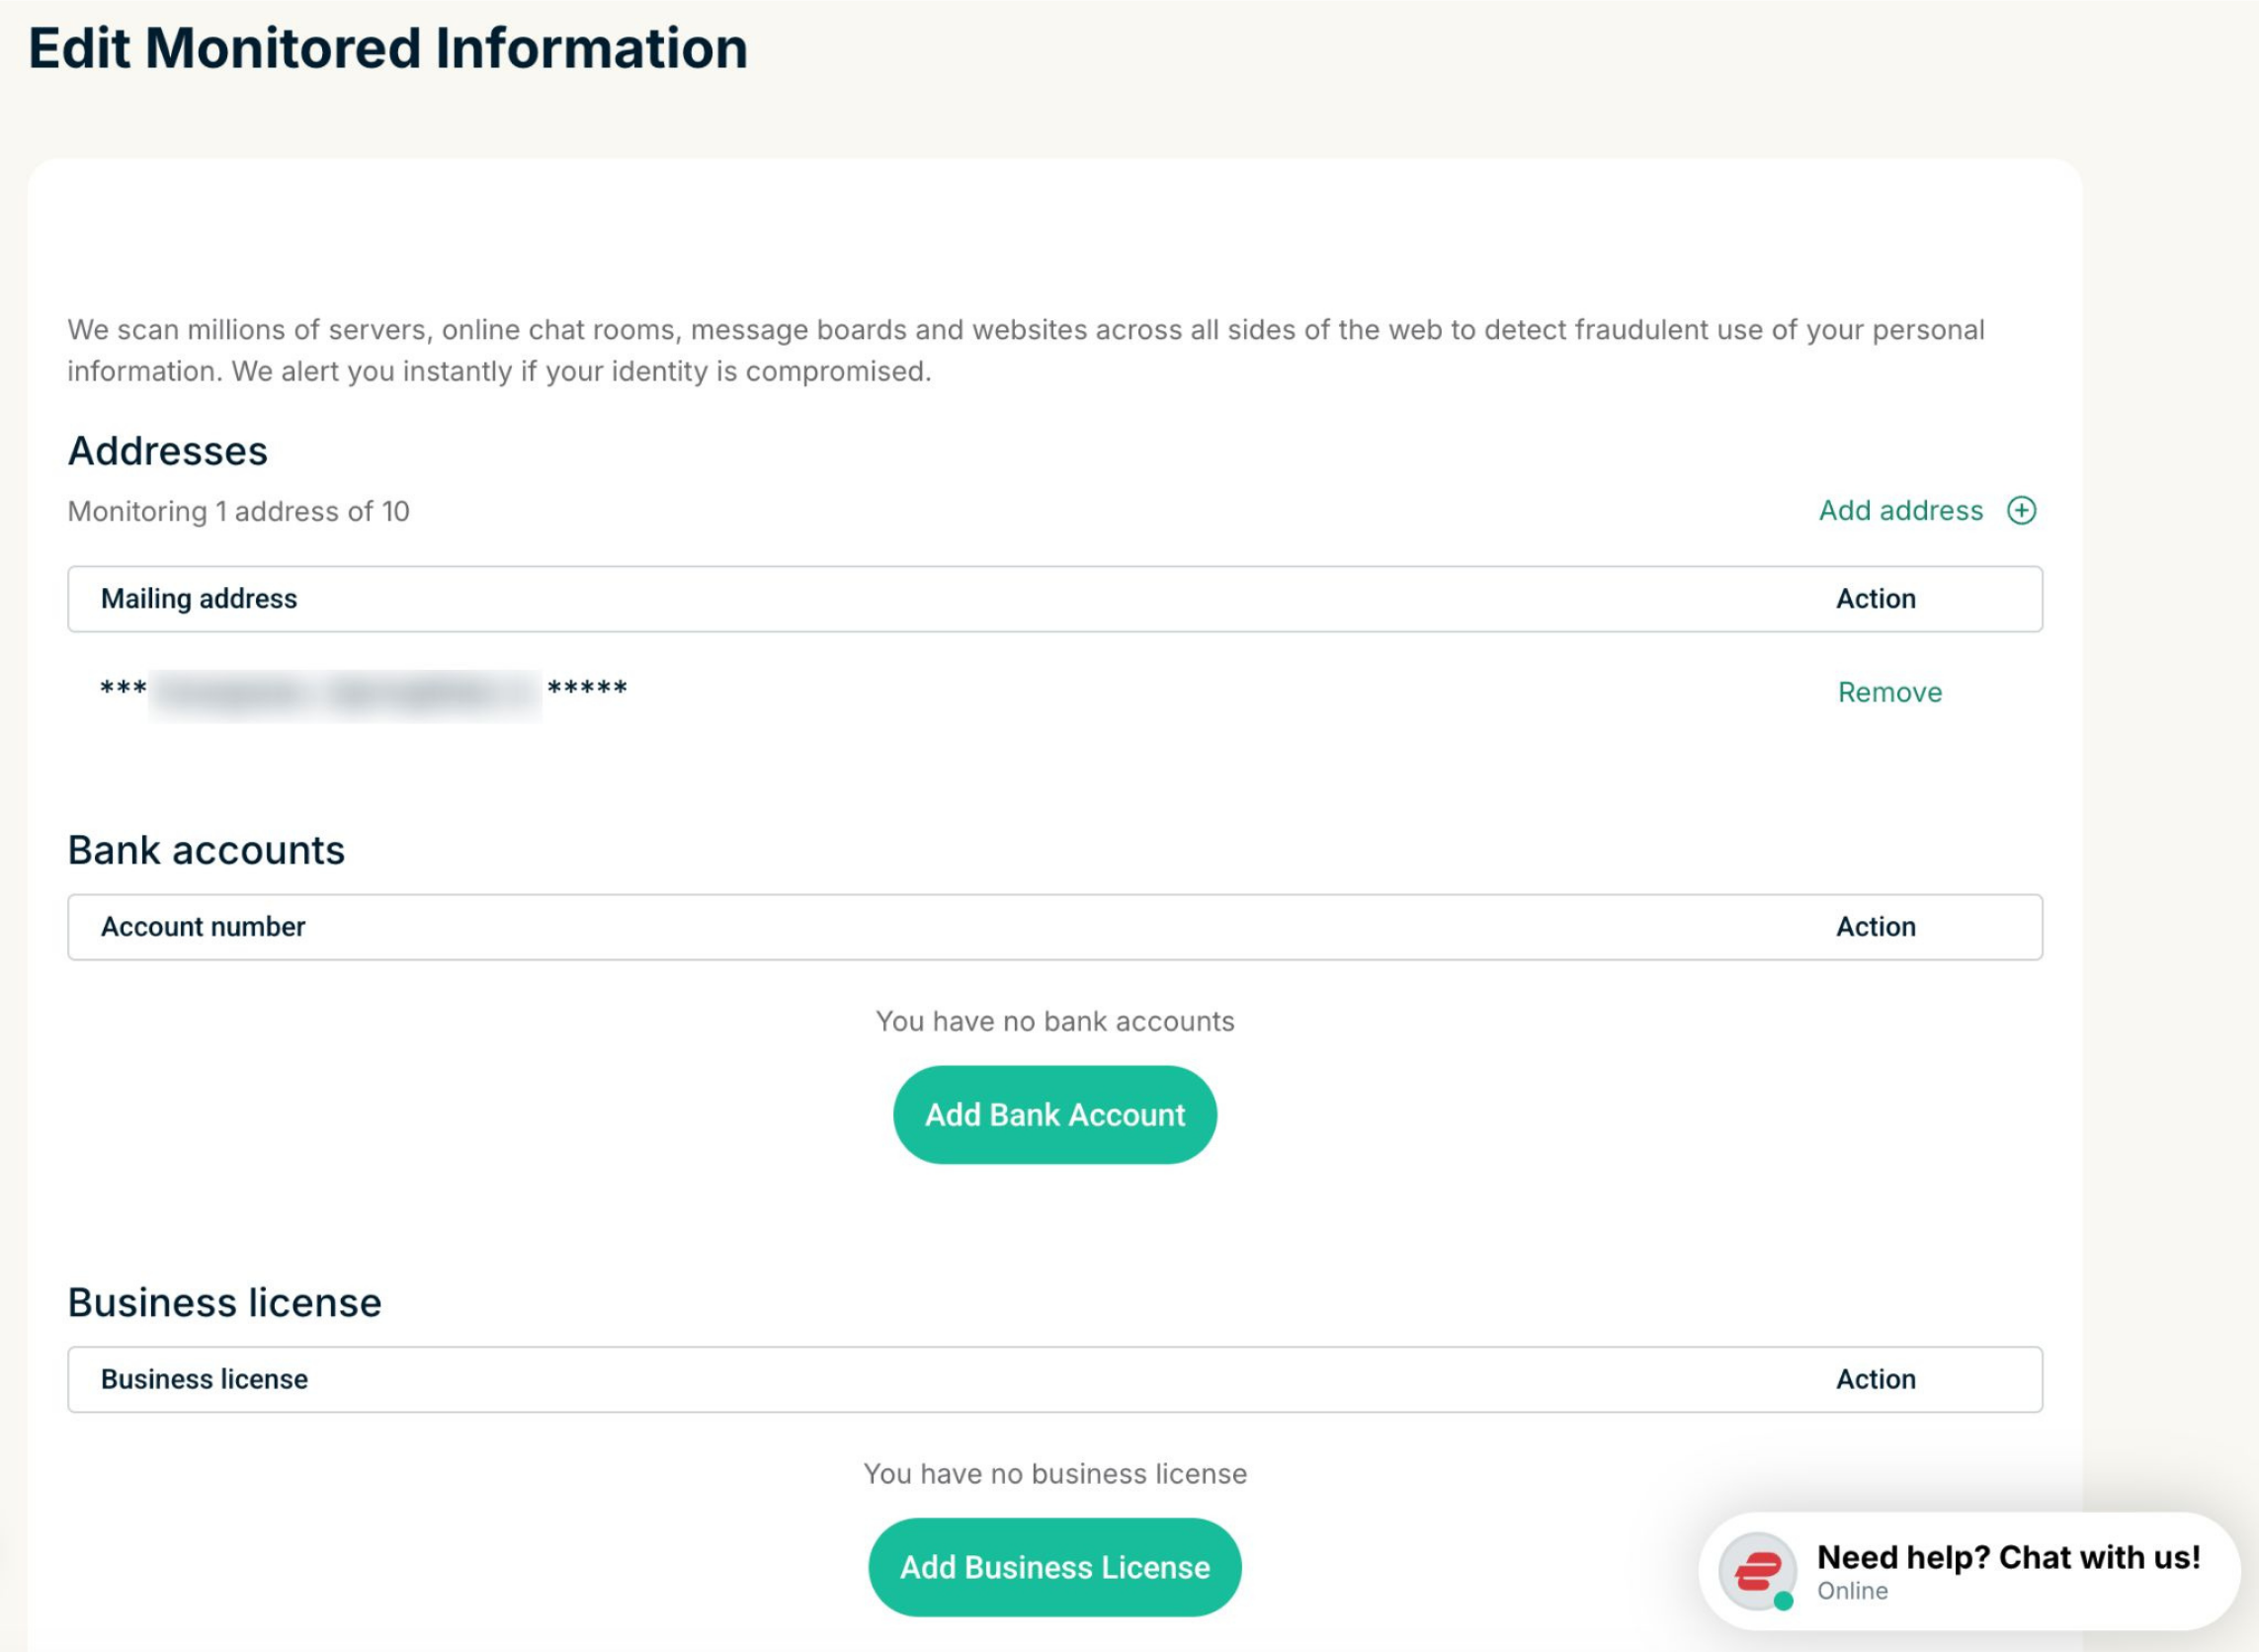
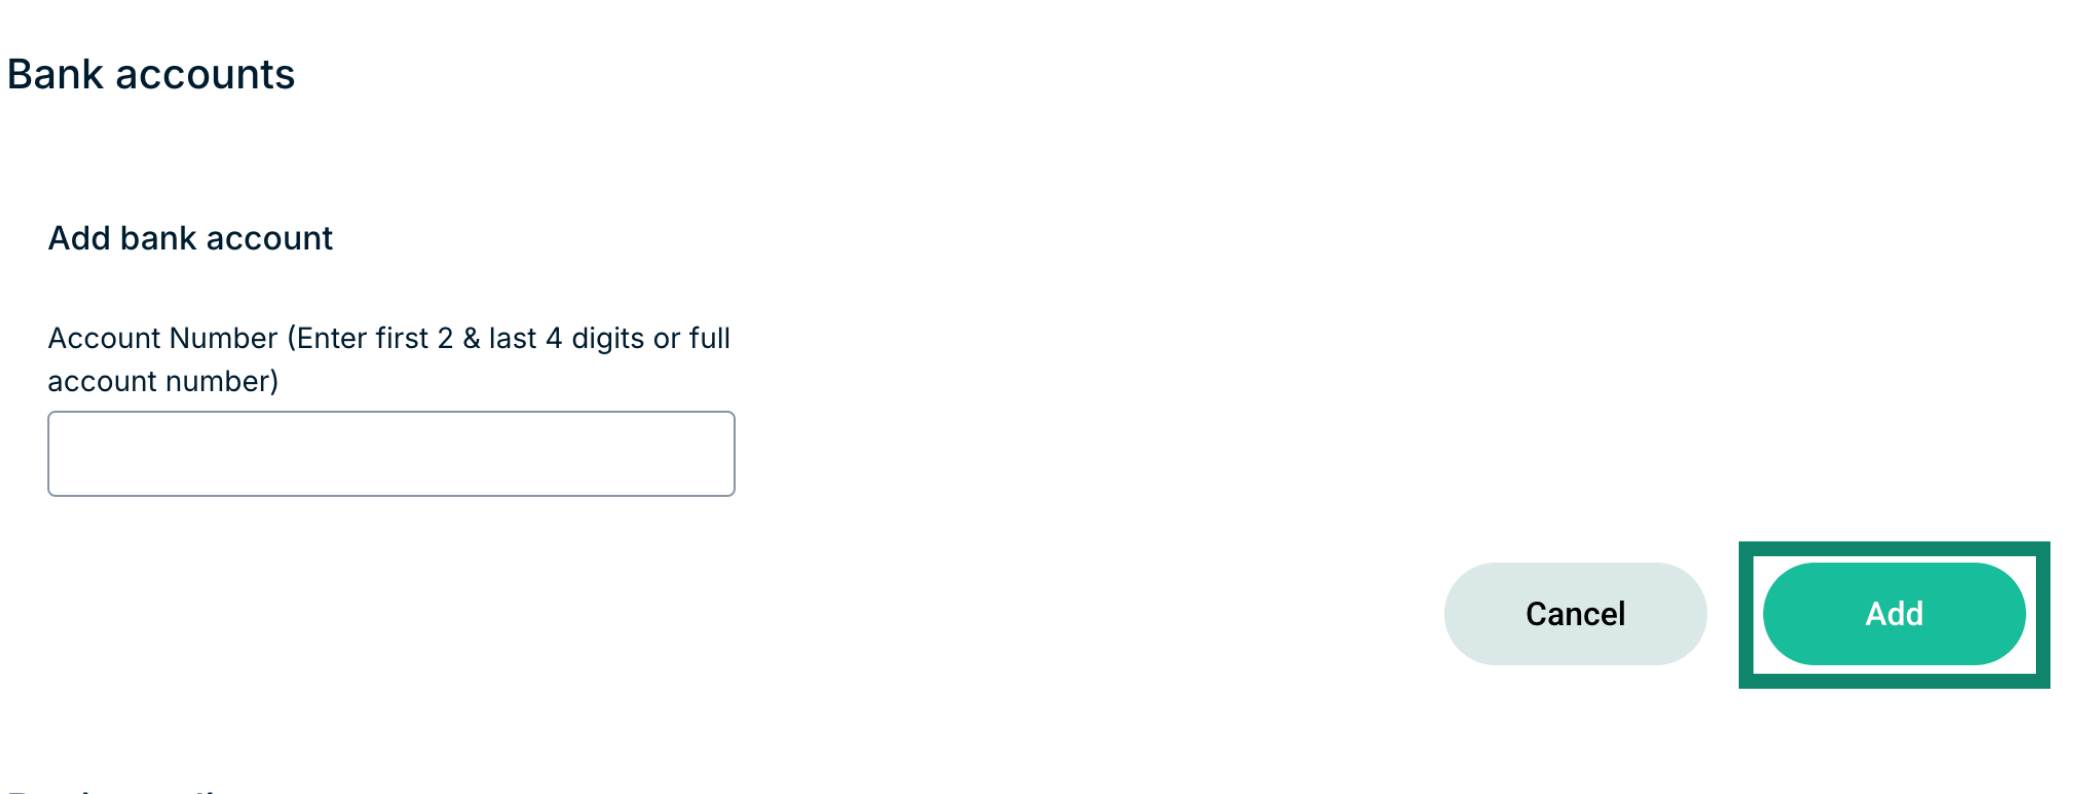
- Find the section you want to add information for and click Add [type of information you’re adding].

- Fill in the information, then click Add to monitor new data.


Need help? Contact the ExpressVPN Support Team for immediate assistance.
Services included in ID Alerts
To use any of these services, you have to confirm your identity by providing basic information during setup. This includes your first name, last name, date of birth, home address, and email.
That said, some of these services require providing more information to work.
The following section explains what each service does and what each requires to work, in addition to the basic information provided during setup.
Dark Web Monitoring
Scans the dark web for your personal data, such as emails, passwords, financial details, or identity documents, that has been exposed. You will be notified when new risks are found, so you can take action to protect yourself.
Note on activation: The dark web monitor automatically monitors the basic information you provided during setup: your first name, last name, date of birth, home address, and email. If you would like to monitor more, you can update your information at any time.
Change of Address Monitoring
Tracks unauthorized address changes that could indicate identity fraud or mail redirection scams. Alerts you if their address is updated without your knowledge, helping prevent missed bills, stolen mail, or account takeovers.
Note on activation: This service automatically monitors the home address you provided during setup. If you would like to monitor additional addresses, you can add up to 10 addresses by updating your information at any time.
SSN Monitoring
Alerts you when your social security number (SSN) is used for loans, payments, employment, and other such activities.
Note on activation: To use this service, you must provide your Social Security Number (SSN). If you provided your basic details during the initial setup, you will only need to add your SSN. If you have already provided all this information, no further action is needed.
Home Title Monitoring
Continuously monitors home title and public property records to detect potential unauthorized changes. Sends timely alerts to help you take action and protect your property from title fraud, where criminals attempt to transfer or leverage property ownership without your consent.
Note on activation: To use this service, you must provide your Social Security Number (SSN). If you provided your basic details during the initial setup, you will only need to add your SSN. If you have already provided all this information, no further action is needed.
Auto Title Monitoring
Continuously monitors vehicle title records and promptly alerts you to any changes, enabling early detection of suspicious activity and protection against identity theft and unauthorized transactions. Criminals can exploit vehicle title systems to transfer ownership without your knowledge, take out loans using a vehicle they don’t own (auto title fraud), and create legal disputes or financial liability for the victim.
Note on activation: To use this service, you must provide your Social Security Number (SSN). If you provided your basic details during the initial setup, you will only need to add your SSN. If you have already provided all this information, no further action is needed.
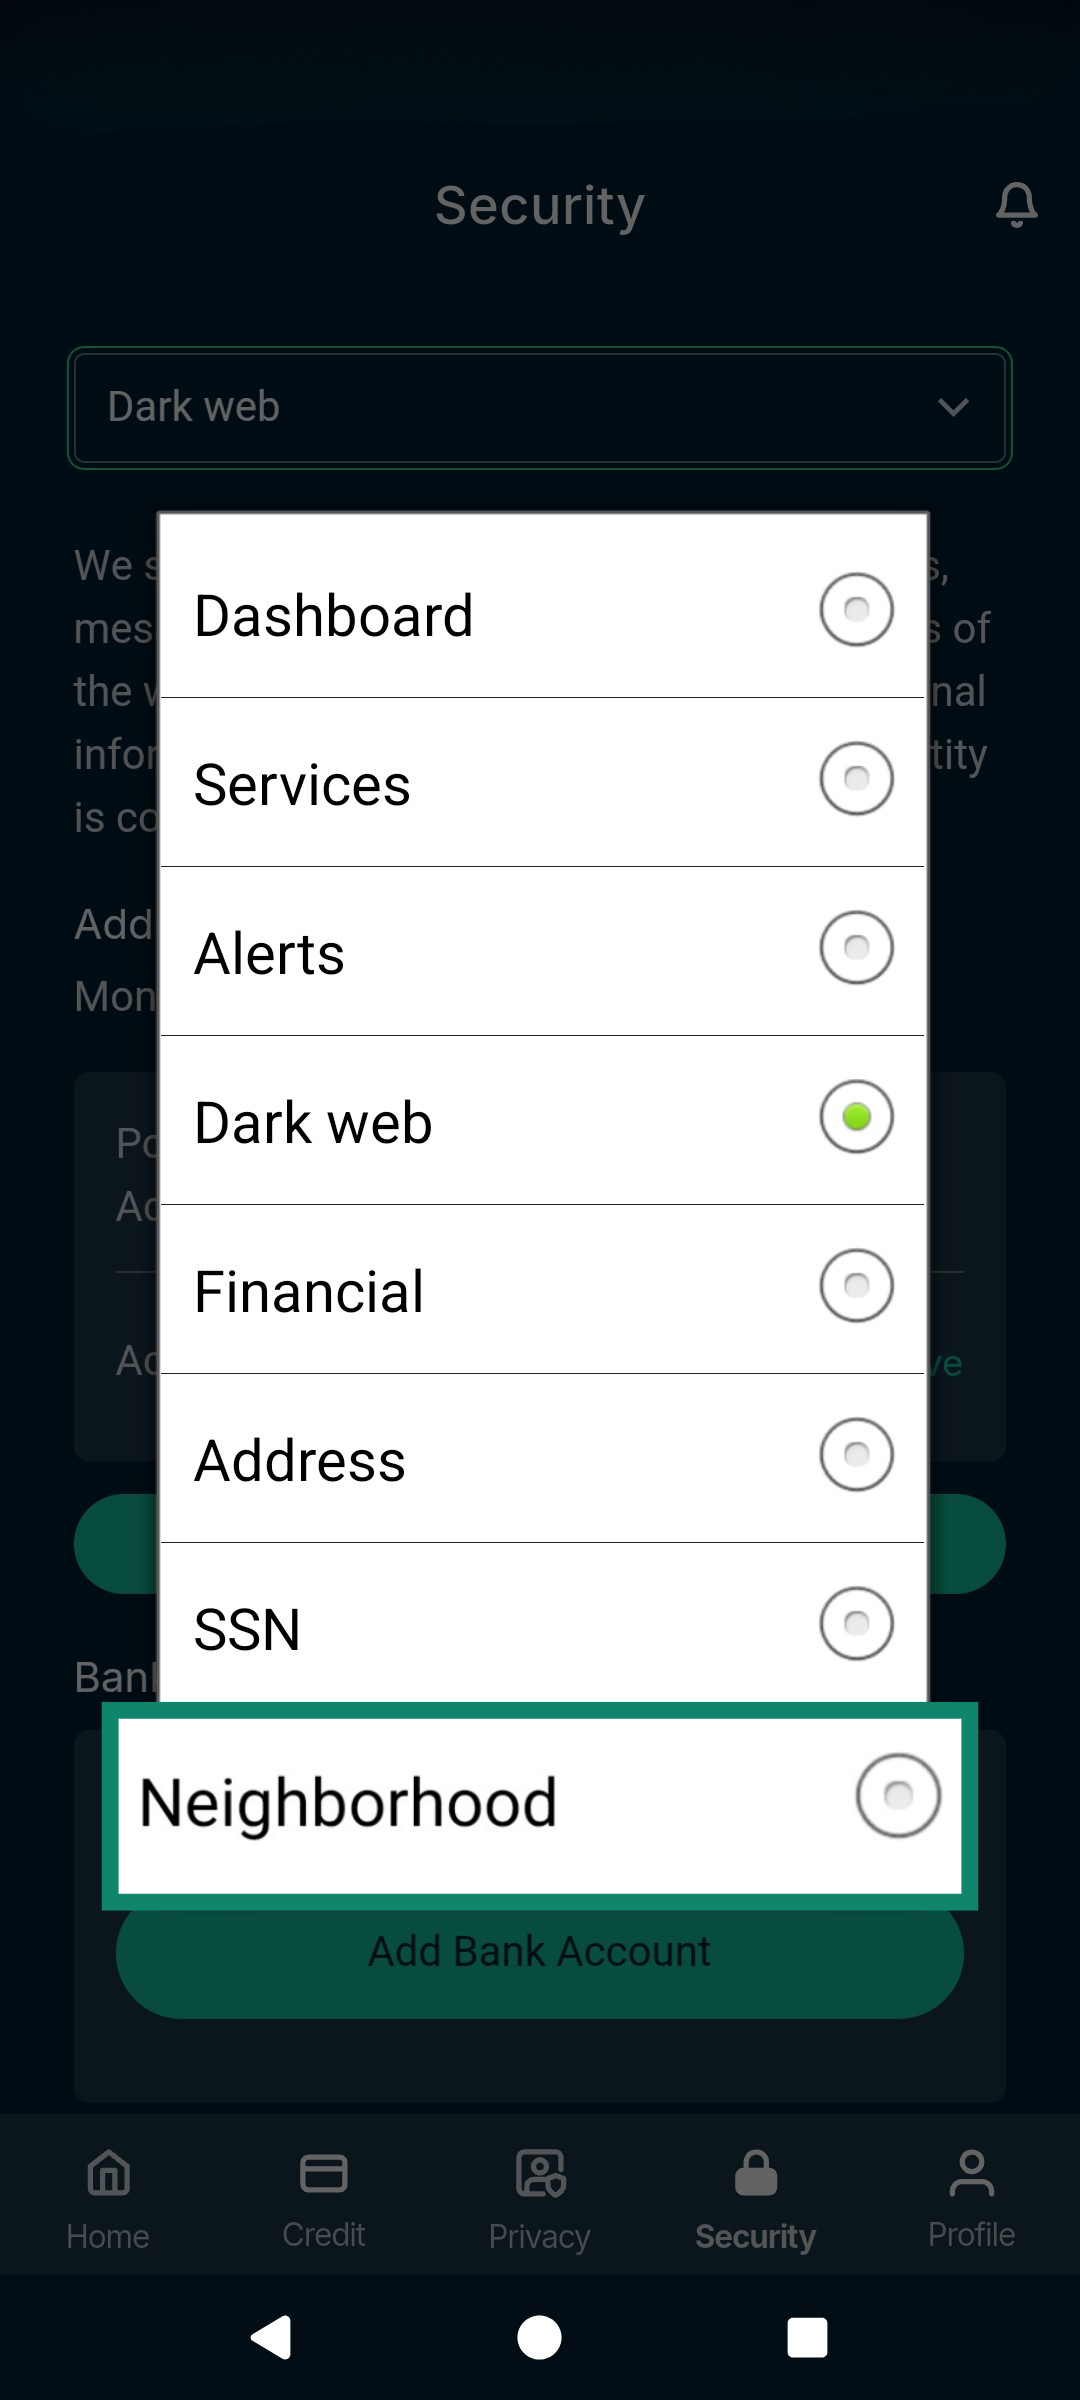
Neighborhood Watch
Notifies you if registered sex offenders move into your neighborhood. It’s designed to improve situational awareness, as well as support personal and family safety.
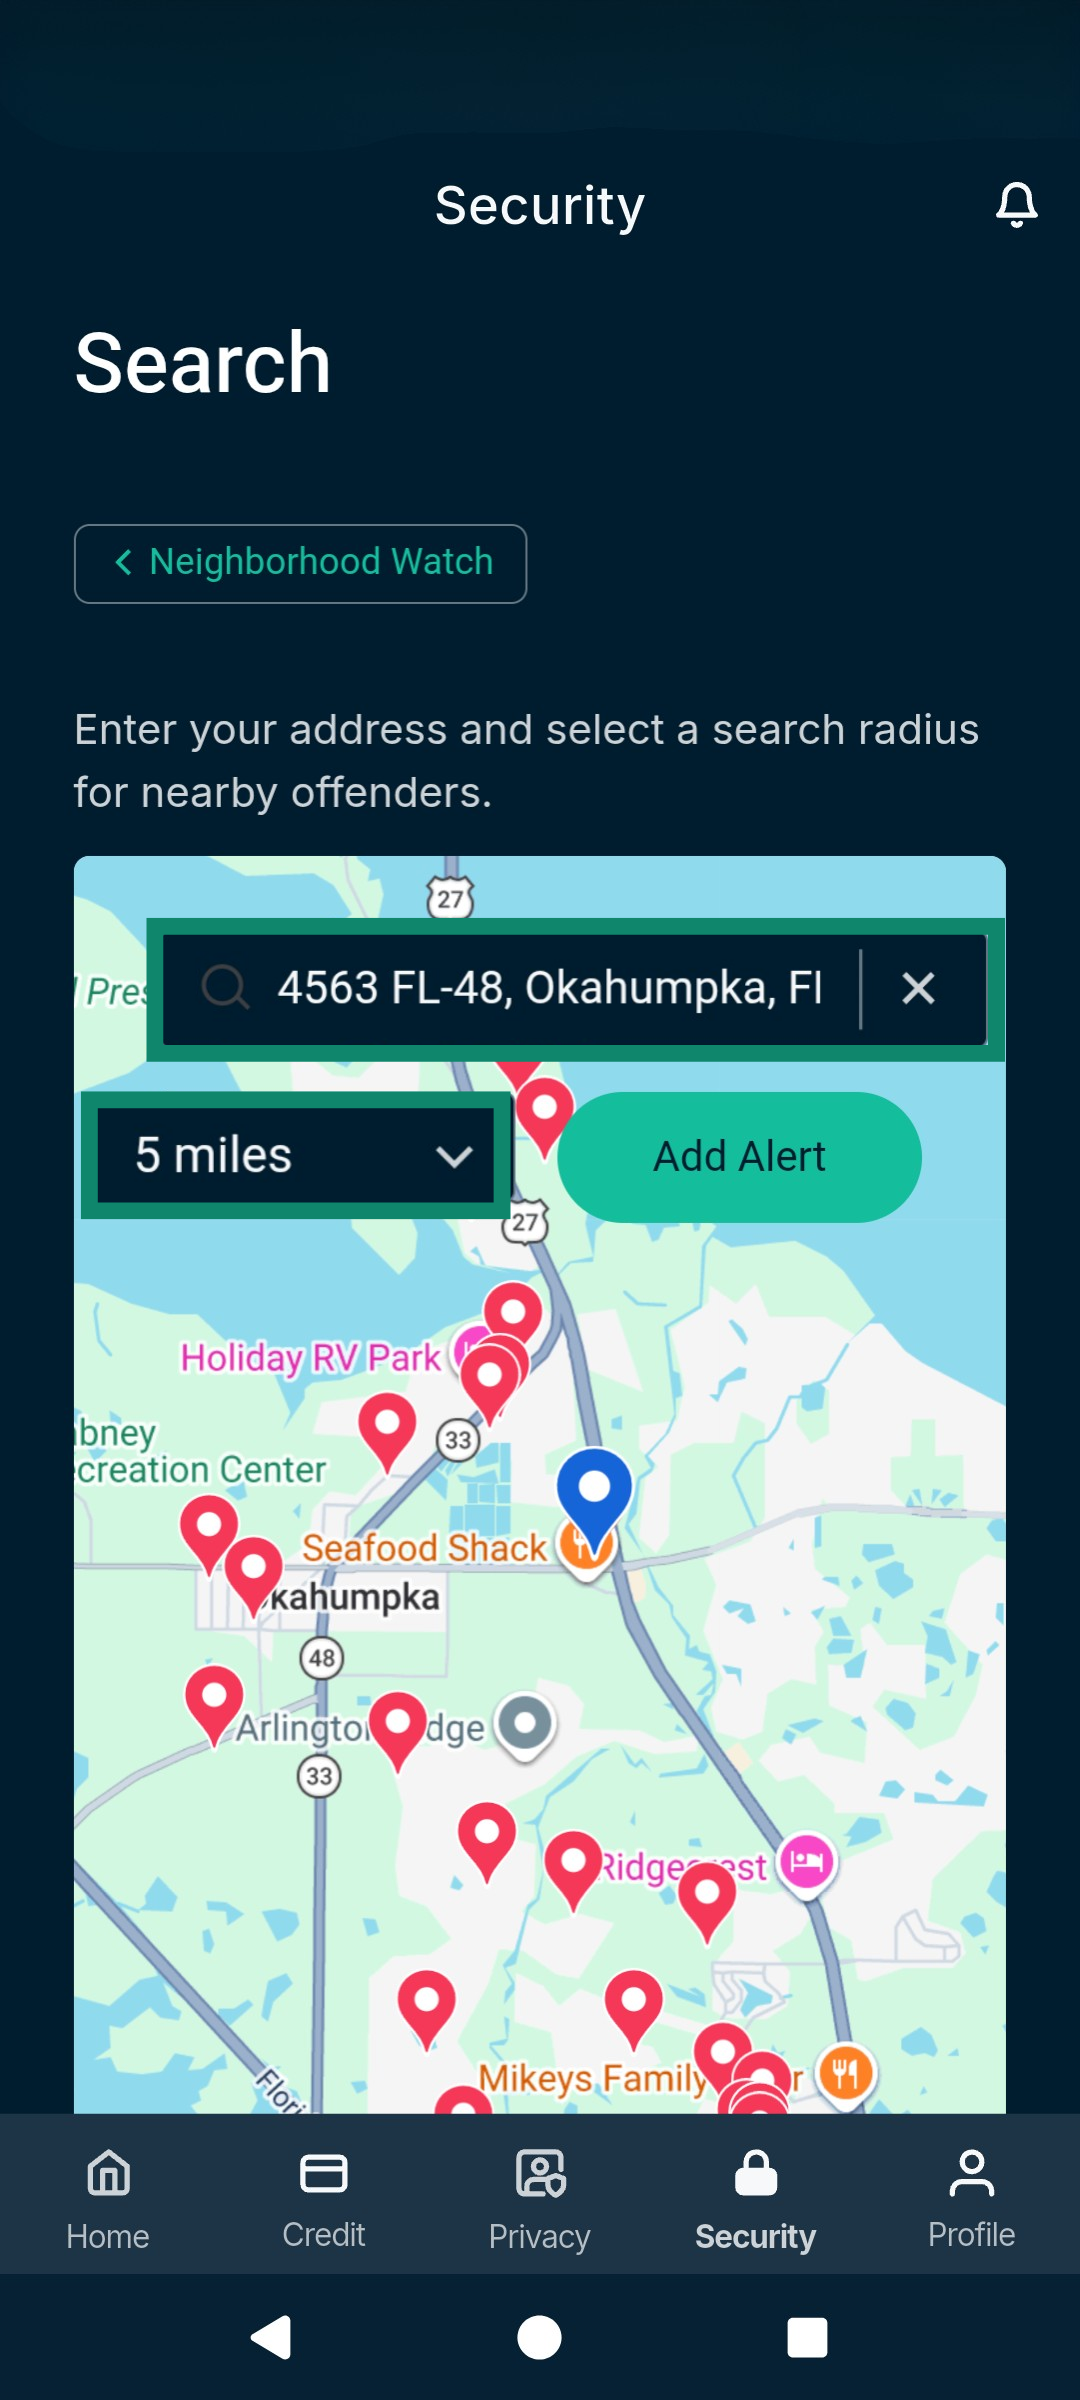
Note on activation: To search your neighborhood for potential sex offenders, you need to provide an address and select a search radius.
- In the Security tab, tap Neighborhood.

- Enter an address and then select a search radius.

- You can then add alerts so you are notified whenever a new registered sex offender is in that area by tapping Add Alert.


Courts Record Monitoring
Provides proactive monitoring of public court and judicial records for activity linked to your identity. Sends timely alerts to help you detect potential misuse and take action to safeguard yourself against identity fraud and unauthorized legal activity.
Note on activation: To use this service, you must provide your Social Security Number (SSN). If you provided your basic details during the initial setup, you will only need to add your SSN. If you have already provided all this information, no further action is needed.
High-Risk Transaction Monitoring
Detects unusually large or suspicious financial transactions associated with your identity. Helps surface early warning signs of fraud or account compromise.
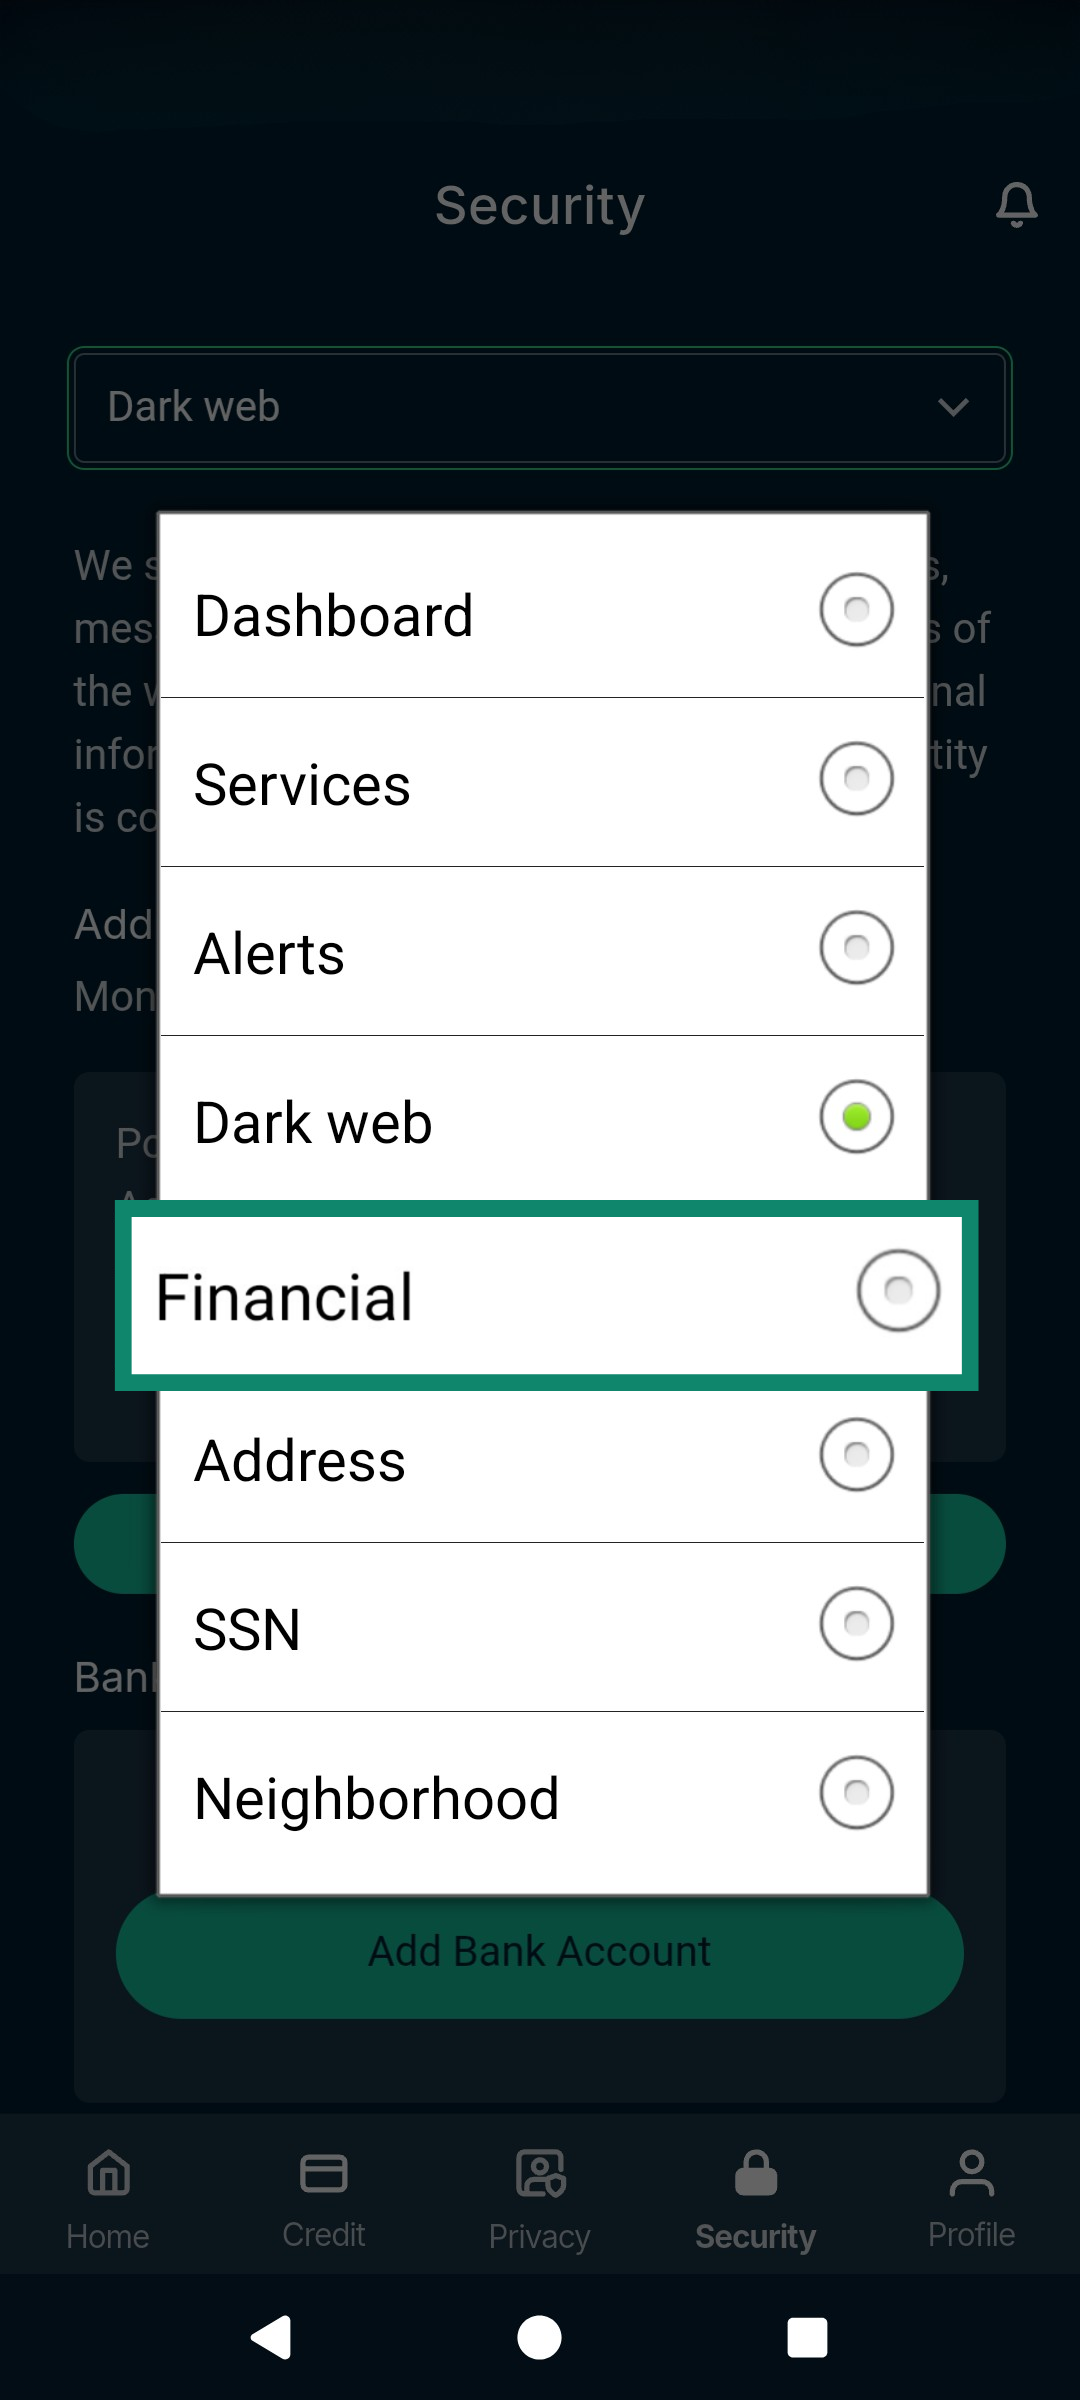
Note on activation: To use this service, you must provide details about your financial account. To do that:
- In the Security tab, tap the dropdown menu and select Financial.

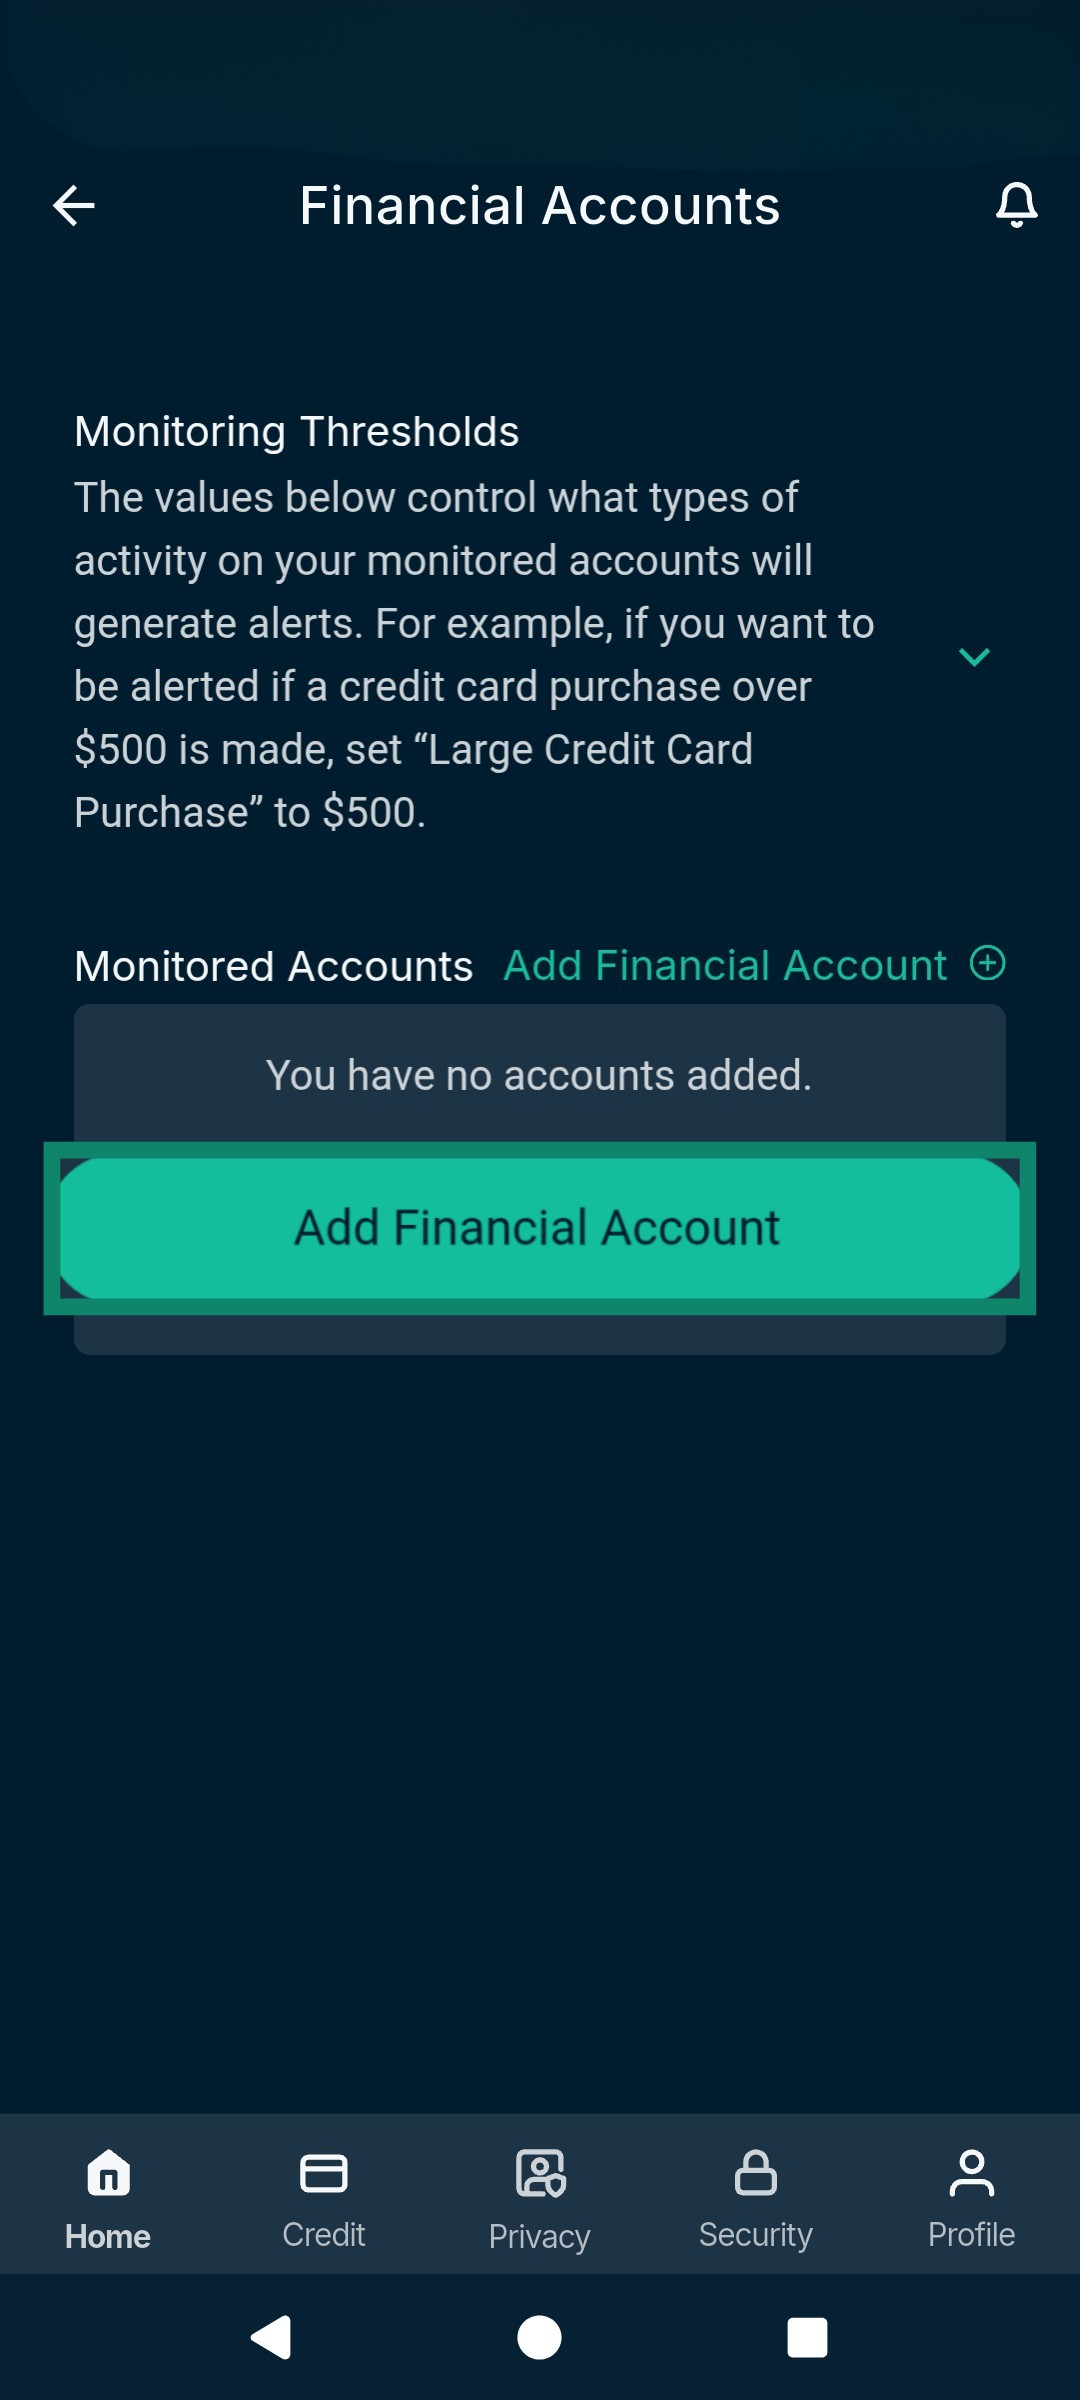
- Under Monitored Accounts, tap Add Financial Account.

- Follow the instructions.
401(k) Alerts
Monitors retirement account activity for unusual activity that is regularly associated with fraud. This includes alerts for unexpected withdrawals or access attempts and changes to any of your 401(k) accounts.
Once suspicious activity is detected, Identity Defender sends you a real-time alert; if you don’t recognize the activity, take immediate action to protect your savings. These alerts focus on high-risk account changes that can quickly drain retirement savings if left unnoticed.
Note on activation: To use this service, you must provide details about your financial account. To do that, follow the instructions on how to add financial account details here.
Need help? Contact the ExpressVPN Support Team for immediate assistance.
*The insurance is underwritten and administered by American Bankers Insurance Company of Florida, an Assurant company, under group or blanket policies issued to Array US Inc, or its respective affiliates, for the benefit of its Members. Please refer to the actual policies for terms, conditions, and exclusions of coverage. Coverage may not be available in all jurisdictions. Review the Advanced Tier Summary of Benefits and the Pro Tier Summary of Benefits.