



This guide will show you how to create, edit, and manage aliases in ExpressMailGuard.
Aliases act as a privacy layer between you and the outside world. They are forwarding email addresses that forward messages to your real email address (your real email address is known as a Recipient in ExpressMailGuard). Services, websites, and contacts only ever see your aliases—your real email address is hidden.
Jump to…
How to create aliases
In ExpressMailGuard, you can create three types of aliases:
- Shared Domain Aliases: Use shared domains like @clivaro.io resulting in aliases like j75gk2@clivaro.io. These aliases offer maximum privacy. Must be created manually.
- Dedicated Subdomain Aliases: These aliases use the Dedicated Subdomains you created, such as silver-fox, to create aliases like example@silver-fox.clivaro.io. Unlimited aliases can be created under such a domain, and automatic alias creation is possible.
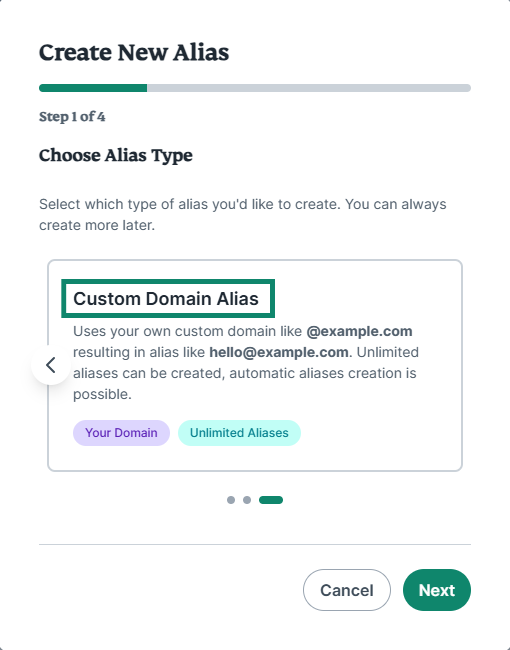
- Custom Domain Aliases: These aliases use any custom domains you own and have added to ExpressMailGuard. Unlimited aliases can be created, and automatic alias creation is possible.
Shared Domain Aliases
To create a Shared Domain Alias:
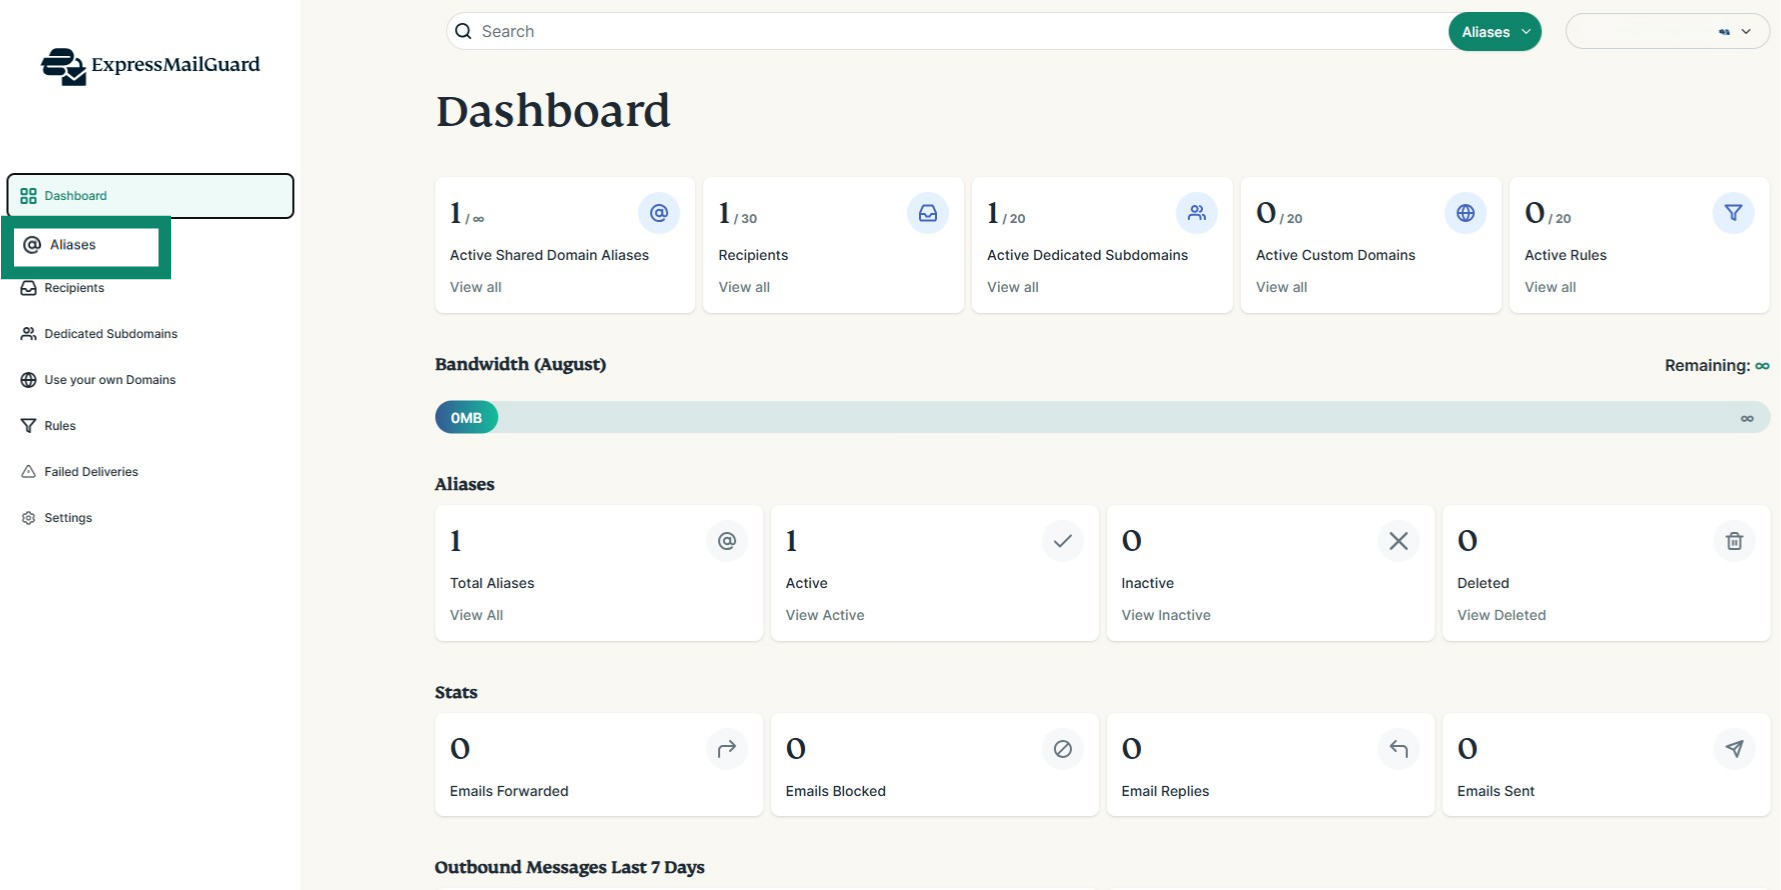
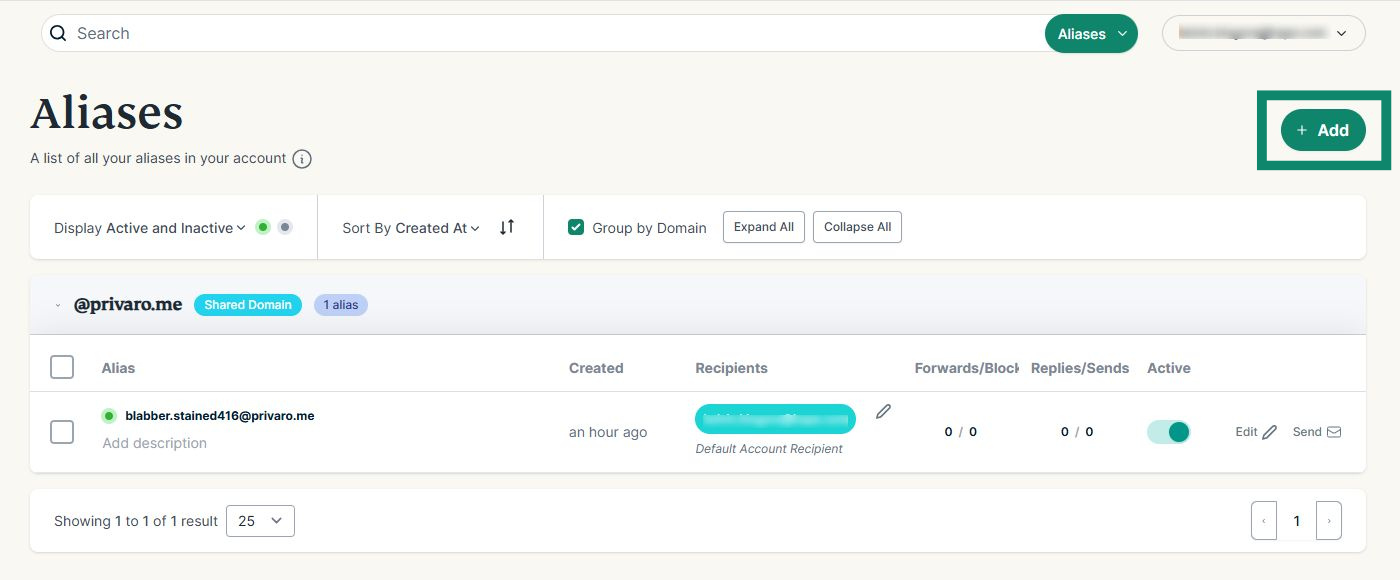
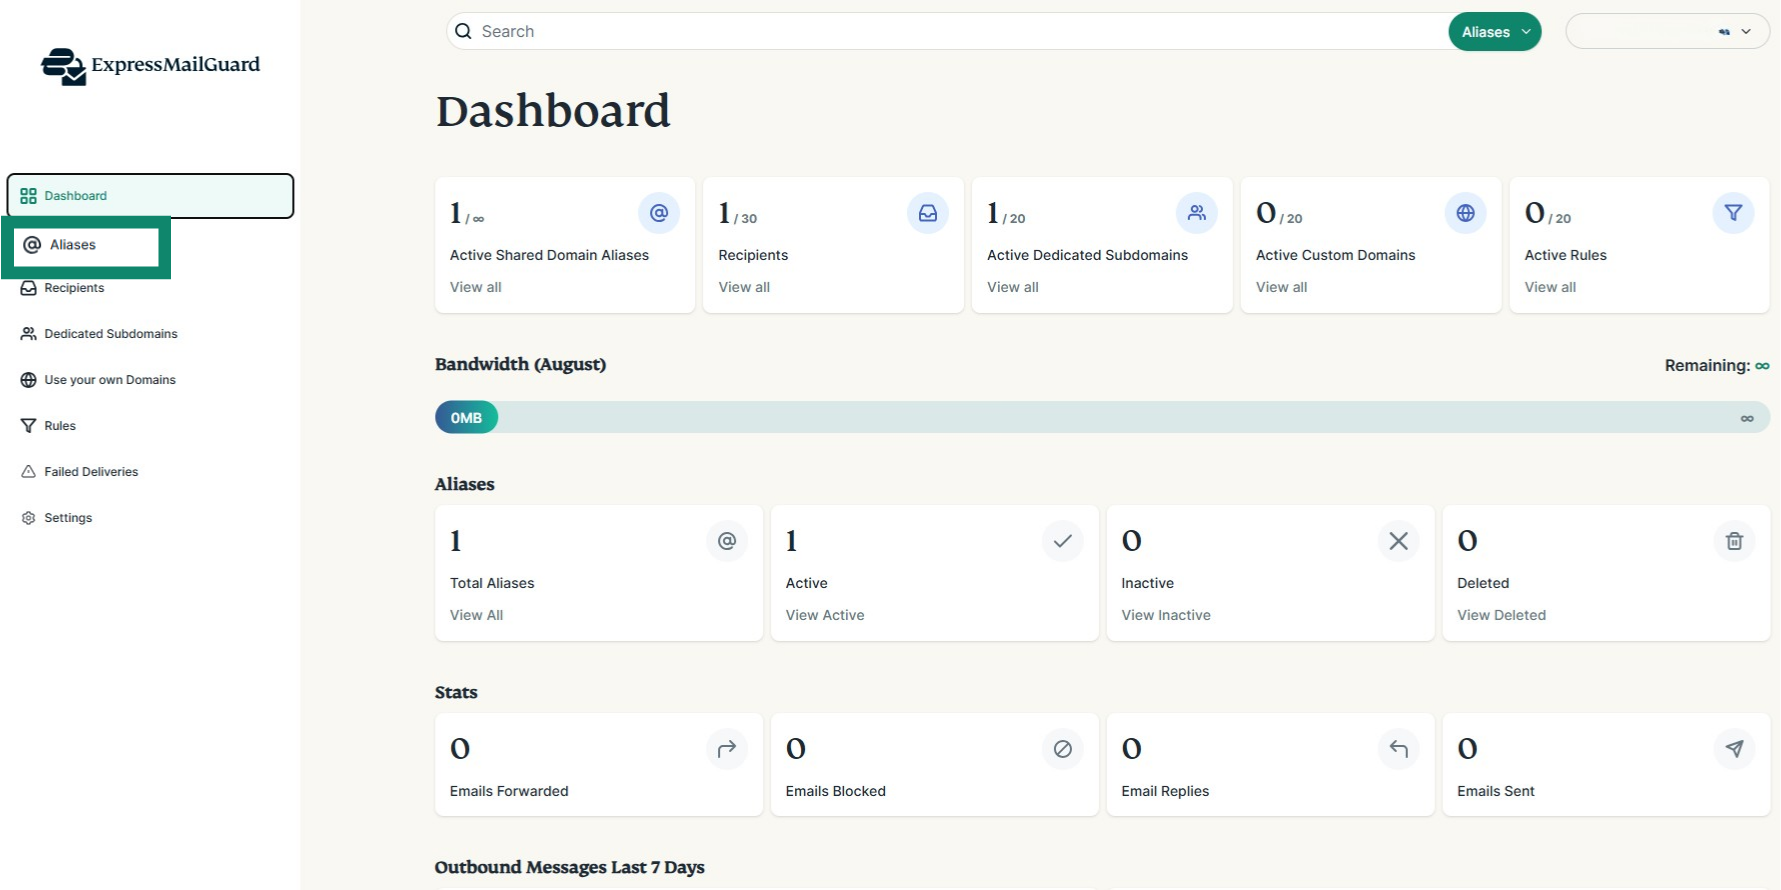
- On the ExpressMailGuard dashboard, click Aliases.


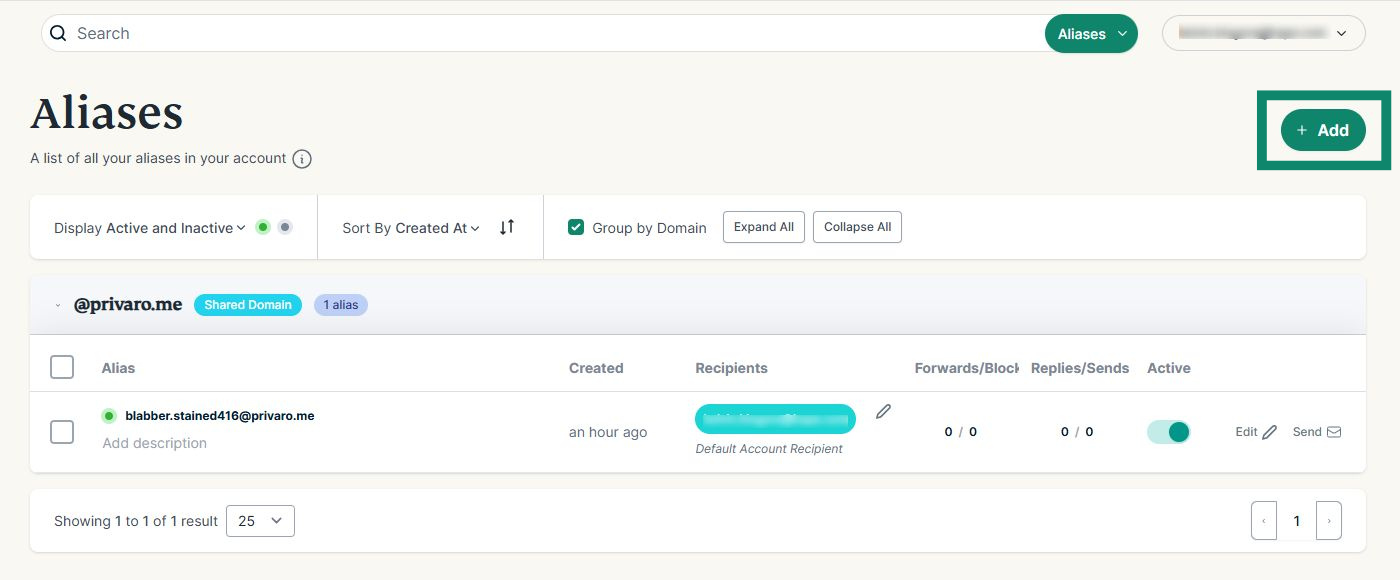
- Click + Add.


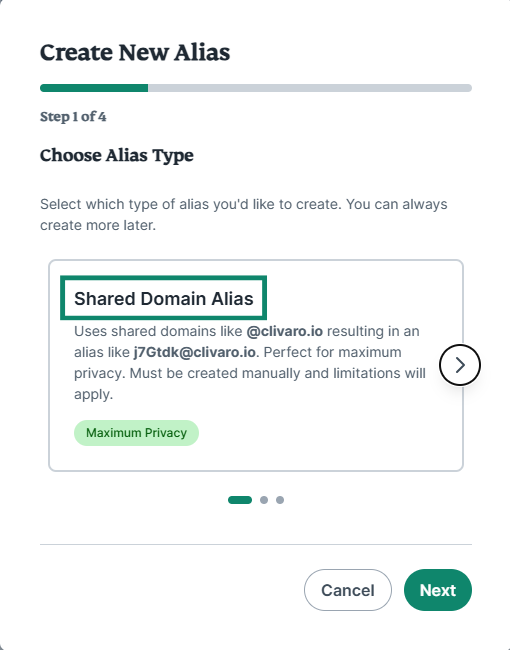
- Click Shared Domain Alias.


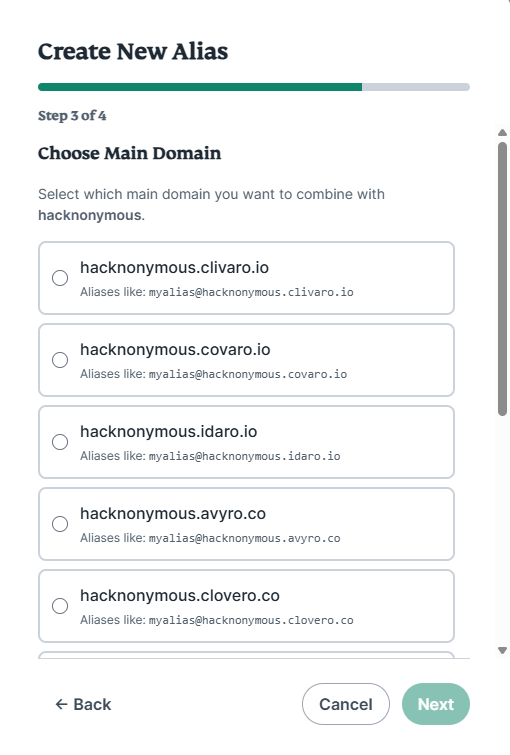
- Click the shared domain you want to use.


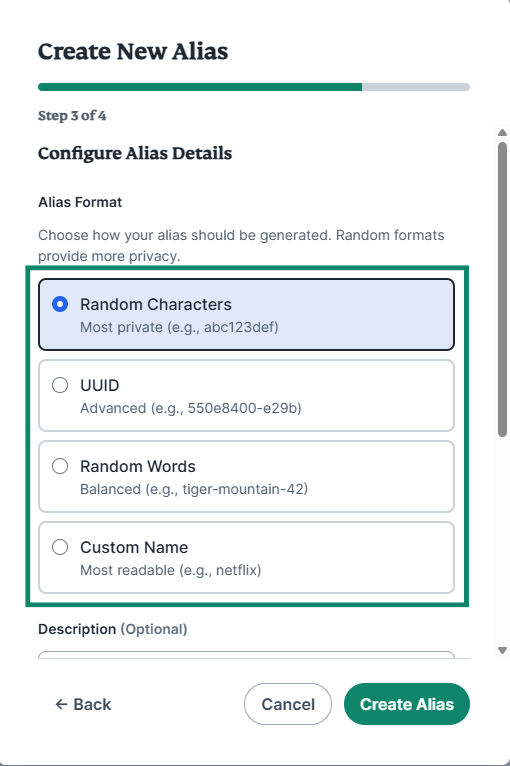
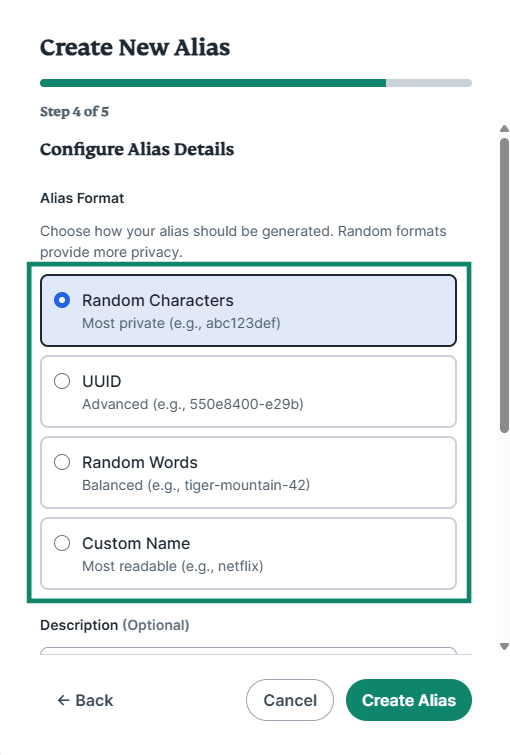
- Click the Alias Format you want to use:


- Random Characters (most private)
- UUID (Universally unique identifier: offers a great level of privacy)
- Random Words (a good balance between privacy and readability)
- Custom Name (most readable)
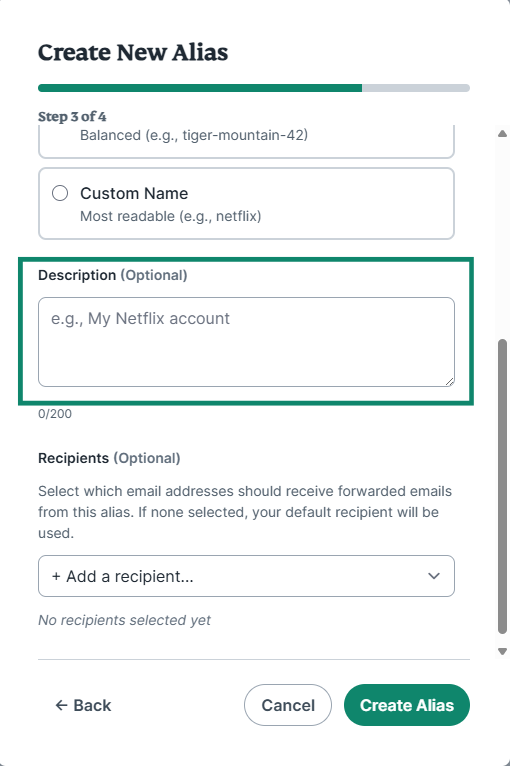
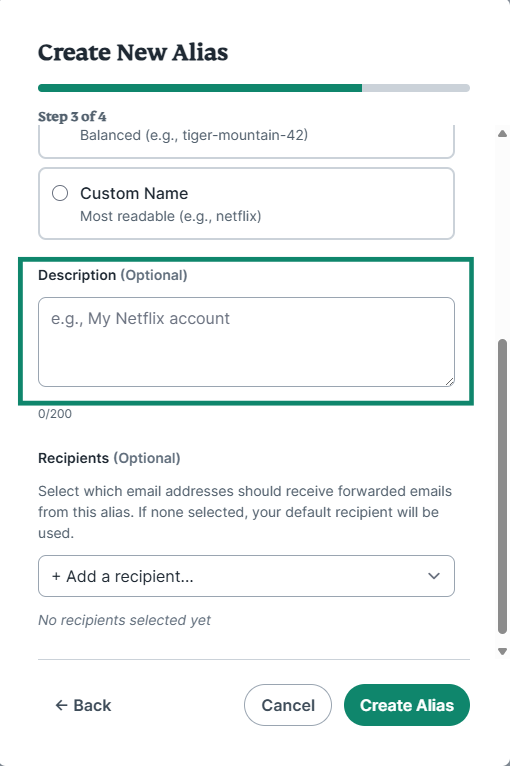
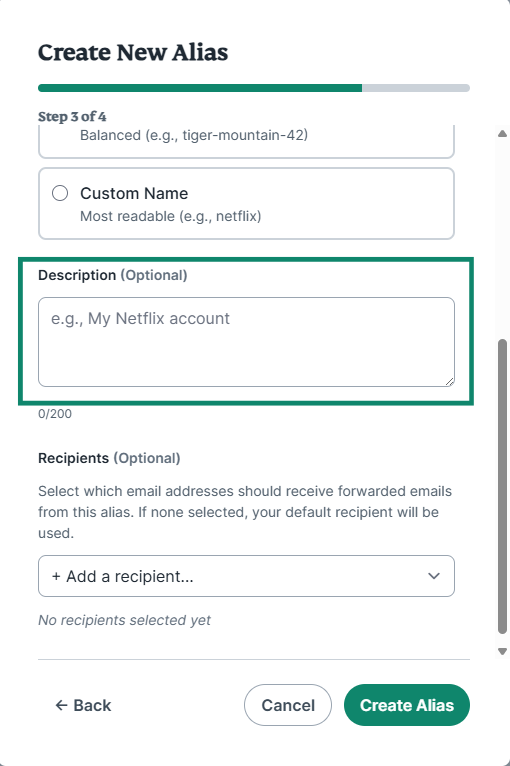
- (Optional) Add a description.

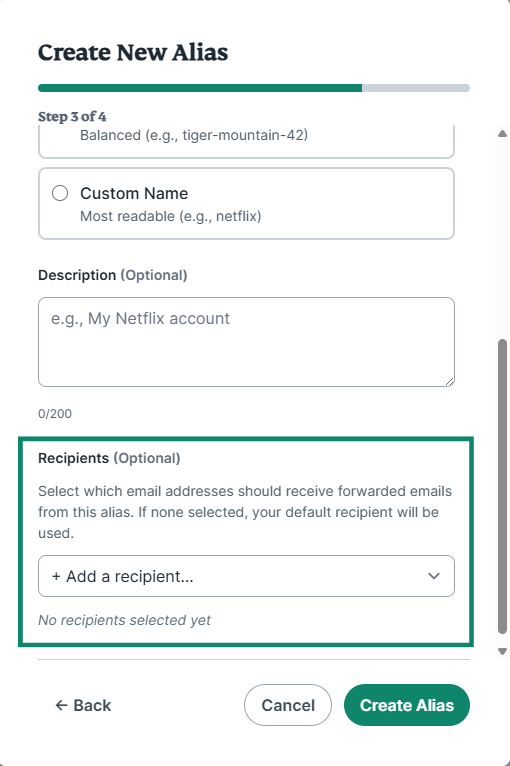
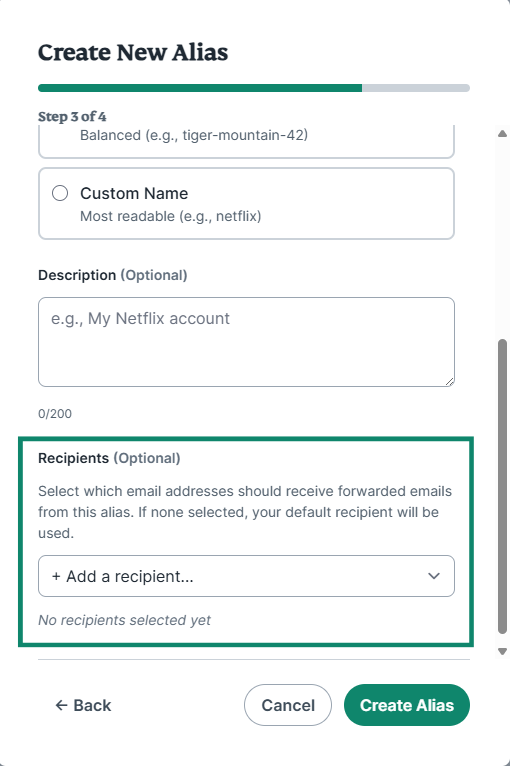
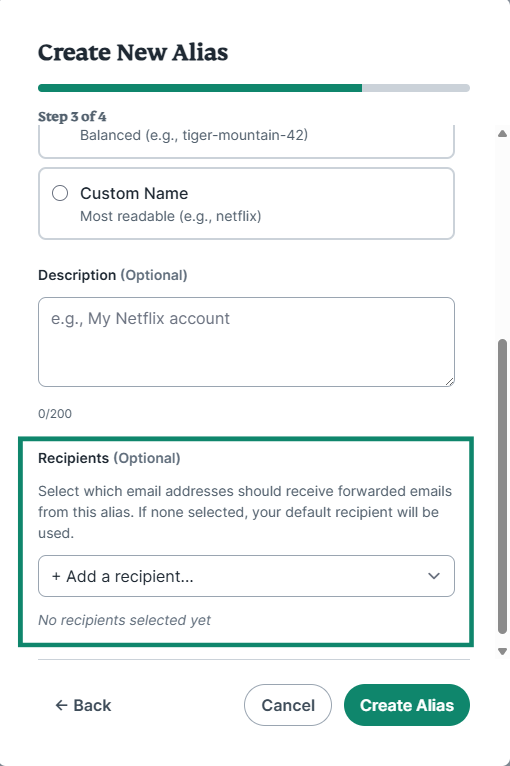
- (Optional) Add a Recipient for your new alias to forward emails to. If none is selected, your default recipient will be used.

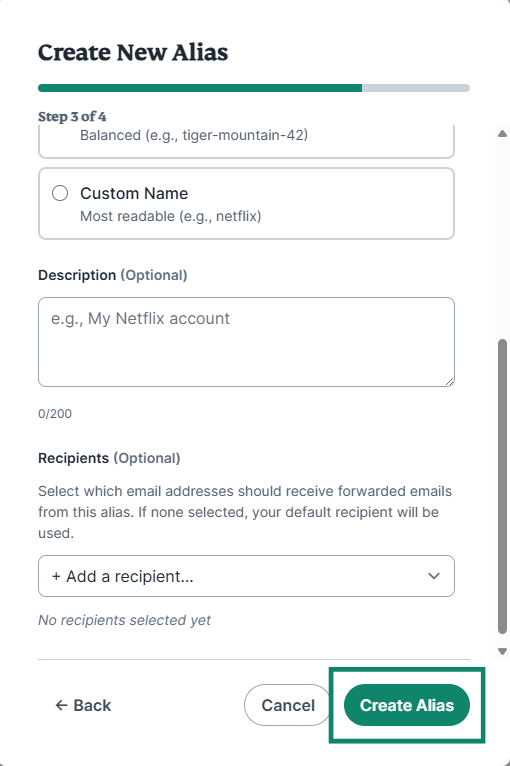
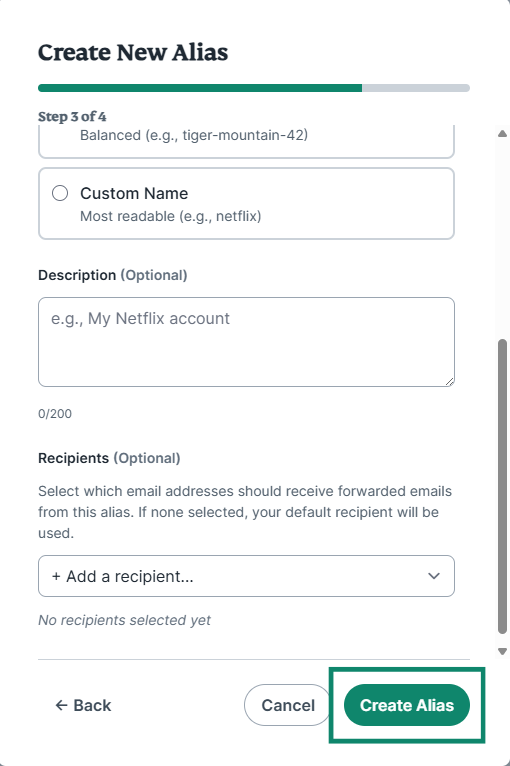
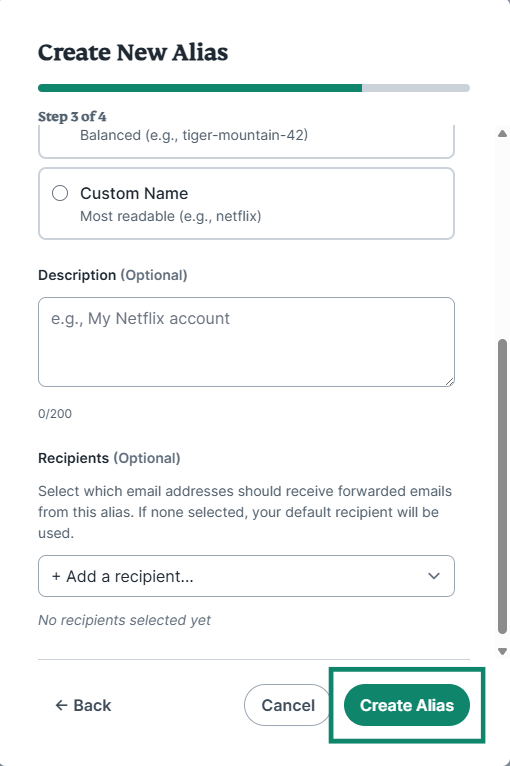
- Click Create Alias.

Dedicated Subdomain Aliases
To create a Dedicated Subdomain Alias:
- On the ExpressMailGuard dashboard, click Aliases.

- Click + Add.

- Click Dedicated Subdomain Alias.

- Click the subdomain you want to use.


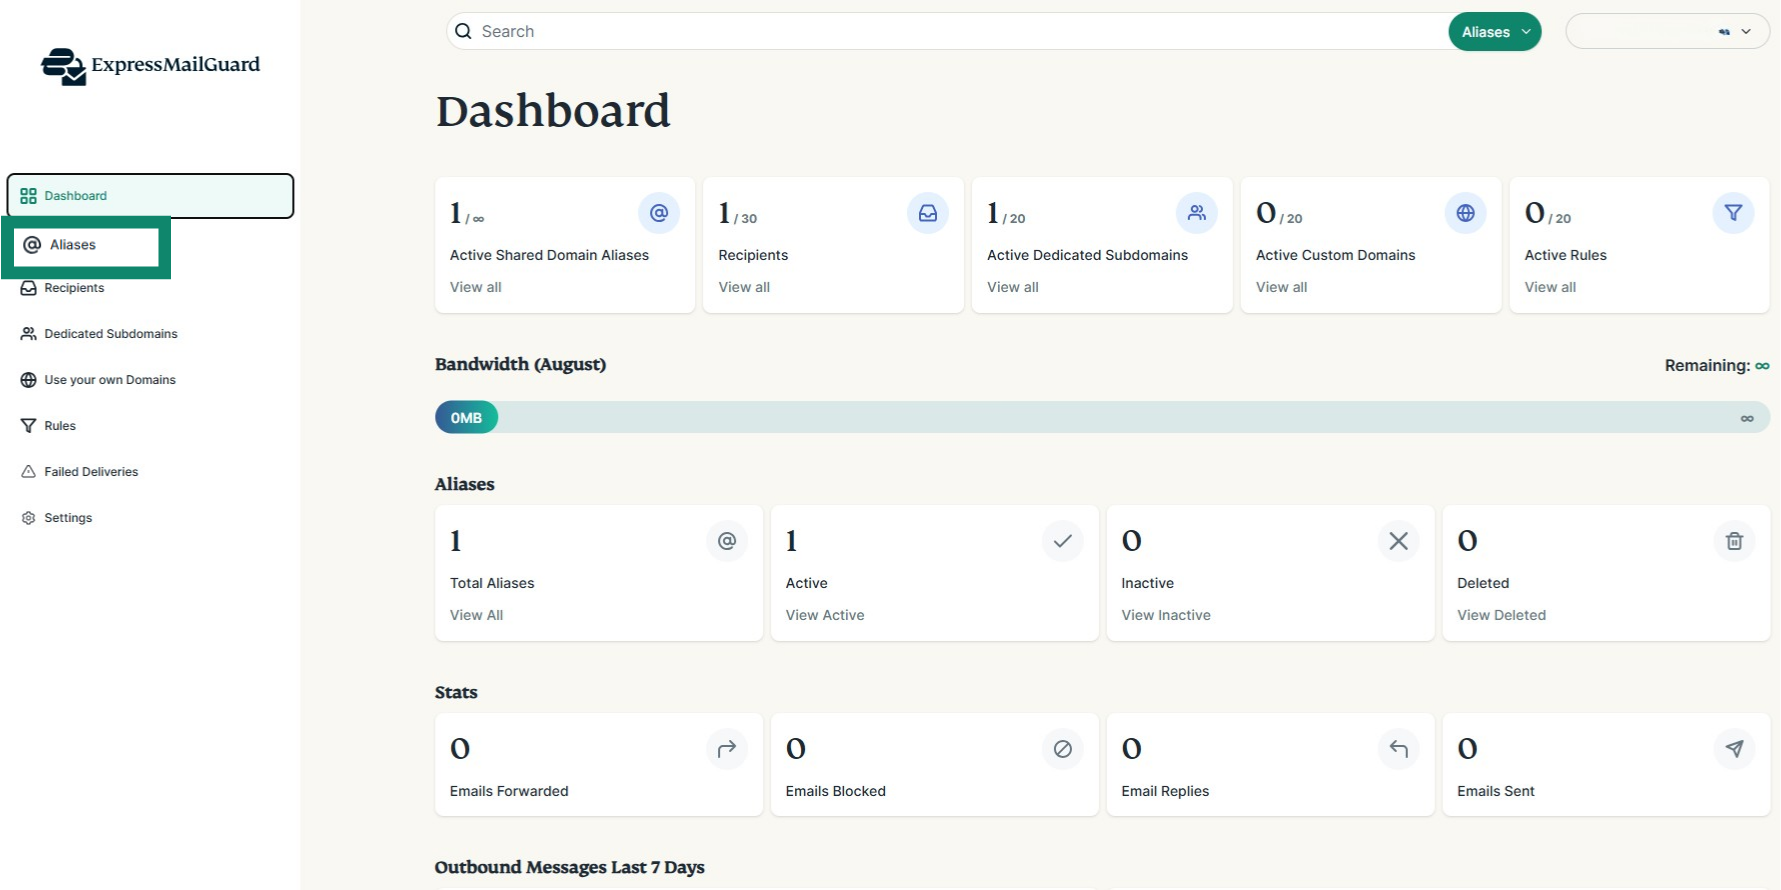
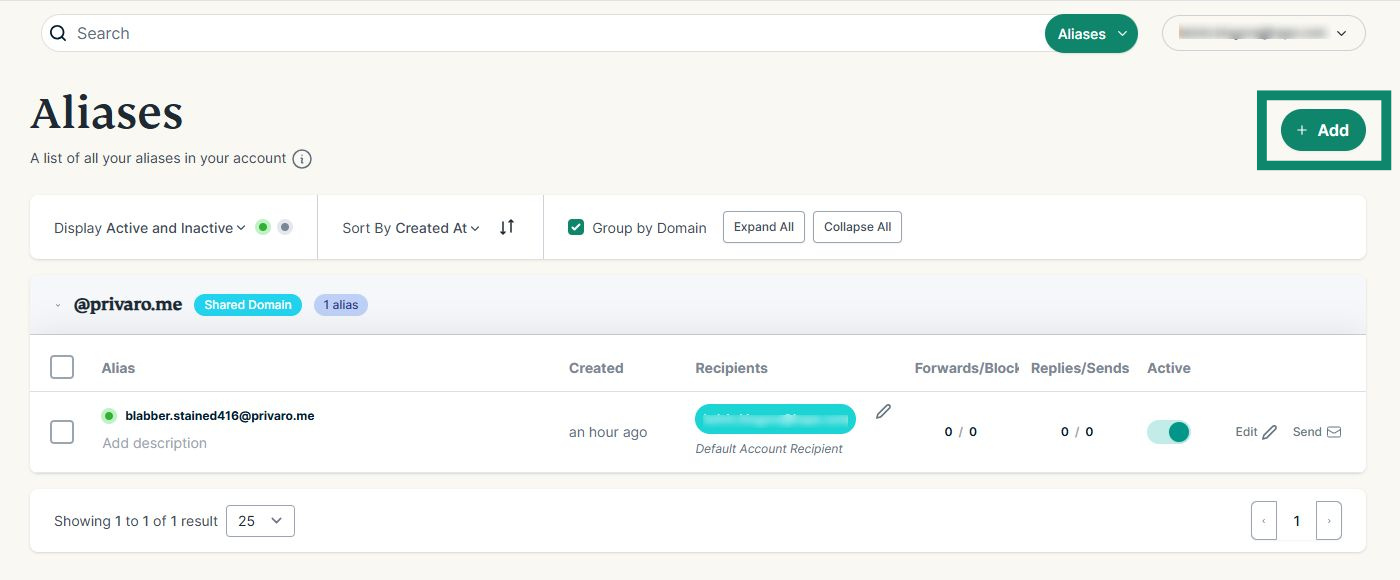
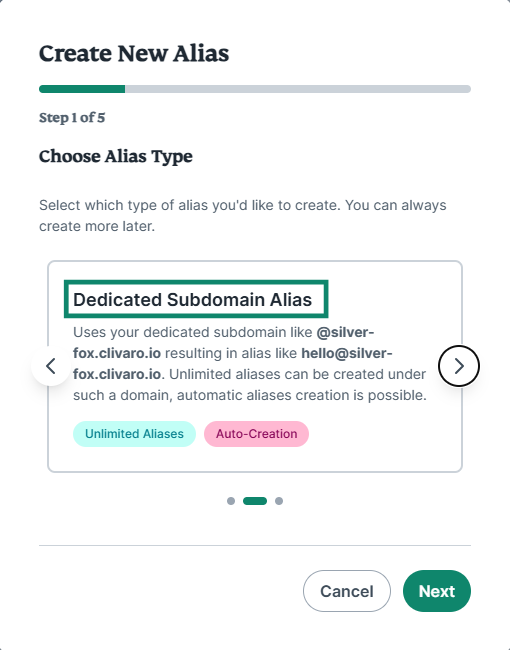
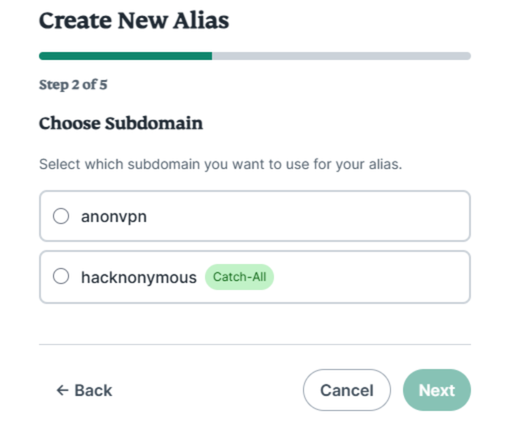
Depending on whether you choose a subdomain with catch-all turned on or off, the next steps will differ slightly. Follow the set of steps below according to whether you chose a subdomain with catch-all turned on or off:
Chose a subdomain with catch-all turned on
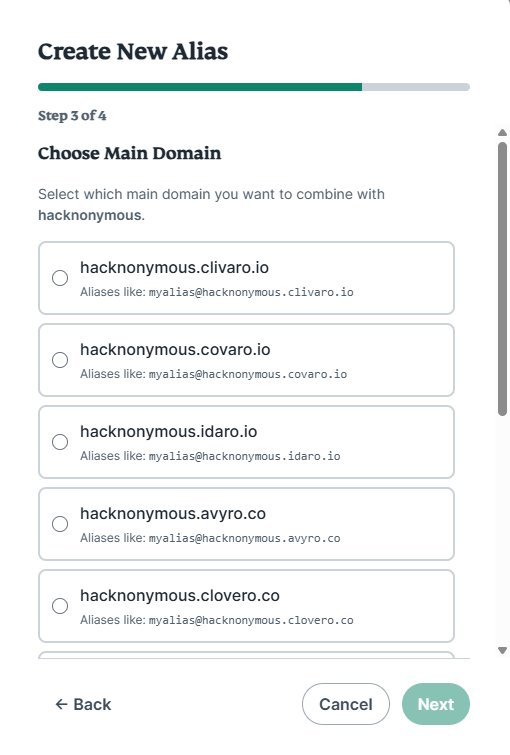
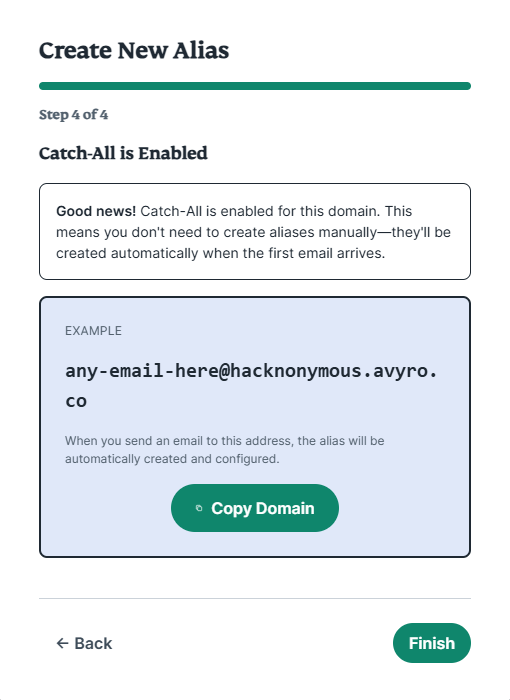
- Click the Main Domain you want to use.

- Since you have catch-all enabled on this domain, there is no need to manually create aliases. Any aliases using this domain will be automatically created when the first email arrives.


Chose a subdomain with catch-all turned off
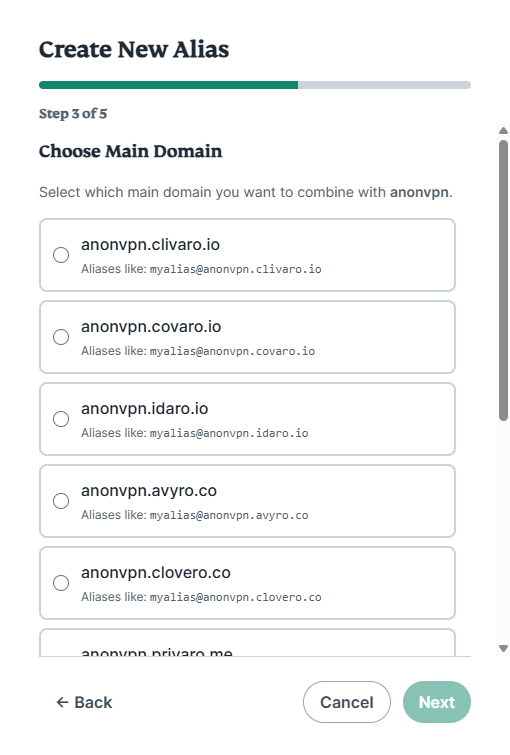
- Click the Main Domain you want to use.

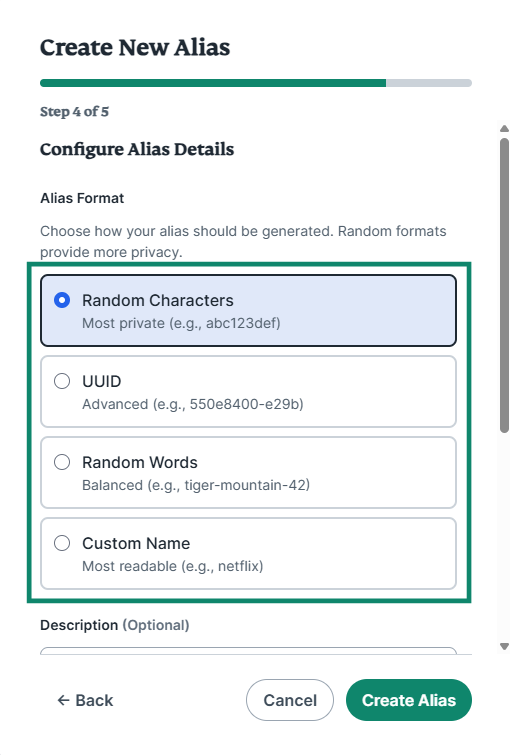
- Click the Alias Format you want to use:

- Random Characters (most private)
- UUID (Universally unique identifier: offers a great level of privacy)
- Random Words (a good balance between privacy and readability)
- Custom Name (most readable)
- (Optional) Add a description.

- (Optional) Add a Recipient for your new alias to forward emails to. If none is selected, your default recipient will be used.

- Click Create Alias.

Custom Domain Aliases
To create a Custom Domain Alias:
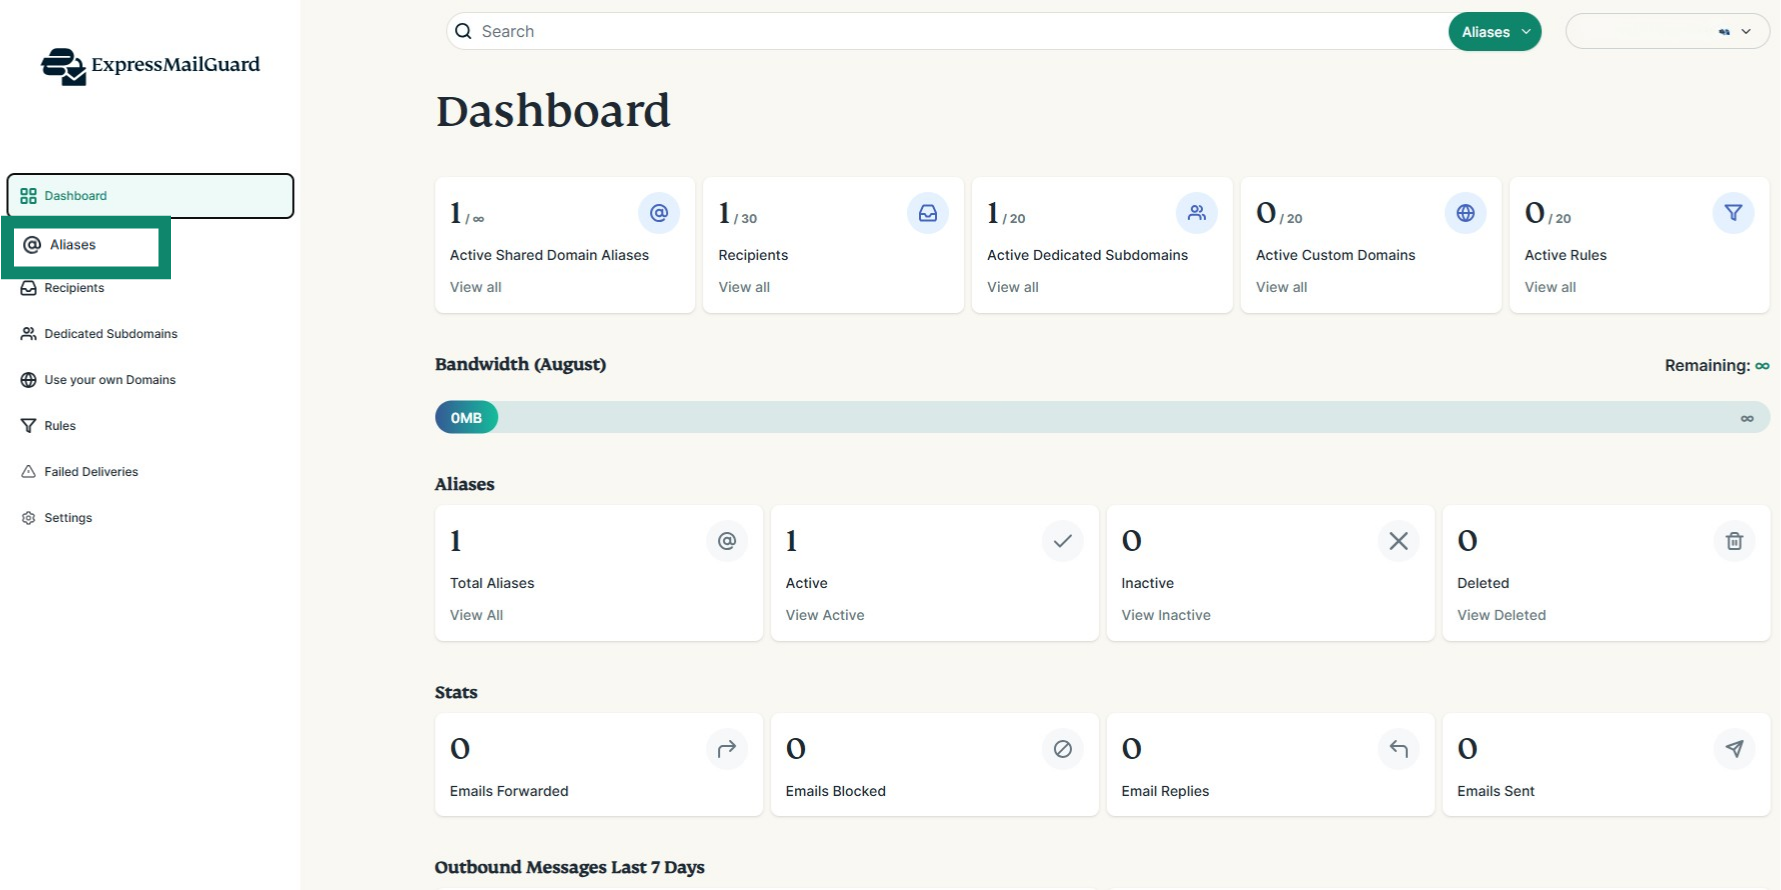
- On the ExpressMailGuard dashboard, click Aliases.

- Click + Add.

- Click Custom Domain Alias.

- Click the custom domain you want to use.


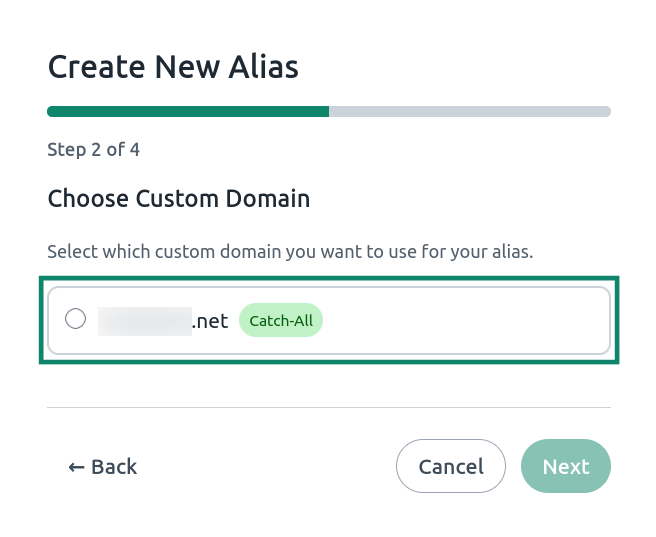
Depending on whether you choose a custom domain with catch-all turned on or off, the next steps will differ slightly. Follow the set of steps below according to whether you chose a custom domain with catch-all turned on or off:
Chose a custom domain with catch-all turned on
Since you have catch-all enabled on this domain, there is no need to manually create aliases. Any aliases using this domain will be automatically created when the first email arrives.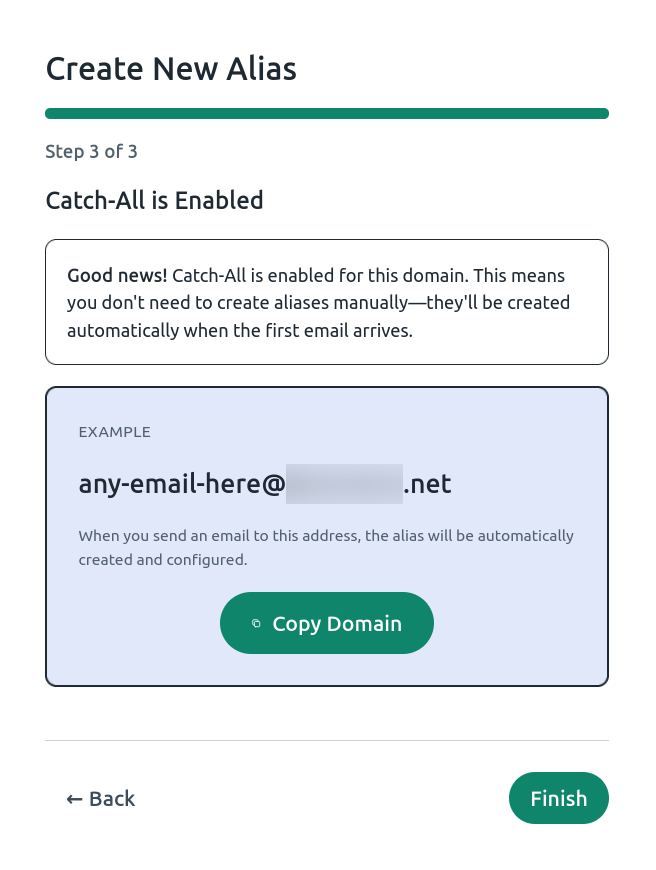
Chose a custom domain with catch-all turned off
- Click the Alias Format you want to use:

- Random Characters (most private)
- UUID (Universally unique identifier: offers a great level of privacy)
- Random Words (a good balance between privacy and readability)
- Custom Name (most readable)
- (Optional) Add a description.

- (Optional) Add a Recipient for your new alias to forward emails to. If none is selected, your default recipient will be used.

- Click Create Alias.

Need help? Contact the ExpressVPN Support Team for immediate assistance.
How to edit aliases
Once you have created an alias, you have two aspects you can edit:
- An alias’s From Name
- The ability to limit replies/sends to attached recipients only
Edit an alias’s From Name
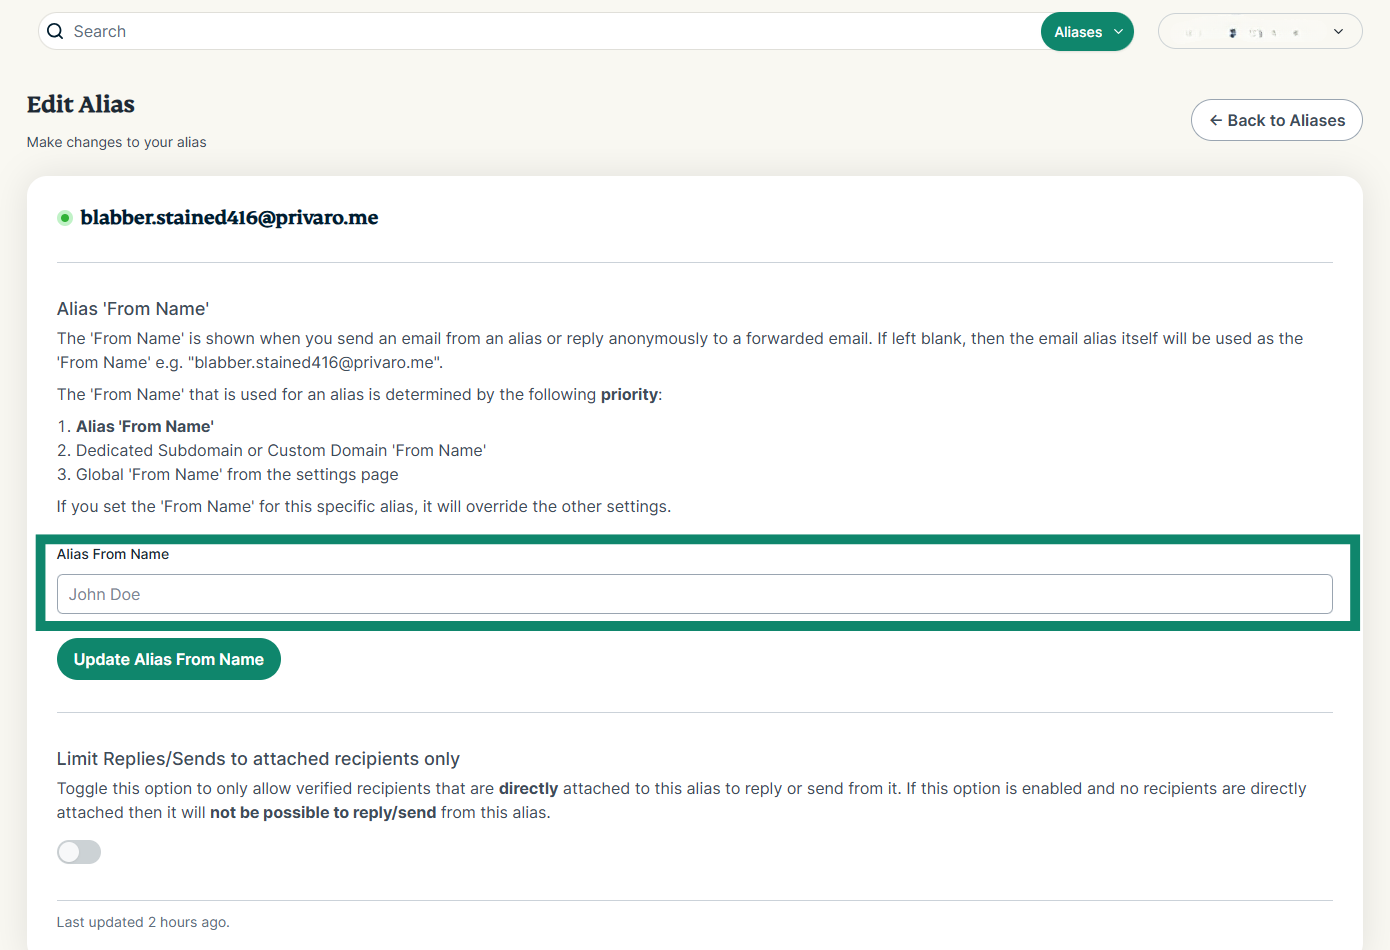
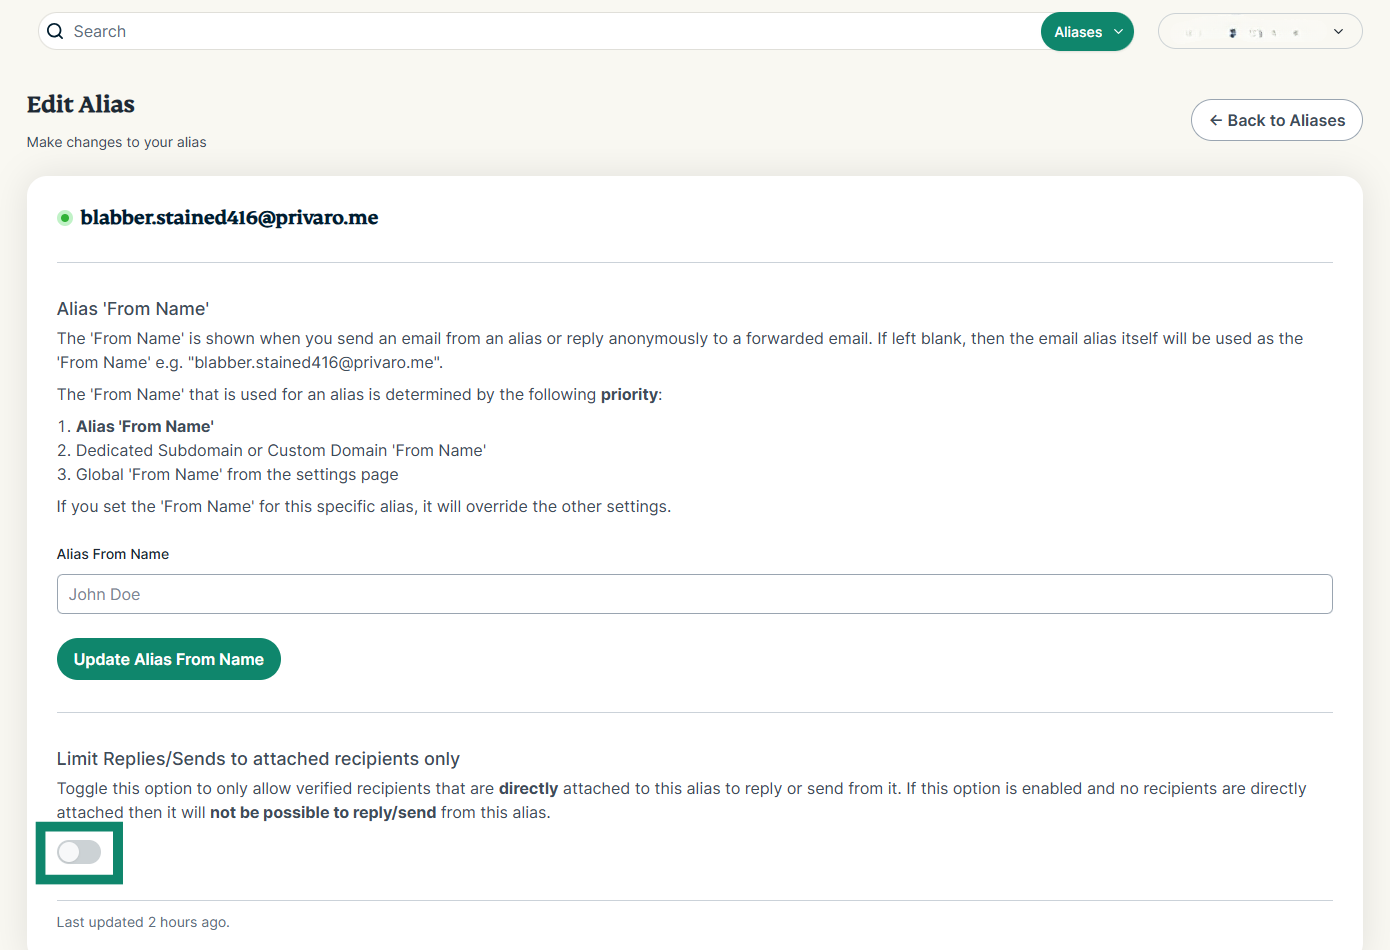
Once you have created an alias, you can edit that alias’s From Name at any time. The From Name is shown when you send an email from an alias or reply anonymously to a forwarded email. If left blank, then the email alias itself will be used as the From Name.
The From Name that is used for an alias is determined by the following priority:
- Alias From Name.
- Username or Custom Domain From Name.
- Global From Name found on the Settings tab.
If you set a From Name for a specific alias, it will override the other settings.
To edit an alias’s From Name:
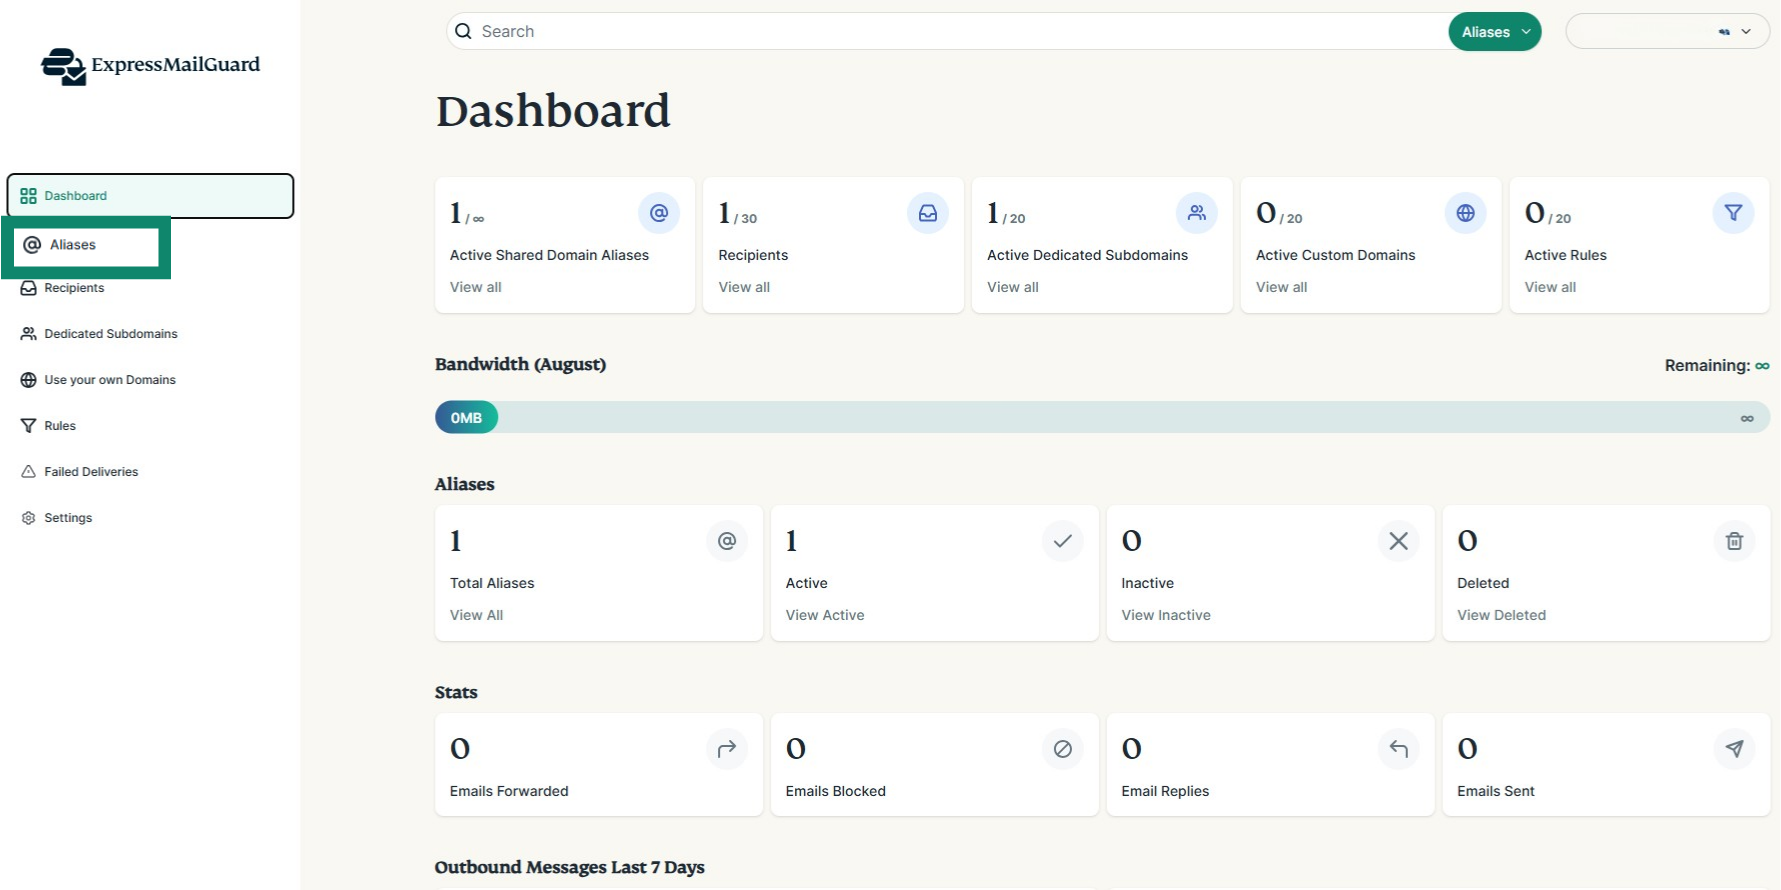
- On the ExpressMailGuard dashboard, click Aliases.

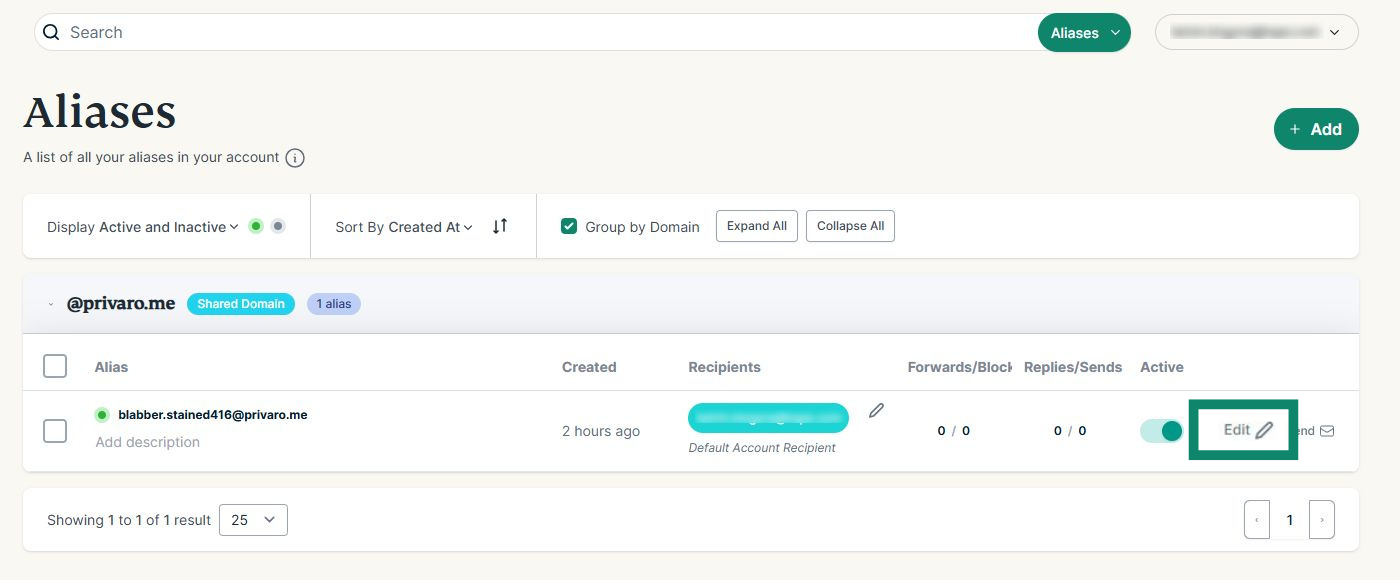
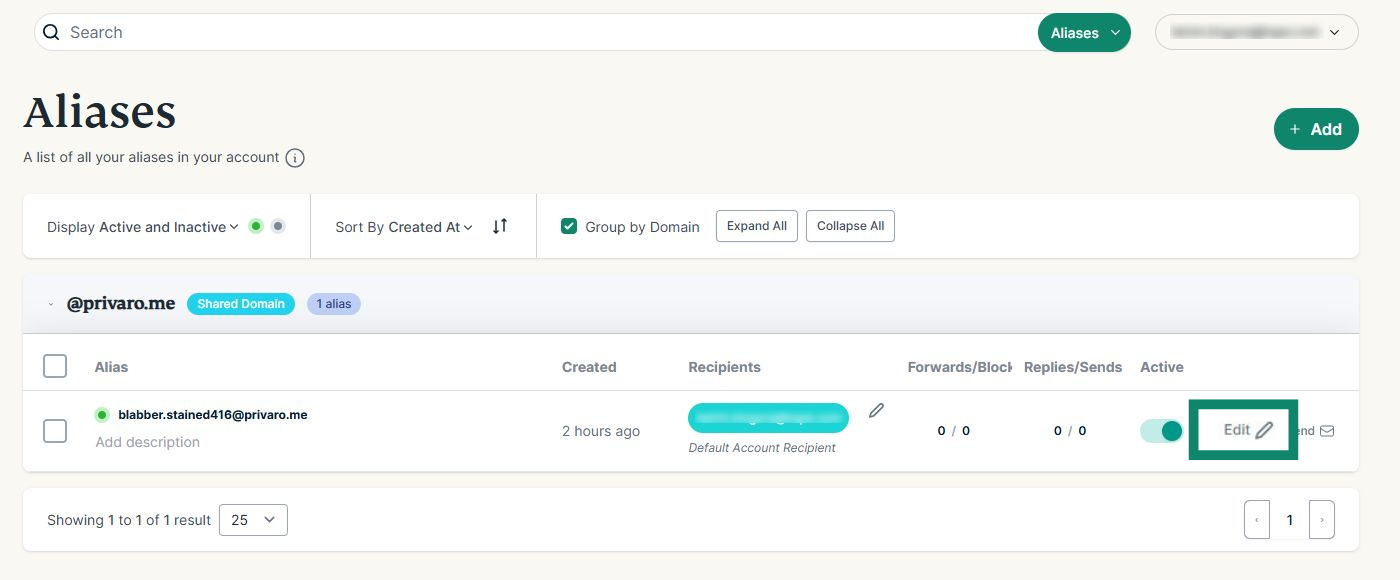
- Click Edit next to the alias you want to modify.

- In the Alias From Name field, enter your new alias From Name.


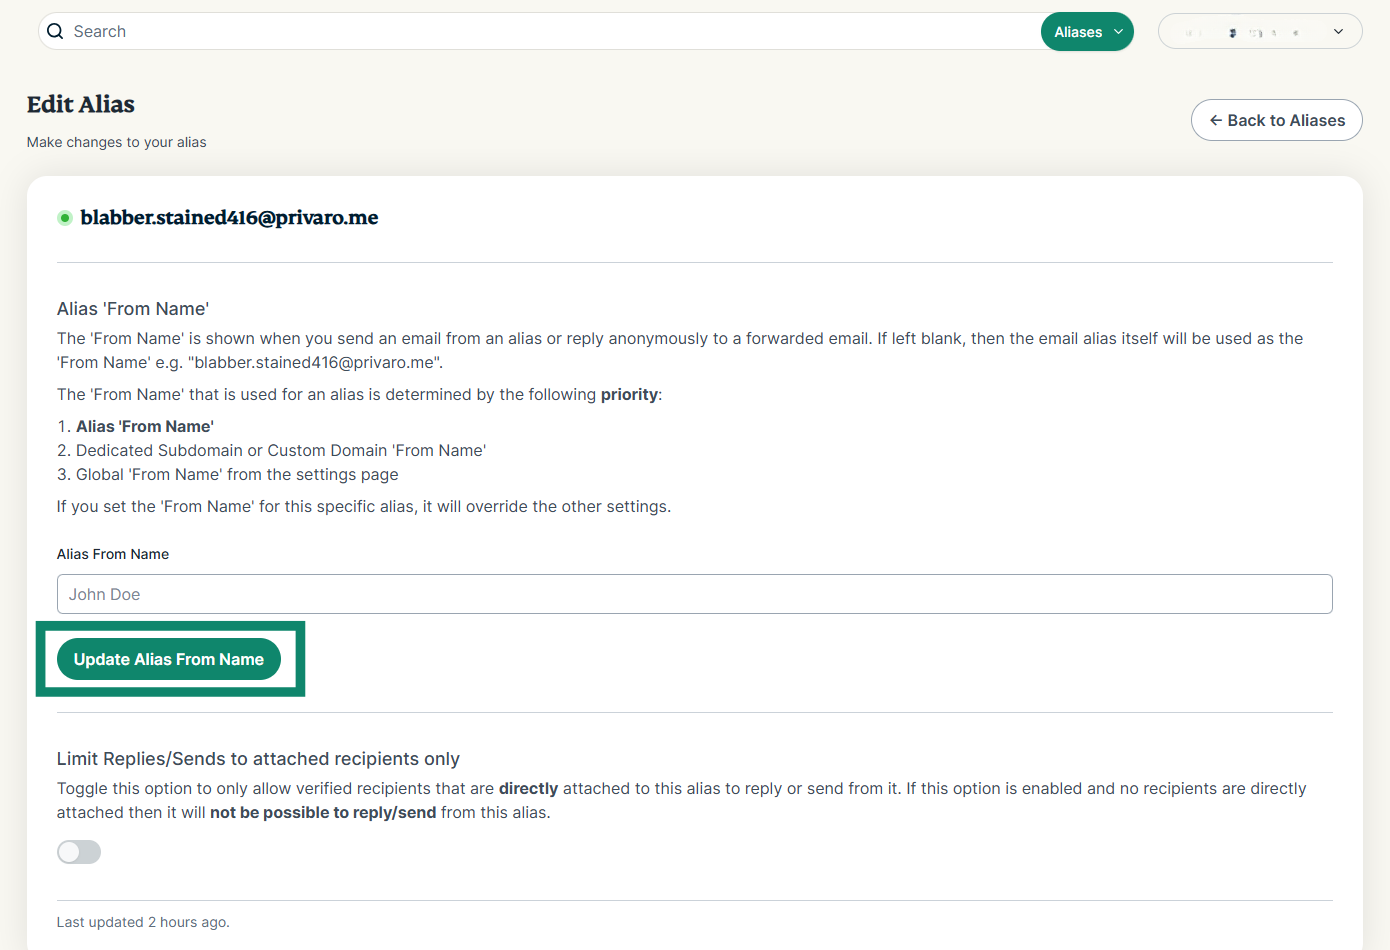
- Click Update Alias From Name.

Limit replies/sends to attached recipients only
You can choose to only allow verified recipients that are directly attached to an alias to reply or send from it.
If this option is enabled and no recipients are directly attached, it will not be possible to reply/send from an alias.
To toggle this option on/off:
- On the ExpressMailGuard dashboard, click Aliases.

- Click Edit next to the alias you want to modify.

- Under Limit Replies/Sends to attached recipients only, click the toggle on/off.

Need help? Contact the ExpressVPN Support Team for immediate assistance.